Author: Shruti Srivastava, Associate Data Engineer
In this article , it is explained how to manually configure database migration from Sql Server to Azure SQL Managed Instance by using Log Replay Service(LRS).
How the Procedure Works:
In this procedure, thee migration consists of making full database backups on SQL Server with CHECKSUM enabled, and copying backup files to Azure Blob Storage. LRS is used to restore backup files from Blob Storage to SQL Managed Instance. Blob Storage is intermediary storage between SQL Server and SQL Managed Instance.
Pre-requisites:
SQL Server side:
- SQL Server 2016-2019
- Full backup of databases (one or multiple files)
- Differential backup (one or multiple files)
- Log backup (not split for a transaction log file)
- CHECKSUM enabled for backups (mandatory)
Azure side:
- PowerShell Az.SQL
- Azure Blob Storage container
- Shared access signature (SAS) security token with read and list permissions generated for the Blob Storage container
Steps for Migration:
1.Backups of SQL Server
Here backups of SQL Server can be made by using two options:
1. Backup to local disk storage,and then upload files to Azure Blob Storage.
2. Back up directly to Blob Storage with the TO URLoption in T-SQL
Make sure the databases you want to migrate must have set to full recovery mode to allow log backups.
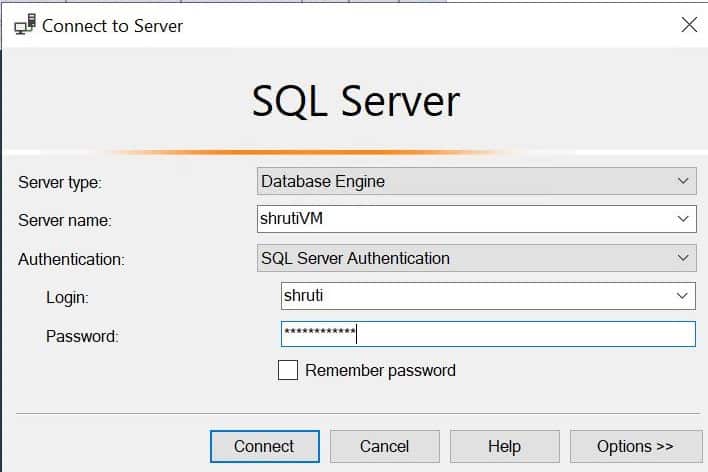
1.Connect to database engine on VM using SQL Server authentication
2.Restore sample database and write SQL query to take backups.
USE master(to permit log backups)
ALTER DATABASE AdventureWorksLT2012
SET RECOVERY FULL
GO
BACKUP DATABASE [AdventureWorksLT2012](to make full database backup to the local disk)
TO DISK=’C:\BACKUP\ AdventureWorksLT2012_full.bak’
WITH INIT, COMPRESSION, CHECKSUM
GO
ACKUP DATABASE [AdventureWorksLT2012](make differential database backup to the local disk)
TO DISK=’C:\BACKUP\ AdventureWorksLT2012_diff.bak’
WITH DIFFERENTIAL, COMPRESSION, CHECKSUM
GO
BACKUP LOG [AdventureWorksLT2012]( to make a transactional log backup to the local disk)
TO DISK=’C:\BACKUP\ AdventureWorksLT2012_log.trn’
WITH COMPRESSION, CHECKSUM
GO

2.Create a Storage Account
In this step, create a new storage account and a blob container in the storage account.
3.Generate a Blob Storage SAS authentication token for LRS
An SAS authentication token need to be generated with only list and read permissions, for LRS. This is to enable LRS to access Blob Storage and use the backup files to restore them on SQL Managed Instance.
The steps to generate the token are as follows:
1. Open Storage Explorer from the Azure portal.
2.Expand Blob Containers.
3. Right-click the blob container and select Get Shared Access Signature.
4. Select the timeframe for token expiration. Ensure that the token is valid for the duration of your migration.
5. Select the time zone for the token: UTC or your local time.
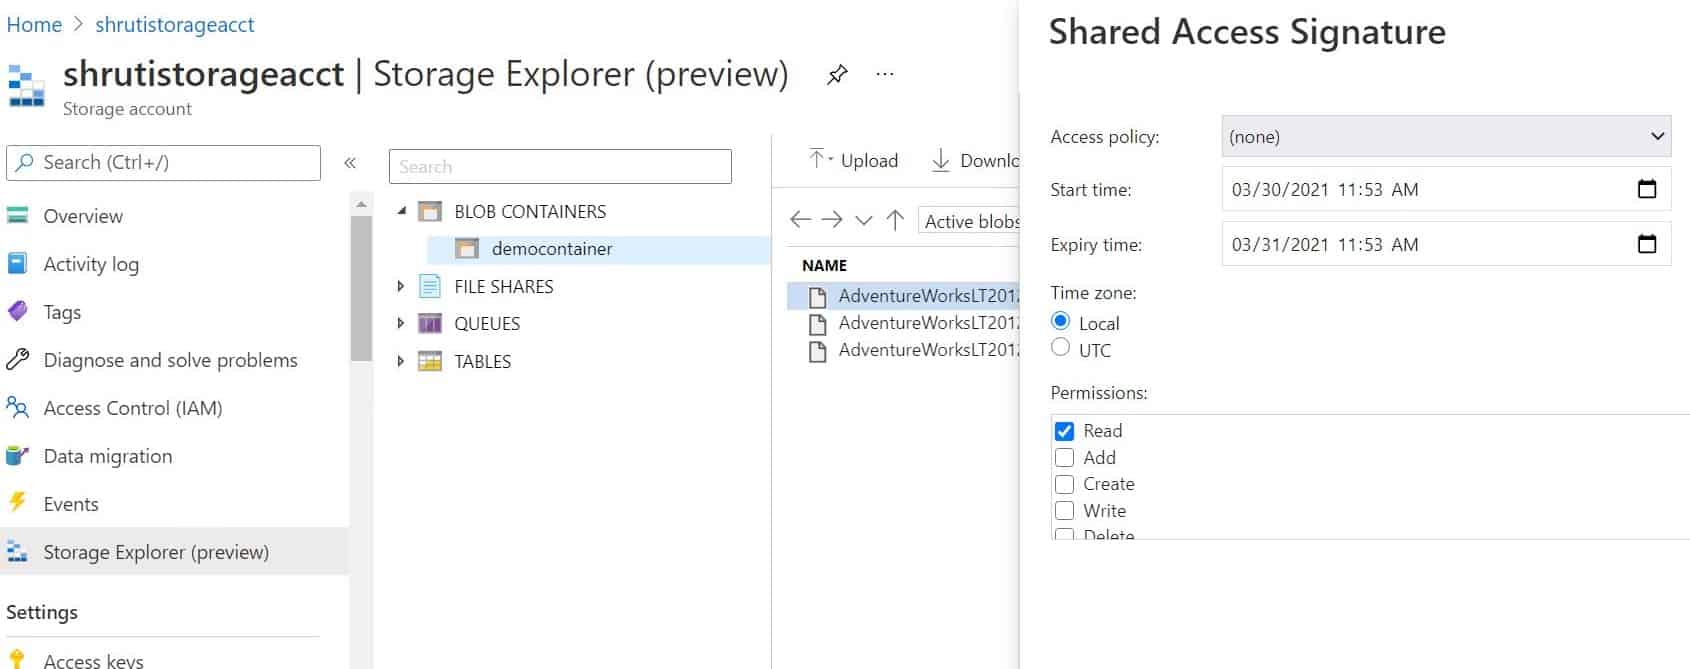
Select read and list permissions only and then select create.
4.Copy parameters from the SAS token
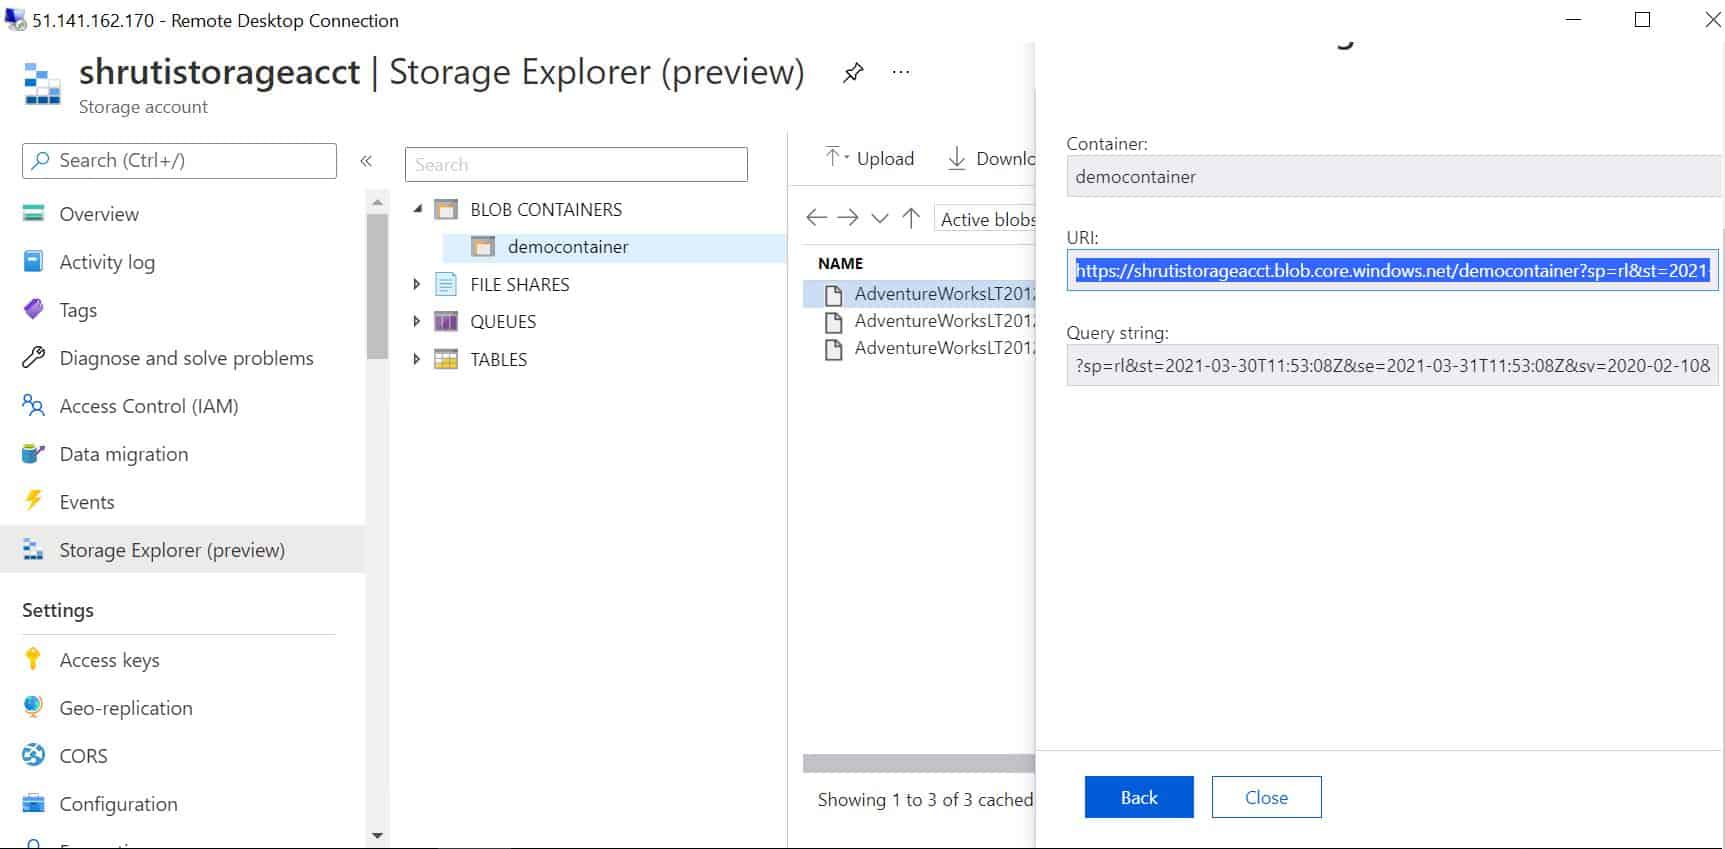
Copt the URI of the generated SAS token which consists of two parts separated with a question mark (?). The first part, starting with https:// until the question mark (?), is used for the StorageContainerURI parameter that’s fed as in input to LRS.
The second part, starting after the question mark (?) and going all the way until the end of the string, is the StorageContainerSasToken parameter.
5.Start the migration:
Migration process can be started by starting LRS. You can start the service in either autocomplete or continuous mode.
When you use autocomplete mode, the migration will finish automatically when the last of the specified backup files has been restored. This option requires the start command to specify the filename of the last backup file.
When you use continuous mode, the service will continuously restore any new backup files that were added. The migration will finish on the manual cutover only.
6.Start LRS in autocomplete mode:
For starting use the Powershell, specify the last backup file name by using -LastBackupName parameter.
Start-AzSqlInstanceDatabaseLogReplay -ResourceGroupName “MI-Demo” `
-InstanceName “sqlmi97” `
-Name “newdatabase” `
-Collation “SQL_Latin1_General_CP1_CI_AS” `
-StorageContainerUri “https://shrutistorageacct.blob.core.windows.netdemocontainer” `
-StorageContainerSasToken “sp=rl&st=2021-03-30T12:09:19Z&se=2021-03-31T12:09:19Z&sv=2020-02-10&sr=c&sig=PMLGOXKPQroZmEMIrZe7gqgD%2FdJ01VuqebqEoFAkMIM%3D” `
-AutoCompleteRestore `
-LastBackupName “AdventureWorksLT2012_full.bak”
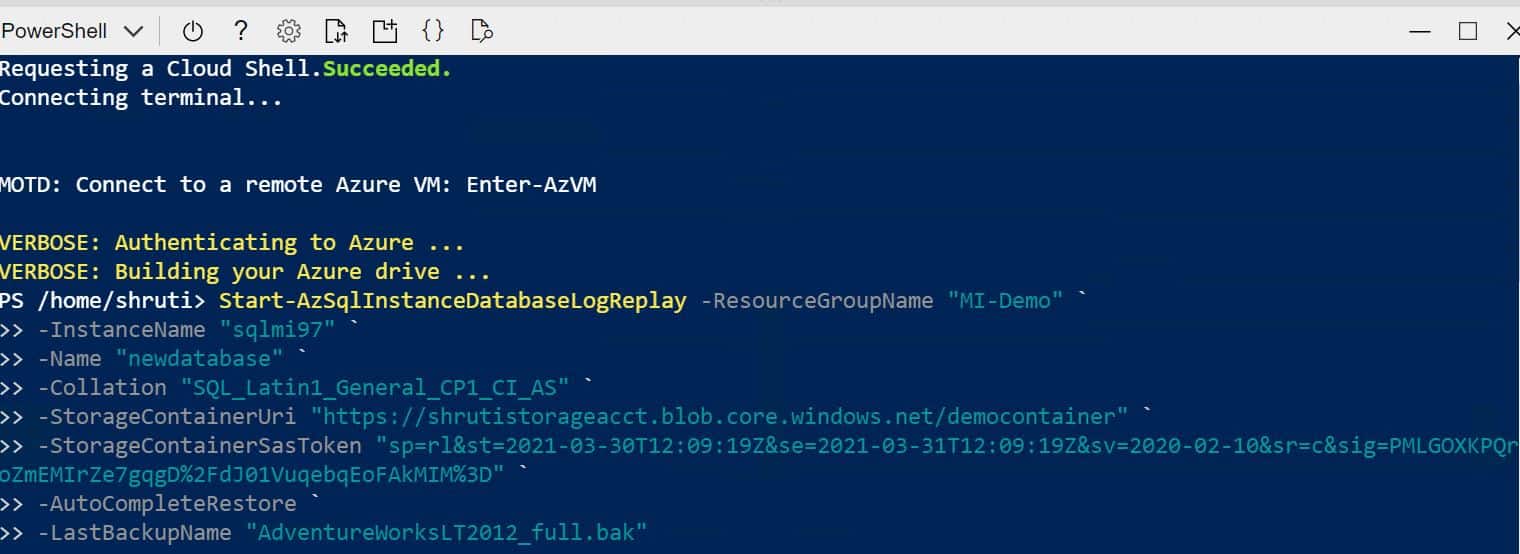
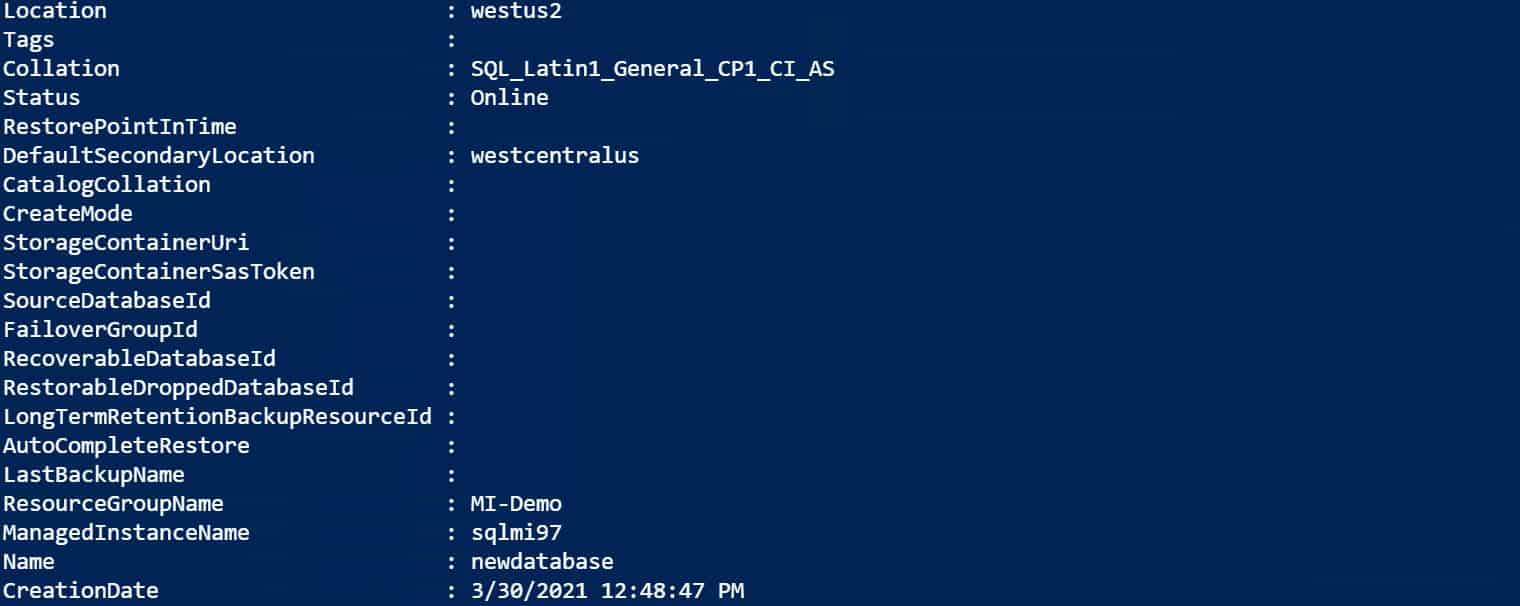
After writing this use will get the result.
7.Monitor the migration progress:
For monitoring the progress of migration through Powershell, use the following command, and you will get the result.
Get-AzSqlInstanceDatabaseLogReplay -ResourceGroupName “MI-Demo” `
-InstanceName “sqlmi97” `
-Name “newdatabase”

To confirm the tables are copied in managed instance, connect the managed instance server in SSMS, expand the database, and expand the tables. Here you will get the same tables as in SQL Server.
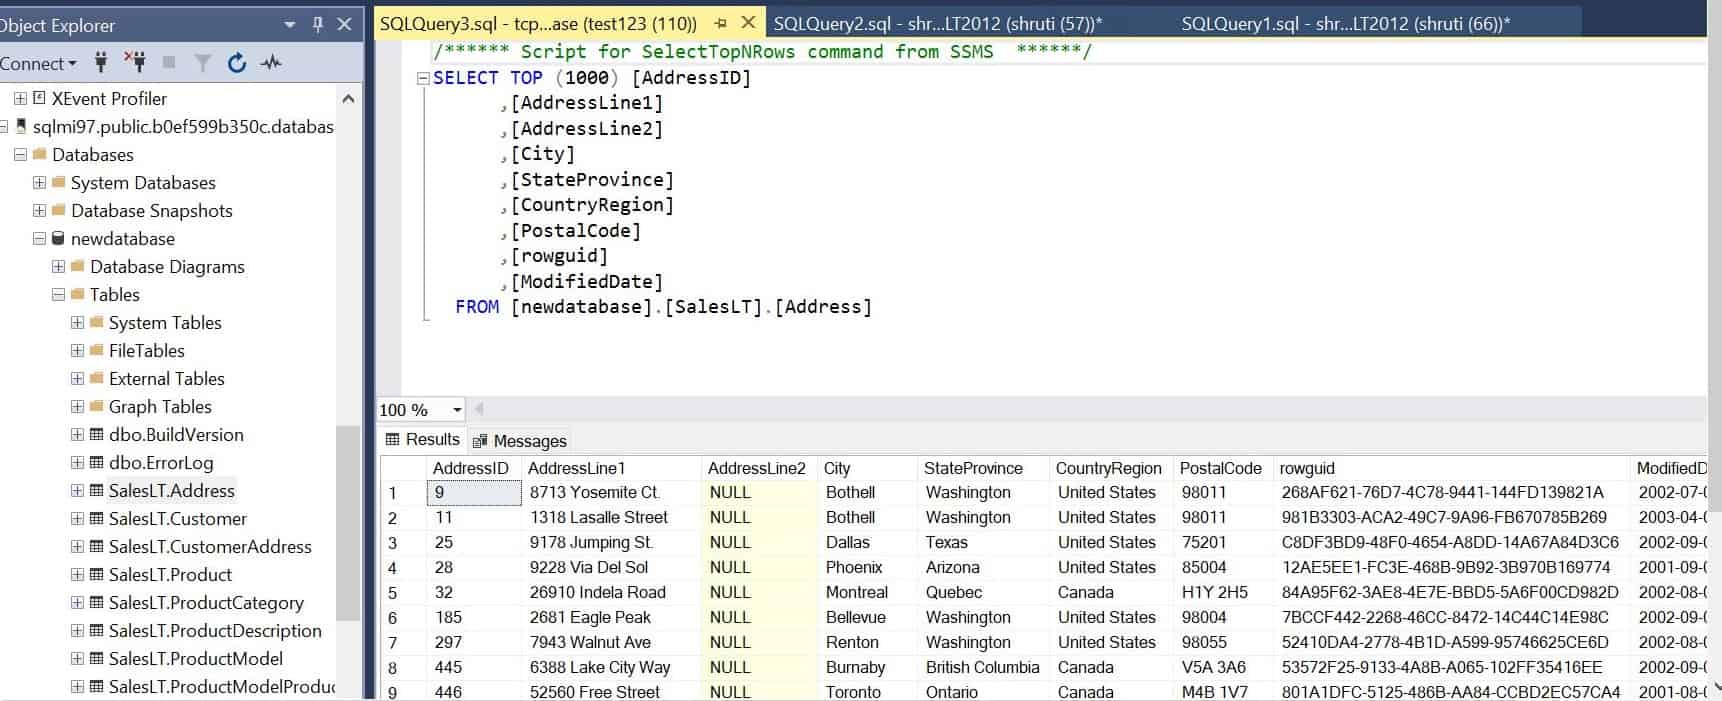
This is how you will perform database migration from SQL Server to Azure Managed Instance using LRS.


