Online migration
Migration Steps (SQL Server to Azure SQL Database)
Prerequisites:
- Create a Vnet for DMS
- Vnet’s nsg should not block communication ports 443, 53, 9354, 445, 12000
- Configure your windows firewall
- open port 1433
- If you’re running multiple named SQL Server instances using dynamic ports, you may wish to enable the SQL Browser Service and allow access to UDP port 1434 through your firewalls so that the Azure Database Migration Service can connect to a named instance on your source server.
- Create a server-level firewall rule for the Azure SQL Database server. Provide the subnet range of the VNET used for DMS
- Ensure that the credentials used to connect to source SQL Server instance have control server permissions.
- Ensure that the credentials used to connect to target Azure SQL Database instance have CONTROL DATABASE permission on the target Azure SQL databases.
- The source SQL Server version must be SQL Server 2005 and above.
- Database(s) must be in either Bulk-logged or Full recovery mode and take their full, transactional log backup.
- If any of the tables don’t have a primary key, enable Change Data Capture (CDC) on the database and specific table(s).
- The LOB tables must have primary key.
Migration steps
In DMA assessment and migration can be performed. Assessment is carried out in order to find the compatibility issues in a database. The migration blockers are solved for further migration process. To run an assessment, you have to be a member of the SQL Server sysadmin role
Post Assessment Steps
Step 1
- Select new migration project. For online migration, premium pricing tier should be choosed.
- Select create and run activity.
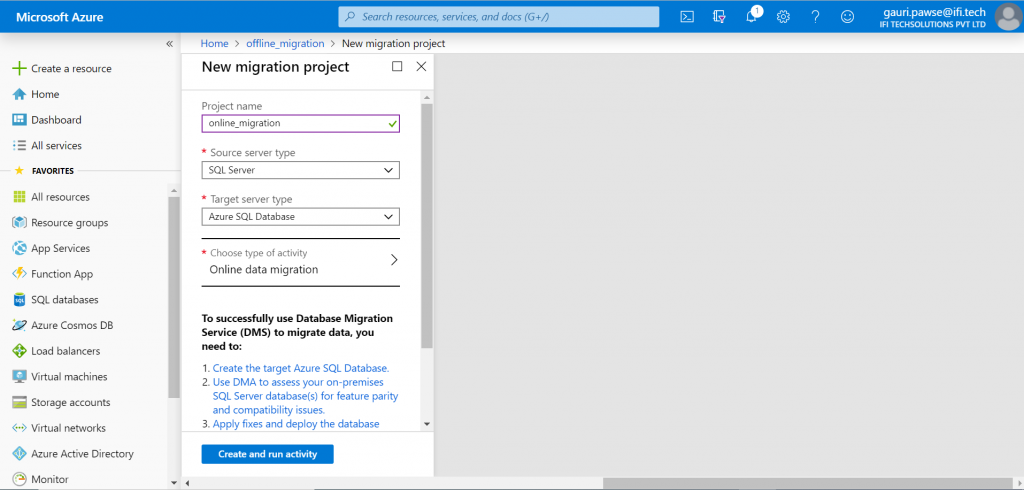
Step 2
Specify source and target details.
Step 3
- Map to target databases screen, map the source and the target database for migration.
- If the target database contains the same database name as the source database, the Azure Database Migration Service selects the target database by default.
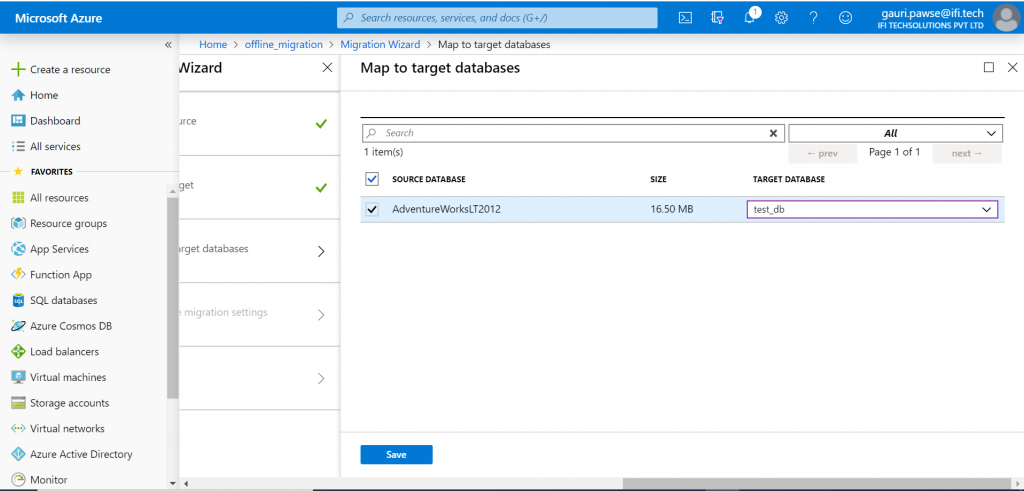
Step 4
Select Save, on the Select tables screen, expand the table listing, and then review the list of affected fields.
The Azure Database Migration Service auto selects all the empty source tables that exist on the target Azure SQL Database instance. If you want to remigrate tables that already include data, you need to explicitly select the tables on this blade
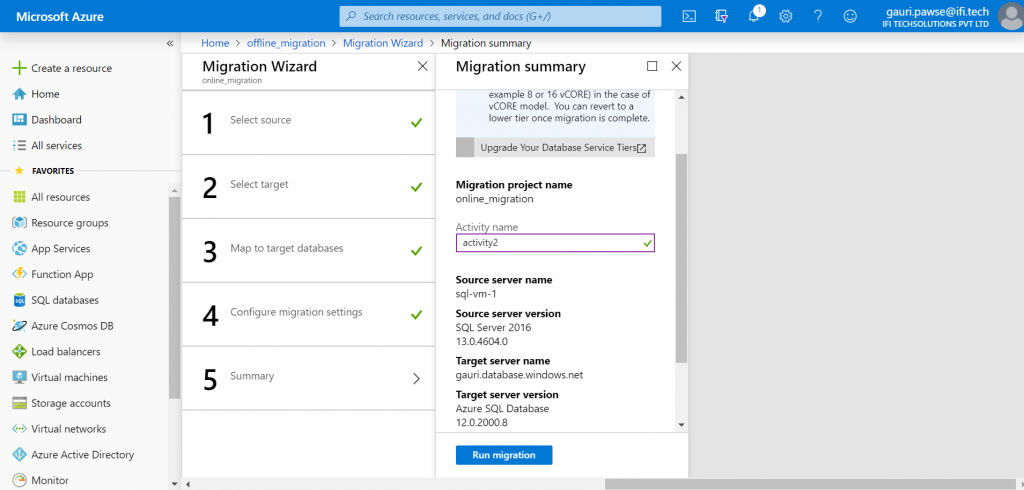
Step 5
- on the Migration summary screen, in the Activity name text box, specify a name for the migration activity, and then review the summary to ensure that the source and target details match what you previously specified. Select run migration.
- Run the migration
Monitor the Migration
Step 1
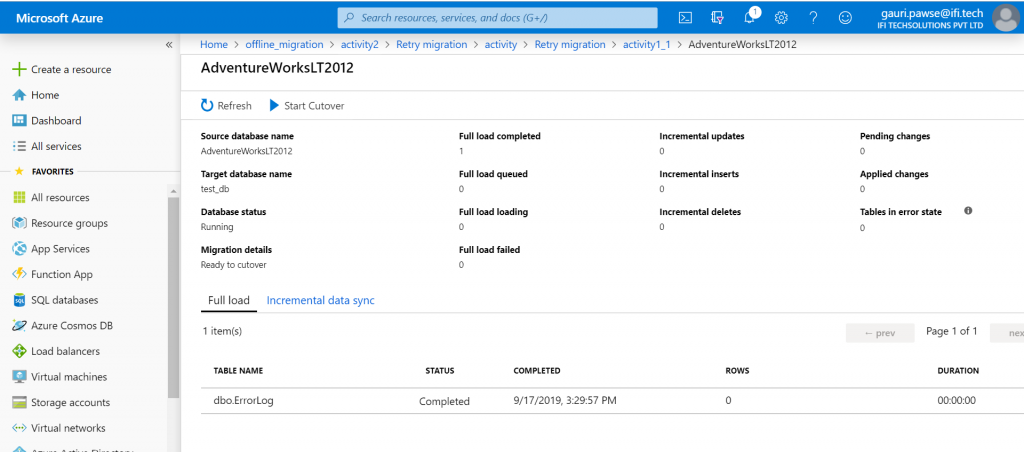
- On the migration activity screen, select Refresh to update the display until the Status of the migration shows as Running.
- Click on a specific database to get to the migration status for Full data load and Incremental data sync operations.
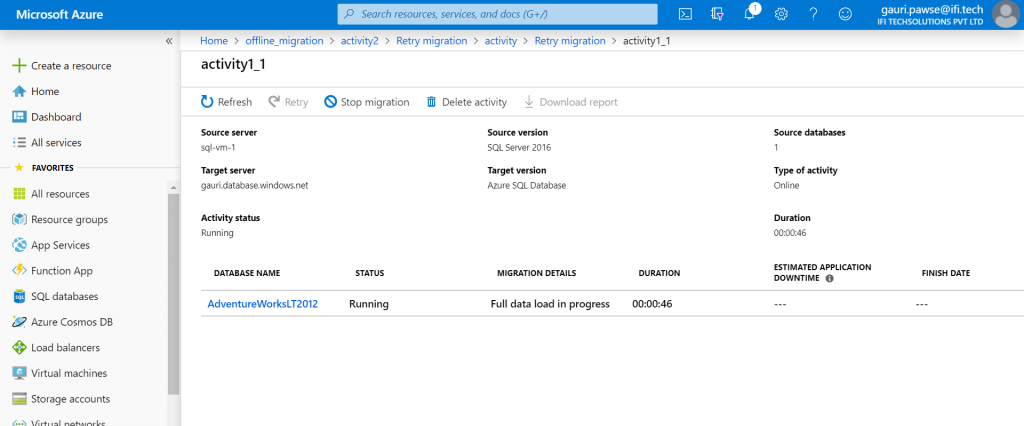
Perform Migration Cutover
Step 1
- When you’re ready to complete the database migration, select Start Cutover.
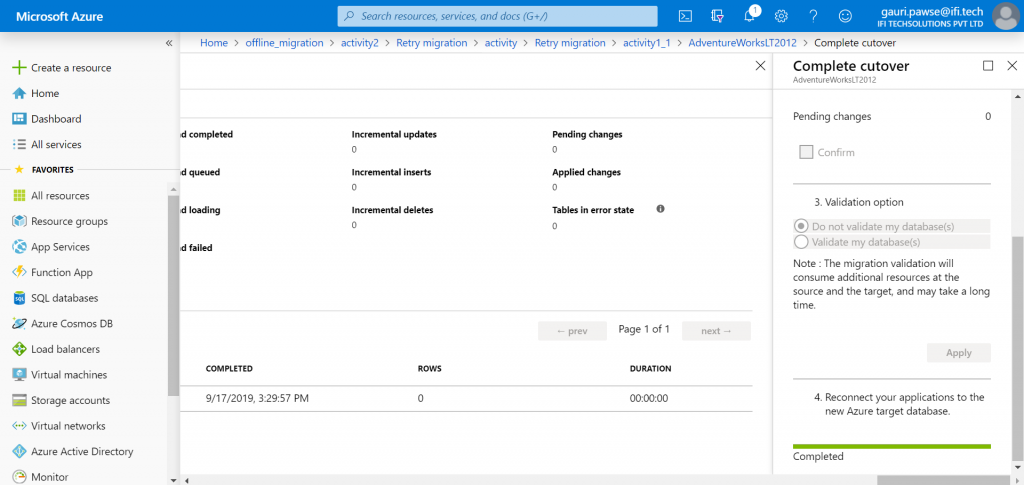
- Make sure to stop all the incoming transactions to the source database; wait until the Pending changes counter shows 0.
Step 2
Select Confirm, and the select Apply. When the database migration status shows Completed, connect your applications to the new target Azure SQL Database
Interested in Microsoft Azure, Let’s CONNECT!


