Author – Sarvesh Pandey, Cloud Engineer
Introduction:
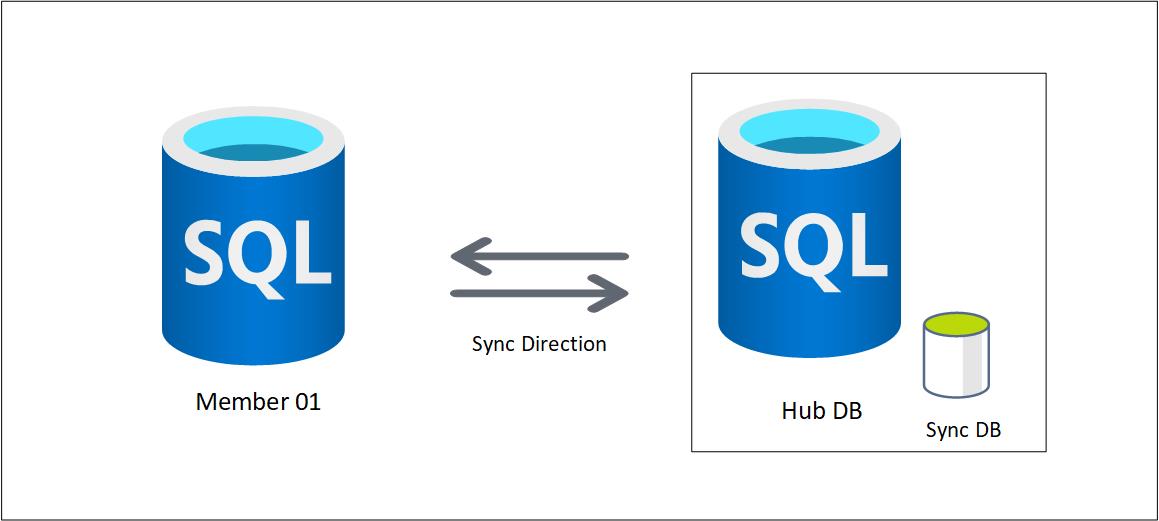
SQL Data Sync is a service built on Azure SQL Database that lets you synchronize the data you select bi-directionally across multiple databases, both on-premises and in the cloud.
You can setup, Data Sync environment without writing a single line of code through Azure Portal.
Weather your Database is in Azure or in On-Premise Server, you can easily sync your data in Azure SQL Database using the Data Sync.
SQL Data Sync is easily customizable, you can scale, add or remove database at any point.
Use Cases:
This is one of the Use Case,
We had client, whose already on cloud and there requirement was to have a duplicate copy of database in different but in should be in a Sync so that there company in that region can perform DML changes.
We can use Geo-replication as the secondary database would in Read only mode. It will be in Sync but the DML changes can’t be performed.
To overcome this issue, Azure SQL Data Sync roles comes here, we can setup sync and it support read and write mode as well.
Prerequisites:
 Step 2:
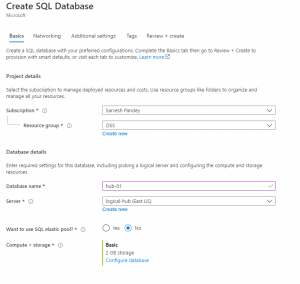
Create a Database name “hub-01”in logical-hub server.
 Step 3:
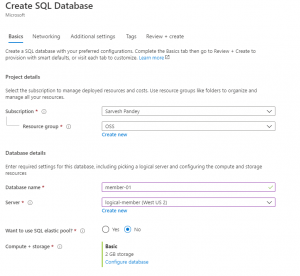
Create Database name “member-01” in logical-member server.
 Step 4:
Add firewall rule to each database.
Go to respective database -> Overview -> Set firewall
 Click on “Add client IP”, it will add you current IP address.
You can manually add your client IP address as well.
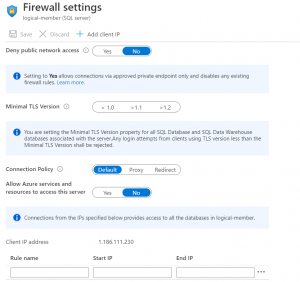 Click “Yes” on Allow Azure services and resources to access this server.
Note – Do this change in both the databases.
Step 5:
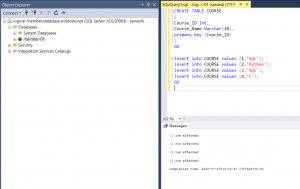
Connect “logical-member” server on your SSMS and add a sample table to “member-01” database.
Make sure table consist a Primary Key.
 Step 6:
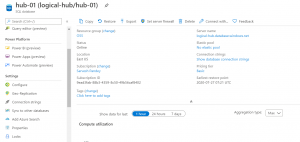
Go to “hub-01” database -> settings -> click on Sync to other databases.
 Step 7:
Click on “New Sync Group” to add new sync.
 Step 8:
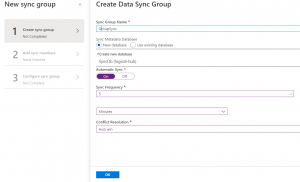
Provide a unique Sync Group Name.
Sync Metadata Database is used to create a new database which will store the Metadata and help the databases to be in Sync.
Its recommended to create a new empty database.
Note – Sync Database should be in the same region of Hub.
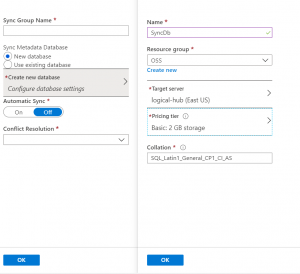
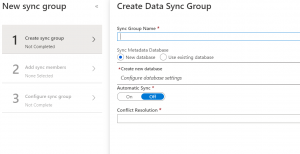 Click on Create new database.
 Step 9:
Select Automatic Sync, currently it is disabled. Minimum Sync time is 5 mins.
Conflict Resolution:
Data Sync provides two options for conflict resolution, Hub wins or Member wins. If you select Hub wins, the changes in the hub always overwrite changes in the member.
If you select Member wins, the changes in the member overwrite changes in the hub. If there is more than one member, the final value depends on which member syncs first.
Note – I have selected Hub Win.
 Step 10:
Add Sync Member:
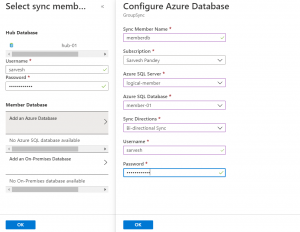
Provide a unique Sync member name
Connect to the Hub database.
Click on Add member database.
Select “member-01” database and Sync Direction.
 Step 11:
Configure Sync Group:
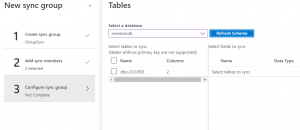
Select the database. Here, I have created sample table in member-01.
Click on Refresh Schema. After few seconds, all the tables in member-01 is going ko appear.
Note – Table without Primary Key will be grey out.
 Step 12:
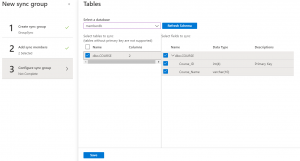
Click on the table name.
Select the column you want to Sync.
 Step 13:
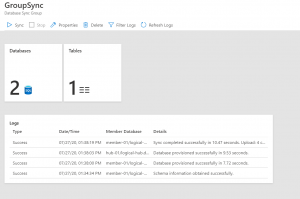
Go the Sync group, in the Logs, all the database will be in synced and the status of the Sync Group will be Good.
 Step 14:
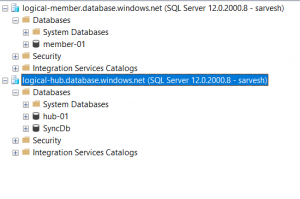
Go to SSMS connect both the Azure SQL Server.
 Step 15:
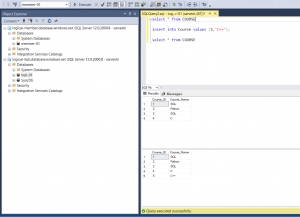
Insert a new row in member-01 database.
 Step 16:
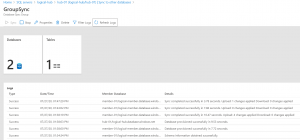
Go to Azure Portal -> Sync Group -> Click on Sync button.
After few seconds, database is sync or wait till the automatic sync time you have schedule.
(Sync button is grayed out because Sync is started)
 Step 17:
Run select query on hub-01.
New row has been added to the Course table in hub-01 database.
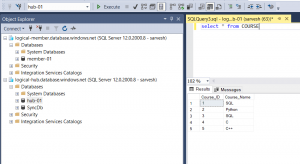 Now, two Azure SQL Database are in Sync.
Likewise, you can setup up-to 30 Azure SQL Database in Sync.
- Azure Subscriptions
- Two Azure SQL Server
- Two Azure SQL Database
- Set Firewall Rule and Allow Azure Services
- SQL Server Management Tool
 Step 2:
Create a Database name “hub-01”in logical-hub server.
 Step 3:
Create Database name “member-01” in logical-member server.
 Step 4:
Add firewall rule to each database.
Go to respective database -> Overview -> Set firewall
 Click on “Add client IP”, it will add you current IP address.
You can manually add your client IP address as well.
 Click “Yes” on Allow Azure services and resources to access this server.
Note – Do this change in both the databases.
Step 5:
Connect “logical-member” server on your SSMS and add a sample table to “member-01” database.
Make sure table consist a Primary Key.
 Step 6:
Go to “hub-01” database -> settings -> click on Sync to other databases.
 Step 7:
Click on “New Sync Group” to add new sync.
 Step 8:
Provide a unique Sync Group Name.
Sync Metadata Database is used to create a new database which will store the Metadata and help the databases to be in Sync.
Its recommended to create a new empty database.
Note – Sync Database should be in the same region of Hub.
 Click on Create new database.
 Step 9:
Select Automatic Sync, currently it is disabled. Minimum Sync time is 5 mins.
Conflict Resolution:
Data Sync provides two options for conflict resolution, Hub wins or Member wins. If you select Hub wins, the changes in the hub always overwrite changes in the member.
If you select Member wins, the changes in the member overwrite changes in the hub. If there is more than one member, the final value depends on which member syncs first.
Note – I have selected Hub Win.
 Step 10:
Add Sync Member:
Provide a unique Sync member name
Connect to the Hub database.
Click on Add member database.
Select “member-01” database and Sync Direction.
 Step 11:
Configure Sync Group:
Select the database. Here, I have created sample table in member-01.
Click on Refresh Schema. After few seconds, all the tables in member-01 is going ko appear.
Note – Table without Primary Key will be grey out.
 Step 12:
Click on the table name.
Select the column you want to Sync.
 Step 13:
Go the Sync group, in the Logs, all the database will be in synced and the status of the Sync Group will be Good.
 Step 14:
Go to SSMS connect both the Azure SQL Server.
 Step 15:
Insert a new row in member-01 database.
 Step 16:
Go to Azure Portal -> Sync Group -> Click on Sync button.
After few seconds, database is sync or wait till the automatic sync time you have schedule.
(Sync button is grayed out because Sync is started)
 Step 17:
Run select query on hub-01.
New row has been added to the Course table in hub-01 database.
 Now, two Azure SQL Database are in Sync.
Likewise, you can setup up-to 30 Azure SQL Database in Sync.


