Author: Suraj Asware, Cloud Engineer.
What is Hyper V?
- Hyper-V is Microsoft’s hardware virtualization product. It let’s you create and run a software version of a computer, called a virtual machine.
- Each virtual machine acts like a complete computer, running an operating system and programs.
- Hyper-V runs each virtual machine in its own isolated space, which means you can run more than one virtual machine on the same hardware at the same time.
How Hyper-V works?
- Hyper-V is hypervisor-based virtualization technology. Hyper-V uses the Windows hypervisor, which requires a physical processor with specific features.
- In most cases, the hypervisor manages the interactions between the hardware and the virtual machines. This hypervisor-controlled access to the hardware gives virtual machines the isolated environment in which they run.
- In some configurations, a virtual machine or the operating system running in the virtual machine has direct access to graphics, networking, or storage hardware.
What does Hyper-V consist of?
- Hyper-V has required parts that work together so you can create and run virtual machines. Together, these parts are called the virtualization platform. They’re installed as a set when you install the Hyper-V role.
- The required parts include Windows hypervisor, Hyper-V Virtual Machine Management Service, the virtualization WMI provider, the virtual machine bus (VM bus), the virtualization service provider (VSP), and virtual infrastructure driver (VID).
- Hyper-V also has tools for management and connectivity. You can install these on the same computer that the Hyper-V role is installed on, and on computers without the Hyper-V role installed.
One of the great things that today’s modern hypervisor platforms allow us to do is run VMs inside of VMs. This is referred to as “nested virtualization”.
Requirement:
- Hyper-V host and guest must both be either Windows Server 2016 or Windows 10 Anniversary update or later.
- VM configuration level must be 8.0 or higher.
- Only Intel processors are currently supported – running VT-x and EPT technology.
Azure specific requirements:
- Create a Windows Server 2016 VM.
- All v3 virtual machines support nested virtualization.
The following SKU Family VMs are capable of nested virtualization. These SKUs are hyper-threaded, nested capable VMs:
- D_v3
- Ds_v3
- E_v3
- Es_v3
- F2s_v2-F72s_v2
- M
Create a nesting capable Azure VM
Create a new Windows Server 2016 Azure VM. For a complete list of virtual machine sizes that support nesting. Remember to choose a VM size large enough to support the demands of a guest virtual machine.
Step 1: First things first, you need to create an Azure VM. Here you need to create a Windows Server 2016 or Windows 10.
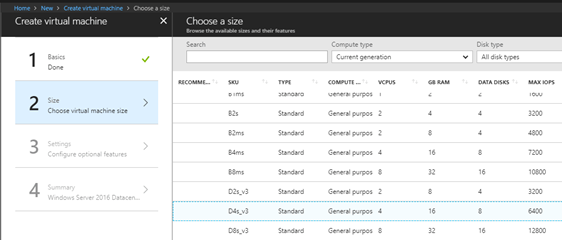
Step 2: Choose the size of the VM to be created in Microsoft Azure. Here you want to make sure the virtual machine chosen is large enough to run nested virtual machines. This typically will be a multiple vCPU configuration with a healthy amount of memory to use for the “layer 2” VMs.
Step 3: Enable the Hyper-V feature on the Azure VM
Step 4: Create a new virtual network adapter for the guest virtual machine and configure a NAT Gateway to enable Internet connectivity.
- On the Azure VM, open PowerShell as an Administrator.
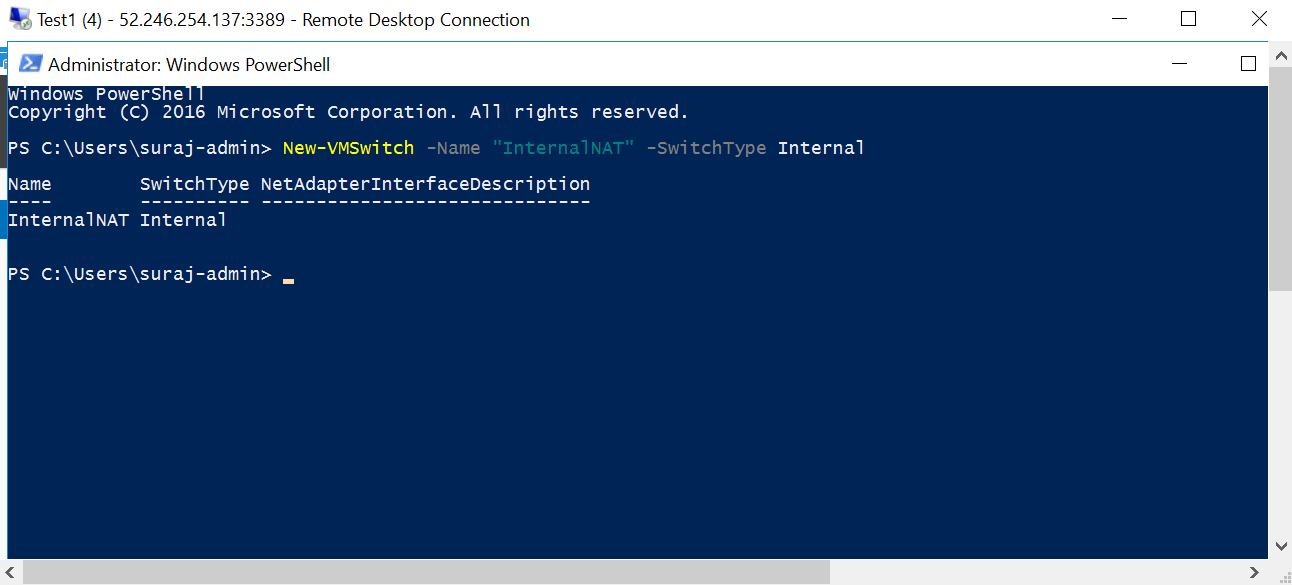
- Create an internal switch. Below is the power shell command.
New-VMSwitch -Name “InternalNAT” -SwitchType Internal
- View the properties of the switch and note the ifIndex for the new adapter.
Get-NetAdapter
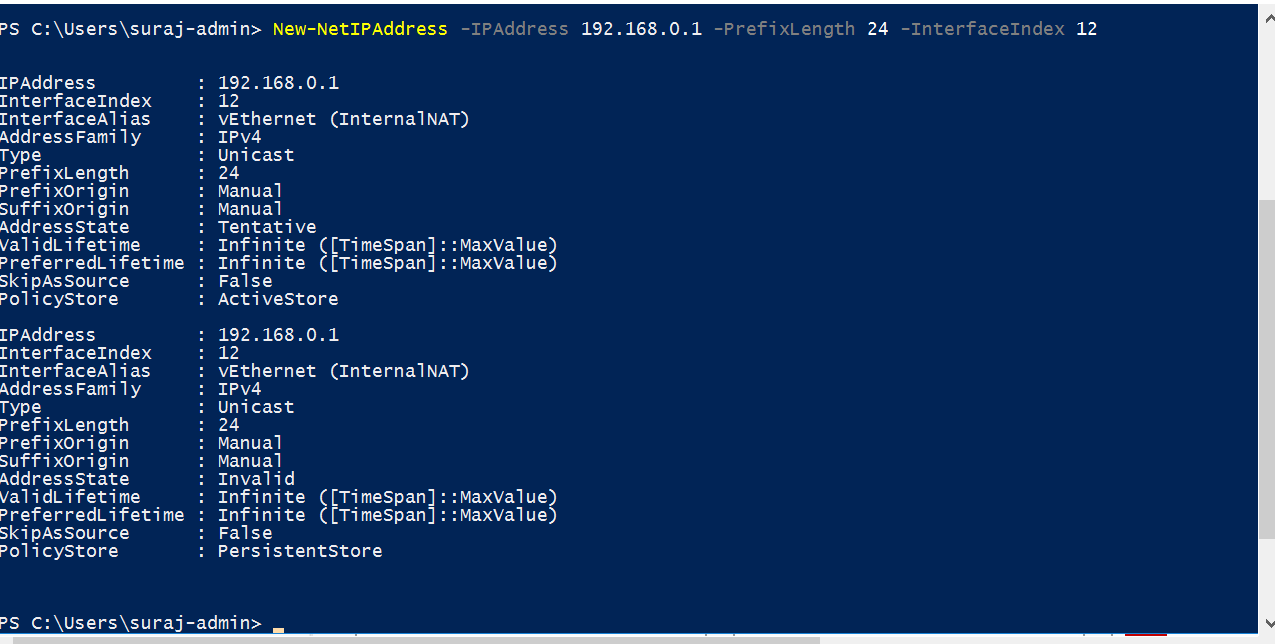
- Create an IP address for the NAT Gateway. Below is the command
New-NetIPAddress -IPAddress 192.168.0.1 -PrefixLength 24 -InterfaceIndex 13
Step 5: Create the NAT network. Below is the following command for Powershell.
New-NetNat -Name “InternalNat” -InternalIPInterfaceAddressPrefix 192.168.0.0/24
Step 6: Create a guest virtual machine.
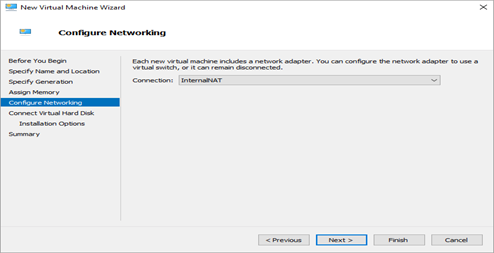
- Open Hyper-V Manager and create a new virtual machine. Configure the virtual machine to use the new Internal network you created.
- Install an operating system on the guest virtual machine.
Step 7: Configure DHCP to dynamically assign an IP address to the guest virtual machine.
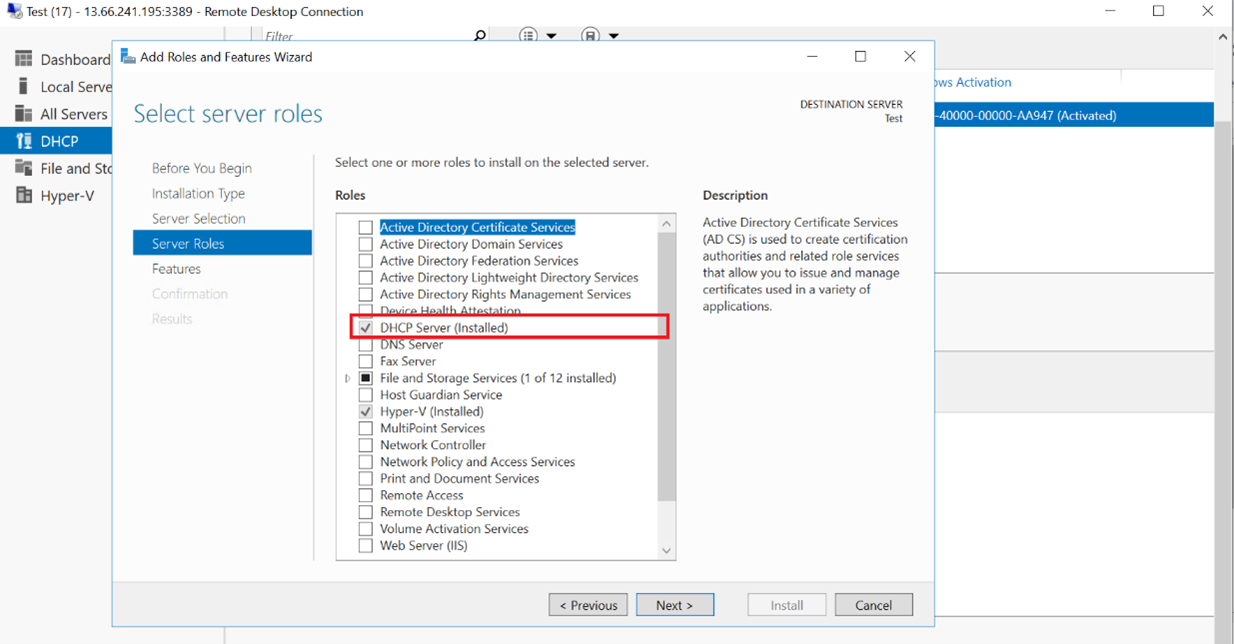
- Open Server Manager. On the Dashboard, click Add roles and features. The Add Roles and Features Wizard appear.
- In the wizard, click Next until the Server Roles page.
- Click to select the DHCP Server checkbox, click Add Features, and then click Next until you complete the wizard.
- Click Install.
- Configure a new DHCP scope
- Open DHCP Manager.
- In the navigation pane, expand the server name, right-click IPv4, and click New Scope. The New Scope Wizard appears, click Next.
- Enter a Name and Description for the scope and click Next.
- Define an IP Range for your DHCP server (for example, 192.168.0.100 to 192.168.0.200).
- Click Next until the Default Gateway page. Enter the IP Address you created earlier (for example, 192.168.0.1) as the Default Gateway, then click Add.
- Click Next until the wizard completes, leaving all default values, then click Finish
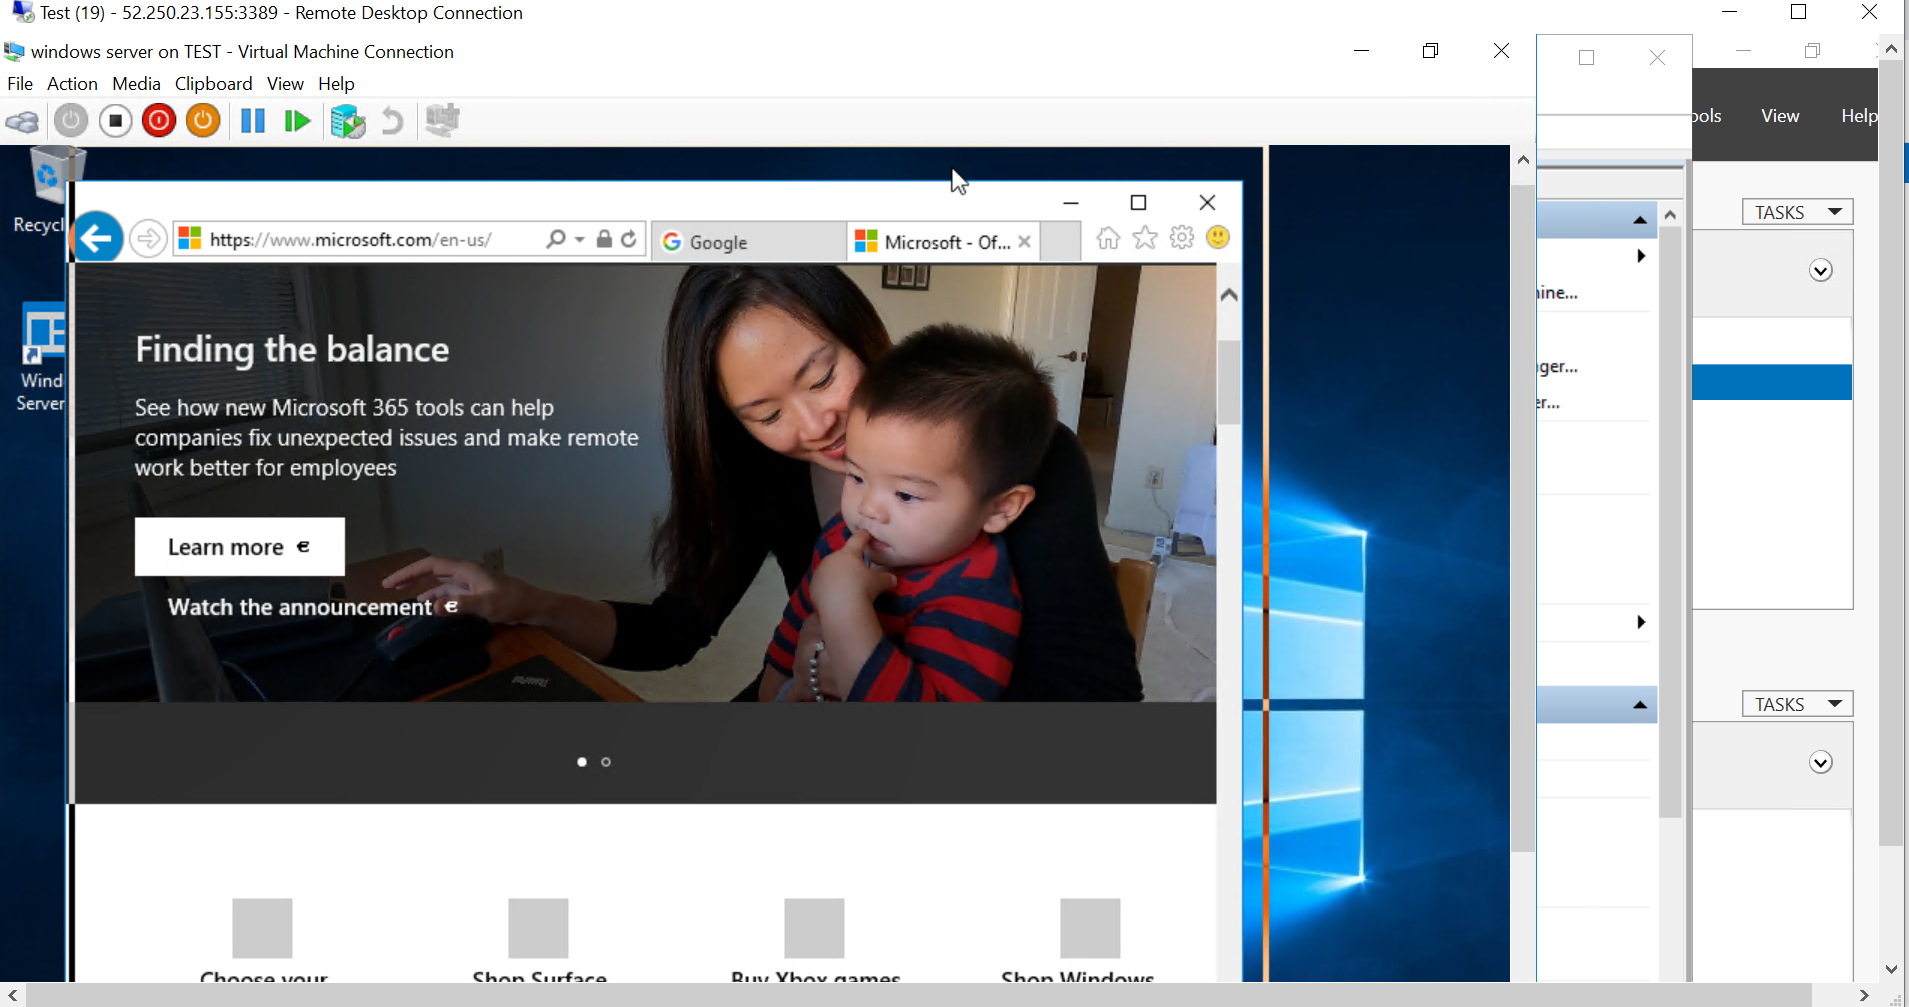
Step 8: Test connectivity in a guest virtual machine.
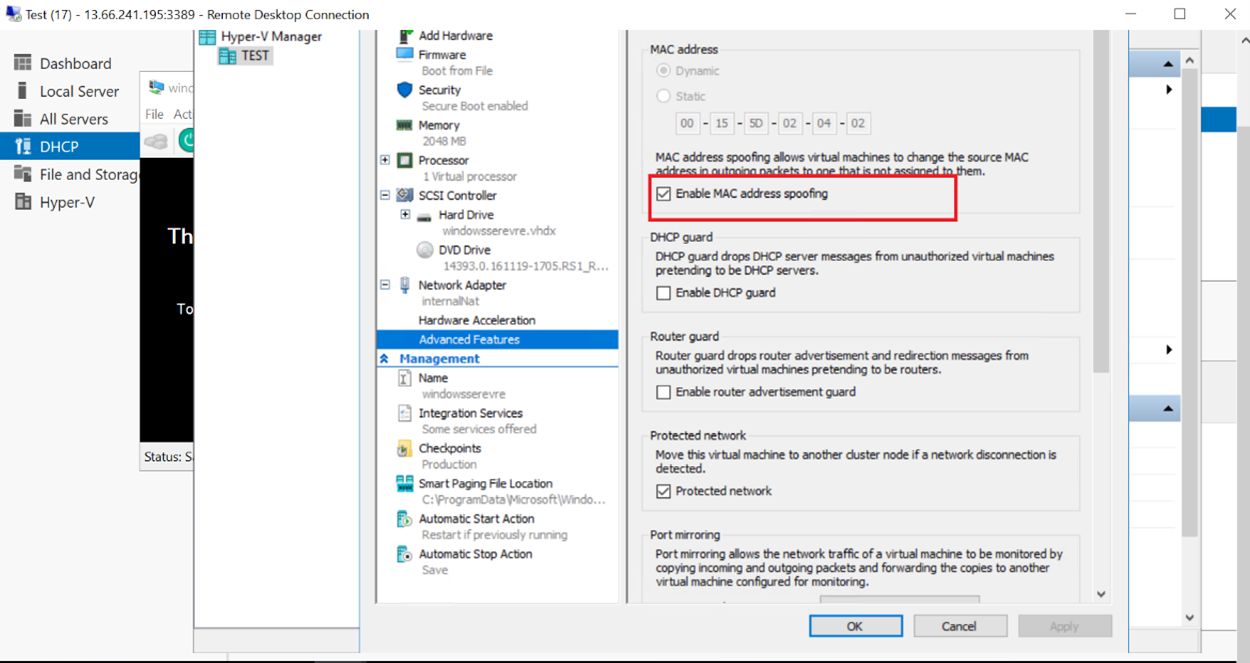
Step 9: To enable Mac Spoofing Go to the Hyper-v virtual machine. Click on setting find the network adapter list on the left and click on the + symbol next to it to drop down some additional options. Click on Advanced Features, and then over on the right, check the checkbox for Enable spoofing of MAC addresses.
Conclusion:-
Nested virtualization is a great step forward for Microsoft’s Hyper-V platform running in Azure. Azure provides a powerful infrastructure platform that is available from anywhere running on top of Microsoft’s world-class data center infrastructure. So, by following this process we can enable nested virtualization in Azure Virtual Machine.


