Author- Anubhav Bisht (Cloud Engineer)
Overview
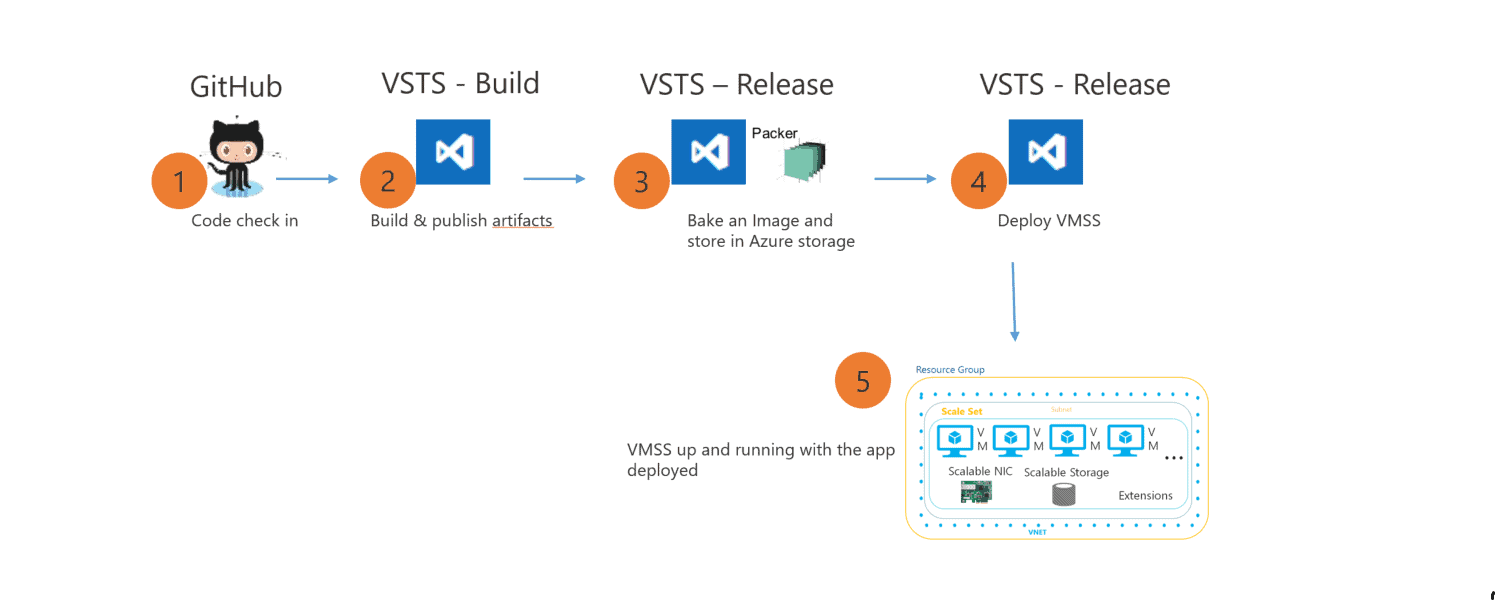
Continuous integration (CI) and continuous deployment (CD) form a pipeline by which you can build, release, and deploy your code. Azure DevOps provides a complete, fully featured set of CI/CD automation platform for deployment. It also provides developer services for support teams to plan work, collaborate on code development, and build and deploy applications. Azure DevOps supports a culture and set of processes that bring developers and project managers and contributors together to complete software development. It allows organizations to create and improve products at a faster pace than they can with traditional software development approaches.
Azure virtual machine scale sets let you create and manage a group of load balanced VMs. The number of VM instances can automatically increase or decrease in response to demand or a defined schedule. Scale sets provide high availability to your applications, and allow you to centrally manage, configure, and update a large number of VMs.
This post describes how to setup a CI/CD pipeline using Azure DevOps to deploy an application to Azure Virtual Machine Scale Set.
Prerequisites:
An azure account with following services:
- An instance of a Load Balancer
- An instance of a VM Scale Set deployed in the same load balancer
- An instance of a Storage Account
Before we deploy the application to VM Scale Set, we first need to update the upgrade policy of VM Scale Set to Rolling Update. To do so, run the following commands in the powershell and substitute the values accordingly:
az network lb probe show –resource-group <Resource Group> –lb-name <Load Balancer> –name tcpProbe
az vmss update –name <VM Scale Set> –resource-group <Resource Group> –queryvirtualMachineProfile.networkProfile.healthProbe –set virtualMachineProfile.networkProfile.healthProbe.id='/subscriptions/<Subscription ID>/resourceGroups/<Resource Group>/providers/Microsoft.Network/loadBalancers/<Load Balancer>/probes/tcpProbe'
az vmss update-instances –name <VM Scale Set> –resource-group <Resource Group> –instance-ids *
Once the commands are successfully executed you’ll see the Health State as Healthy as shown below:
Application Deployment:
- Continuous Integration:
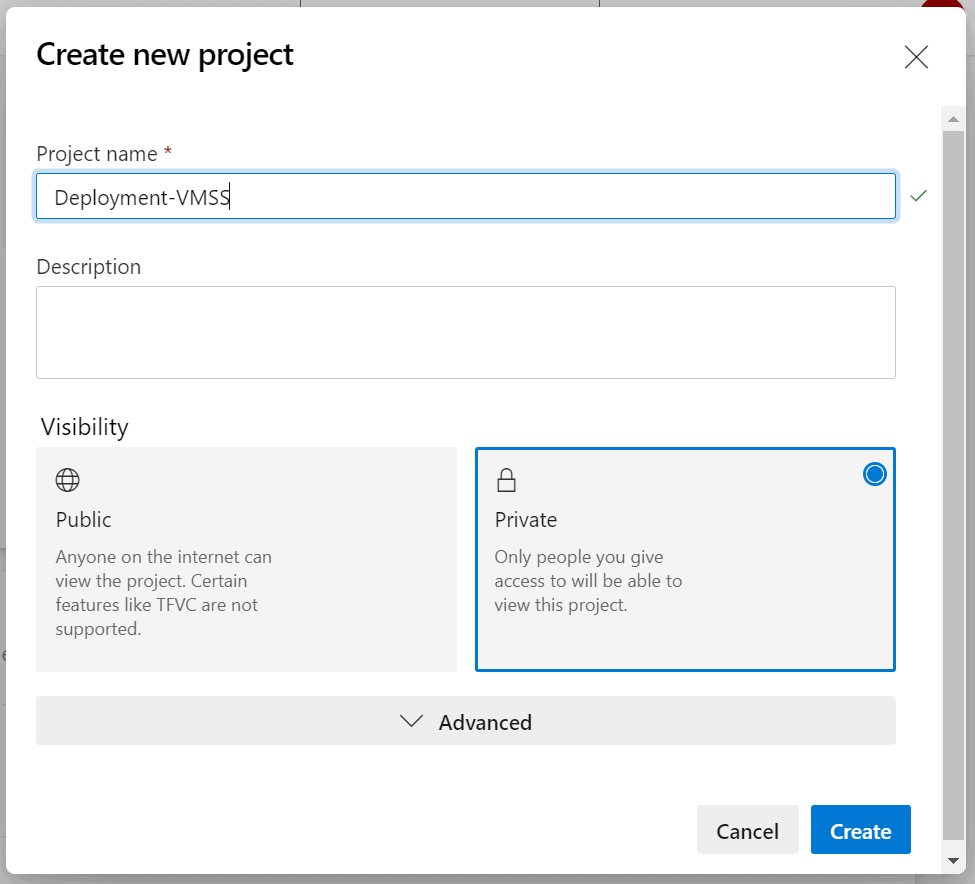
- Create a new project in Azure Devops
-
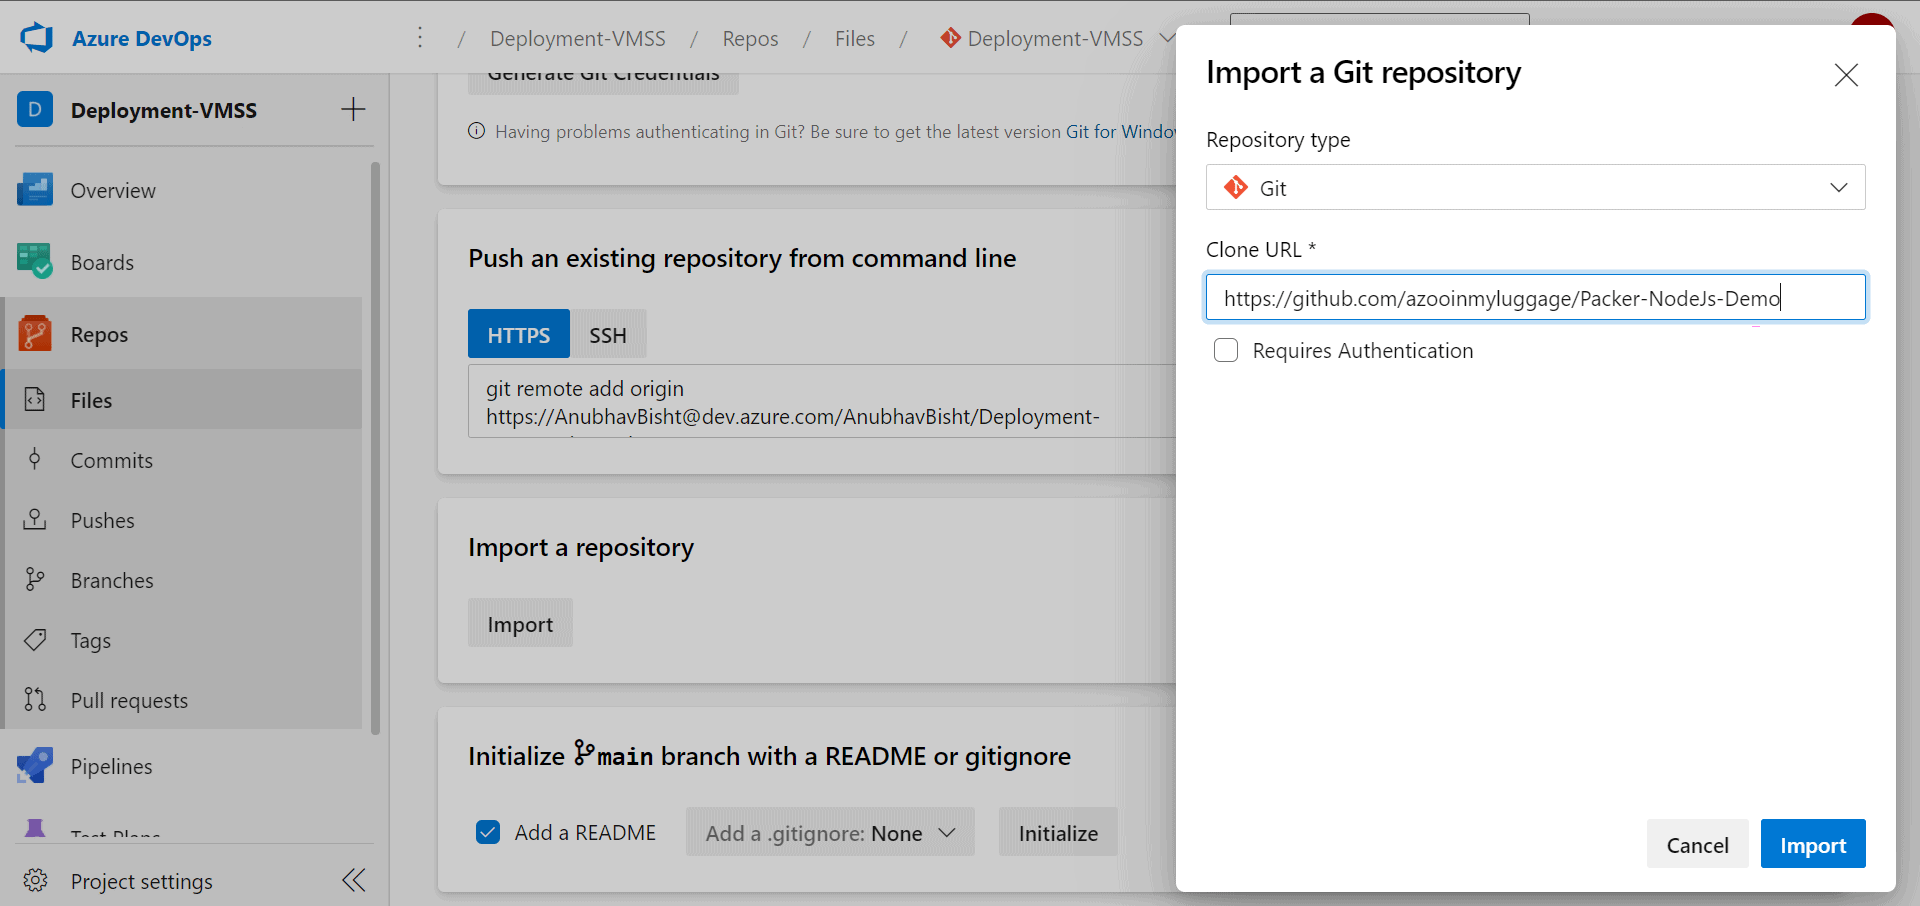
- Go to the Repos section and import the repository that has the sample code for the application
-
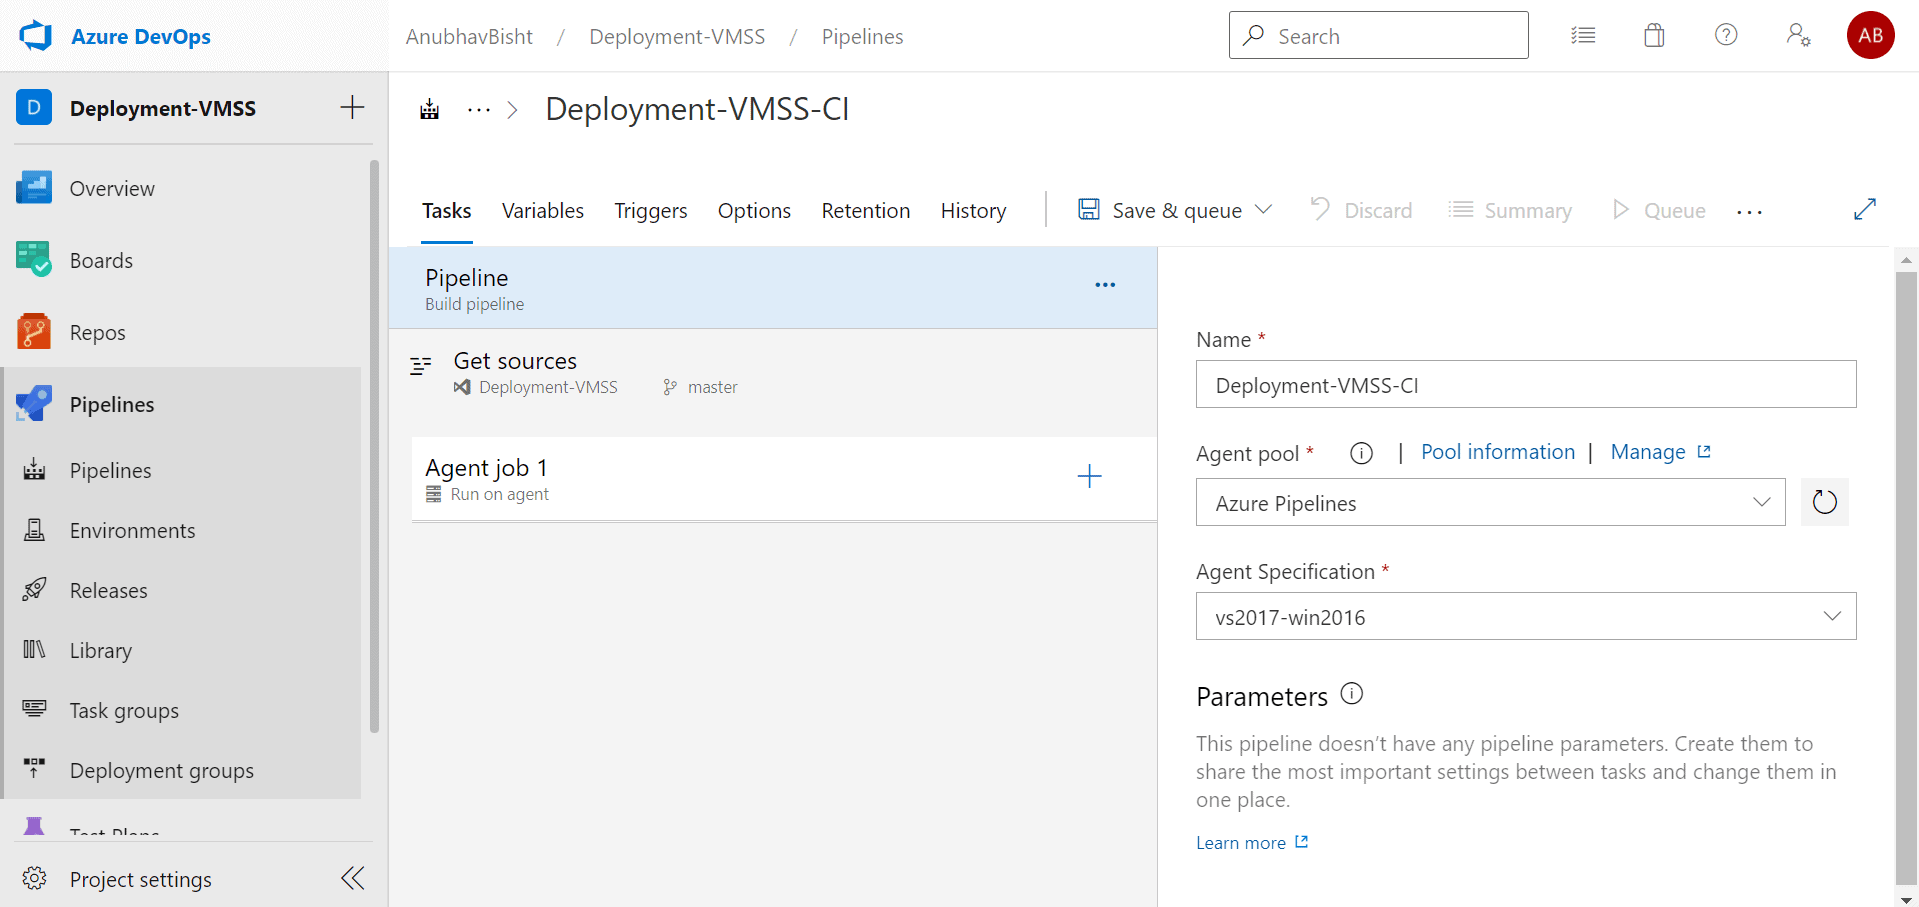
- Now, in pipeline section create a new pipeline using classic editor. Select the repository that has the sample code and create an empty job
-
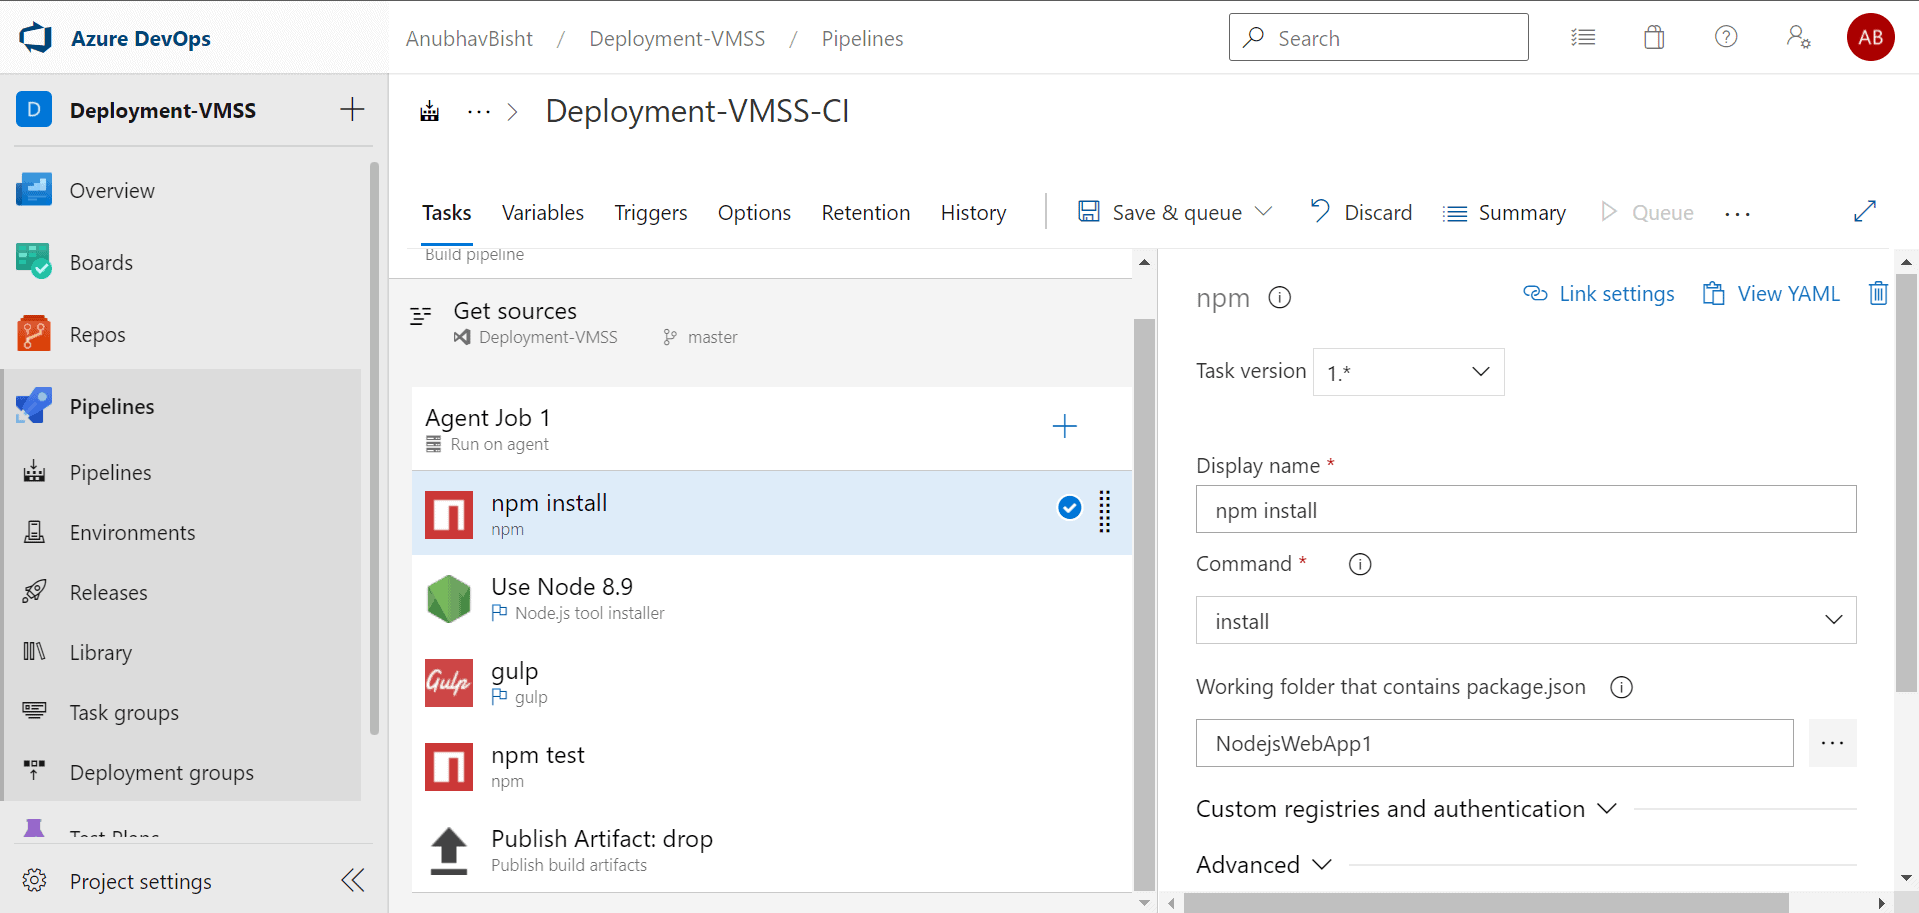
- Add the following tasks to the build pipeline
- NPM (Install): Install your npm package dependencies. Set the working folder to the folder where your application code is committed in the repository
- Add the following tasks to the build pipeline
-
-
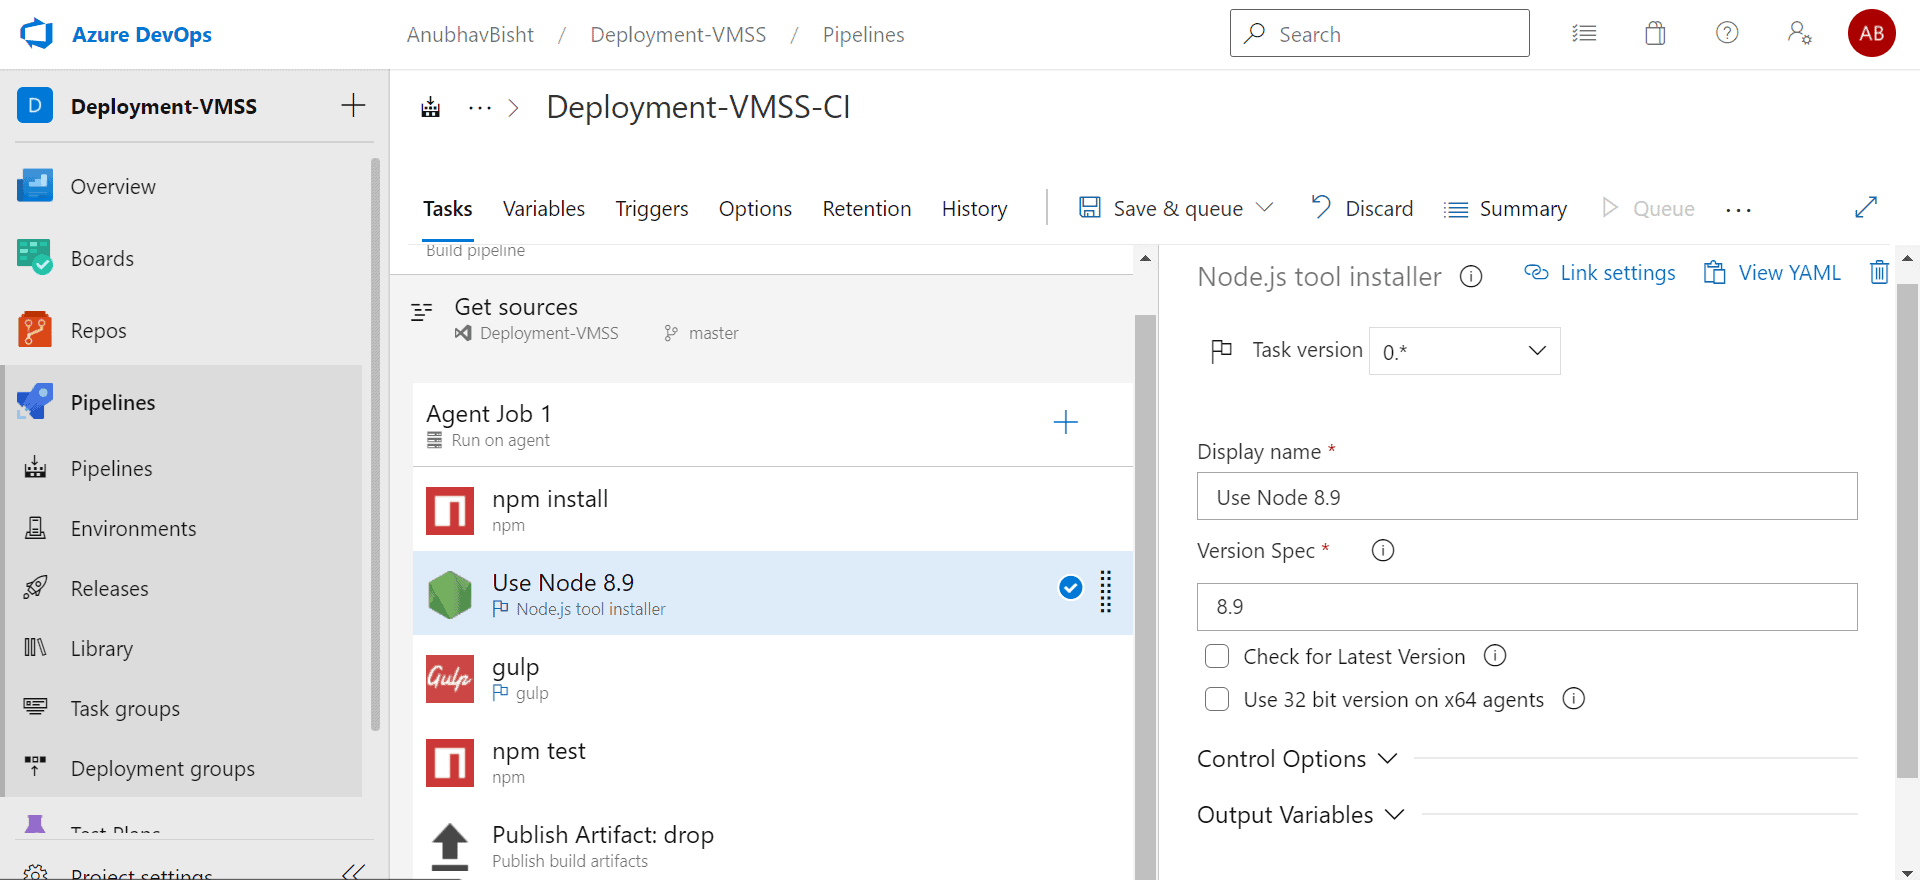
- NodeJS Tool Installer: Download and caches the specified version spec of Node.js and add it to the path. Here, we have used version 8.9. If you want to use any other version then it needs to be updated in NodejsWebApp1/Deploy/ubuntu/deployNodejsApp.sh file also.
-
-
-
- Gulp: Transpiles typescript to JavaScript. The path of guplfile.js needs to be specified in this task.
-
-
-
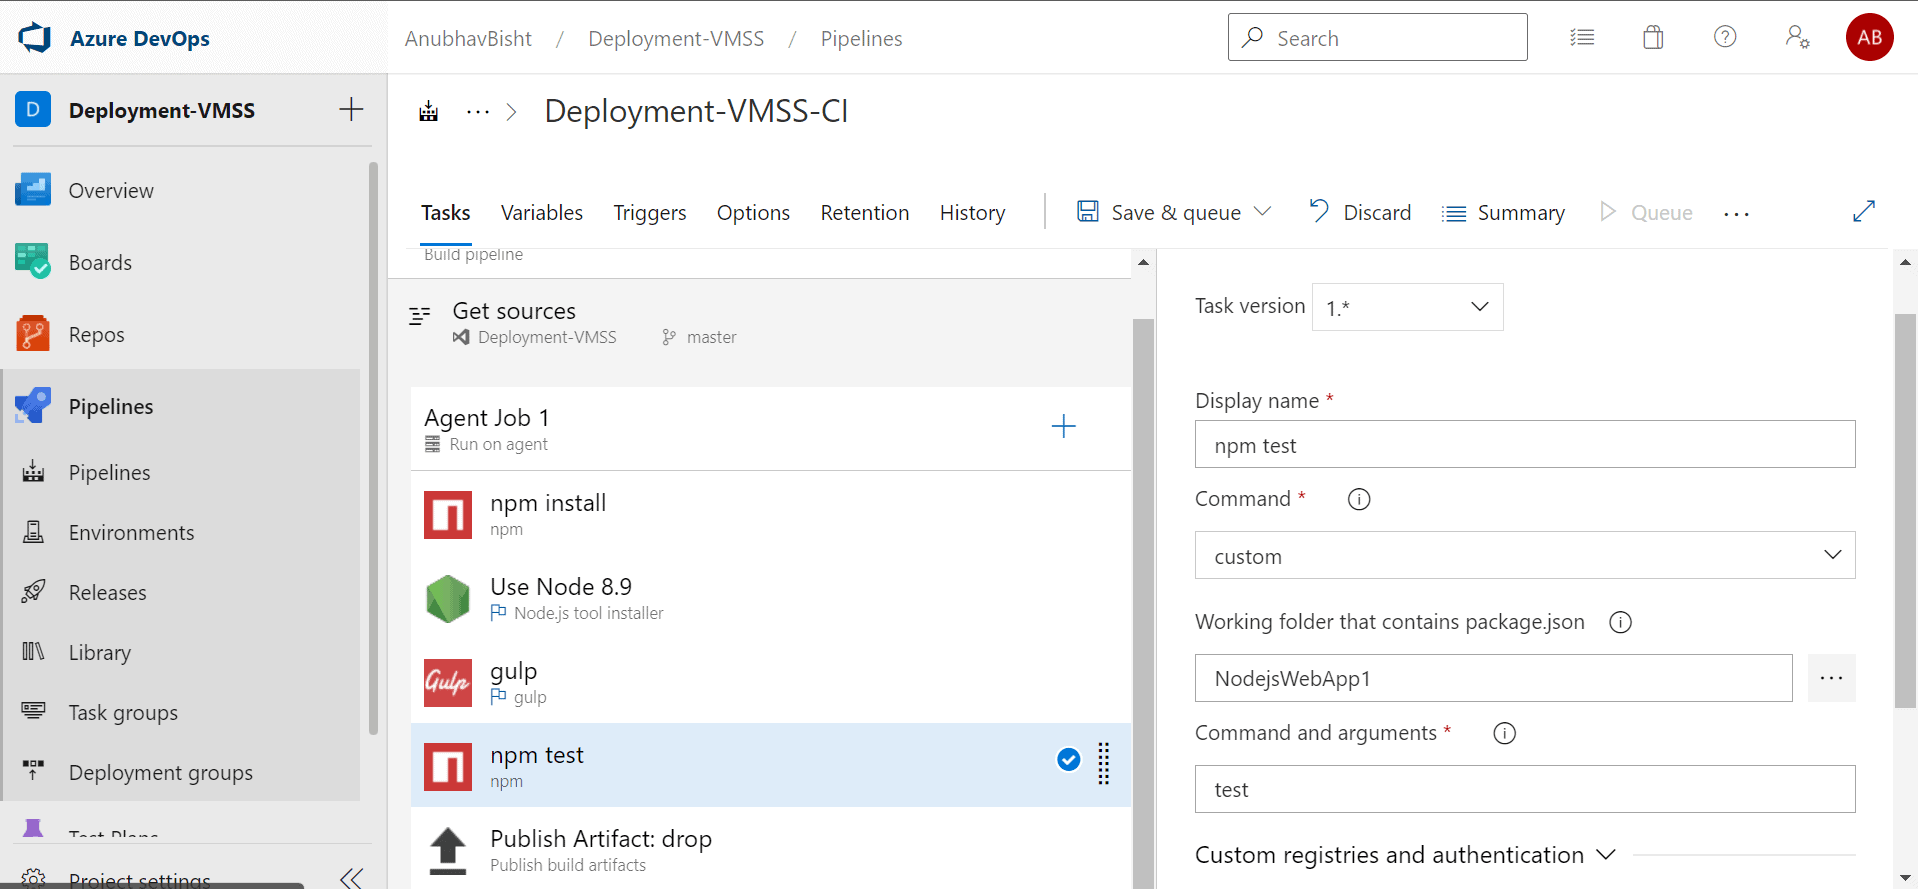
- NPM (Test): Test your application. A custom command test needs to be added to this task. Set the working folder to the folder where your application code is committed in the repository.
-
-
-
- Publish build artifact: Publish the build outputs. Use variables or $(Build.ArtifactStagingDirectory) Folder or file path to publish. Either fully qualified path or relative to repo root.
-
-
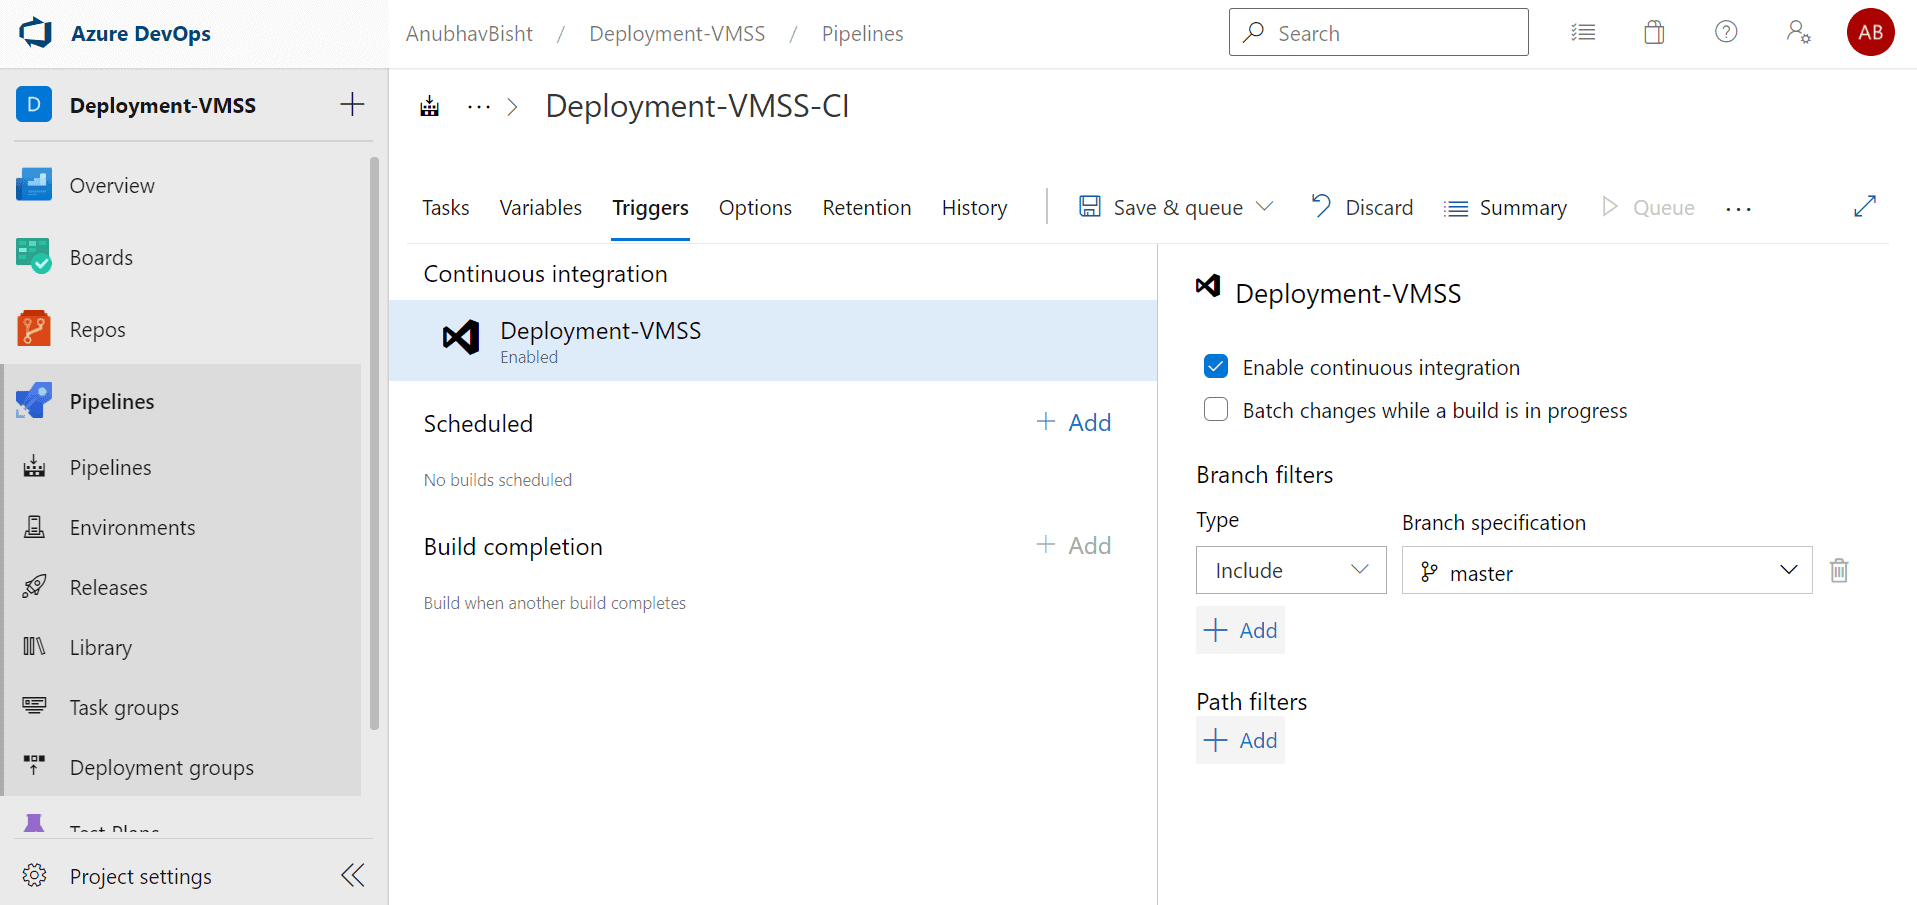
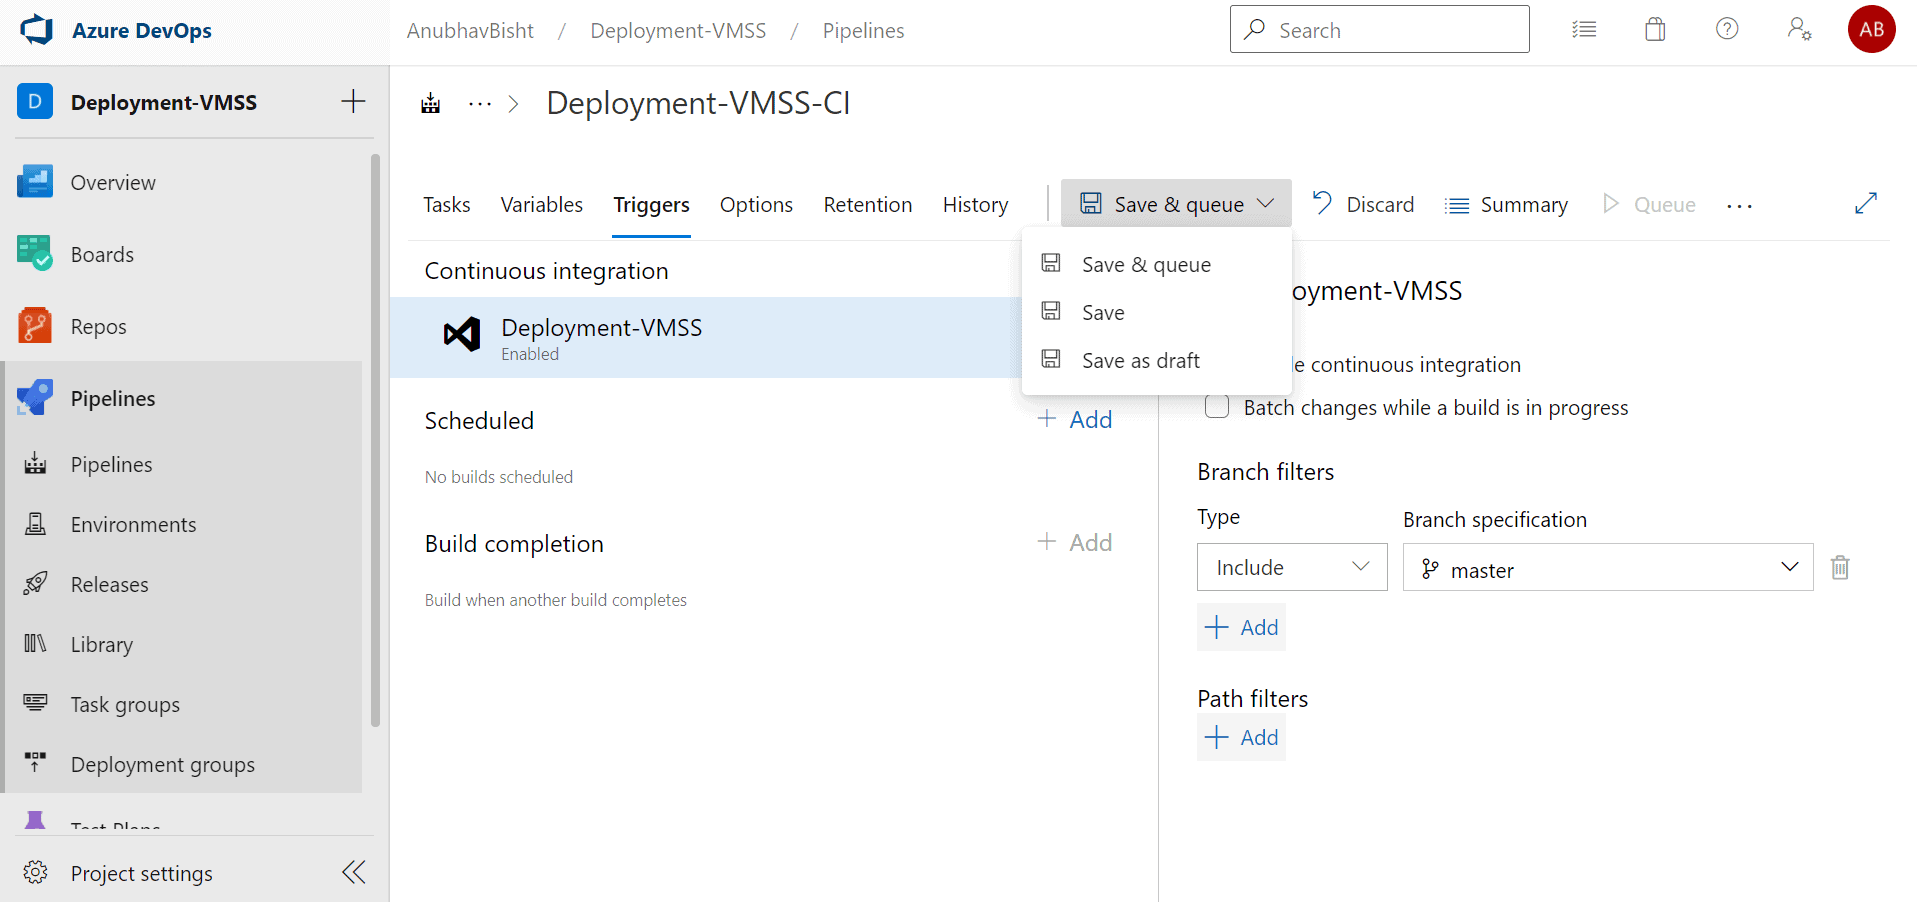
- Once all the tasks are set, go to the trigger section and enable Continuous Integration
-
- Now save the pipeline and Queue it to create build for the application
-
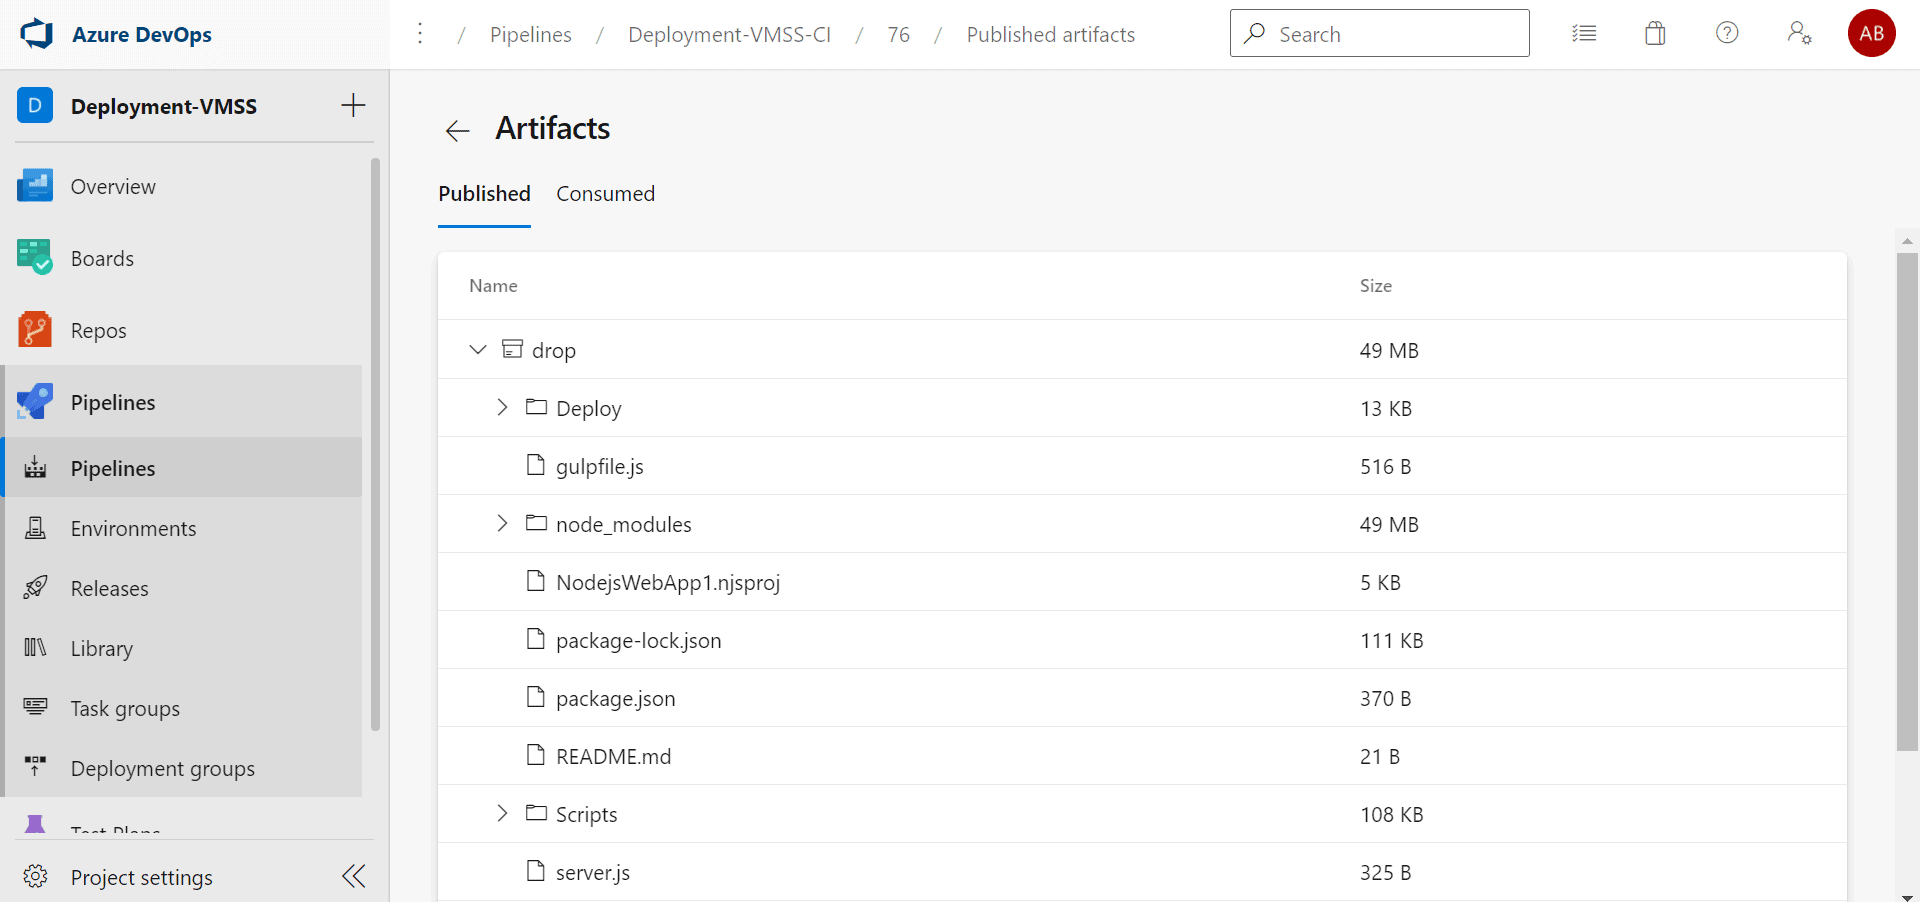
- Once the build pipeline is succeeded, you can check the artifacts as well in the drop folder
2. Continuous Deployment:
-
- Go to the release section and create a new Release Pipeline with empty job
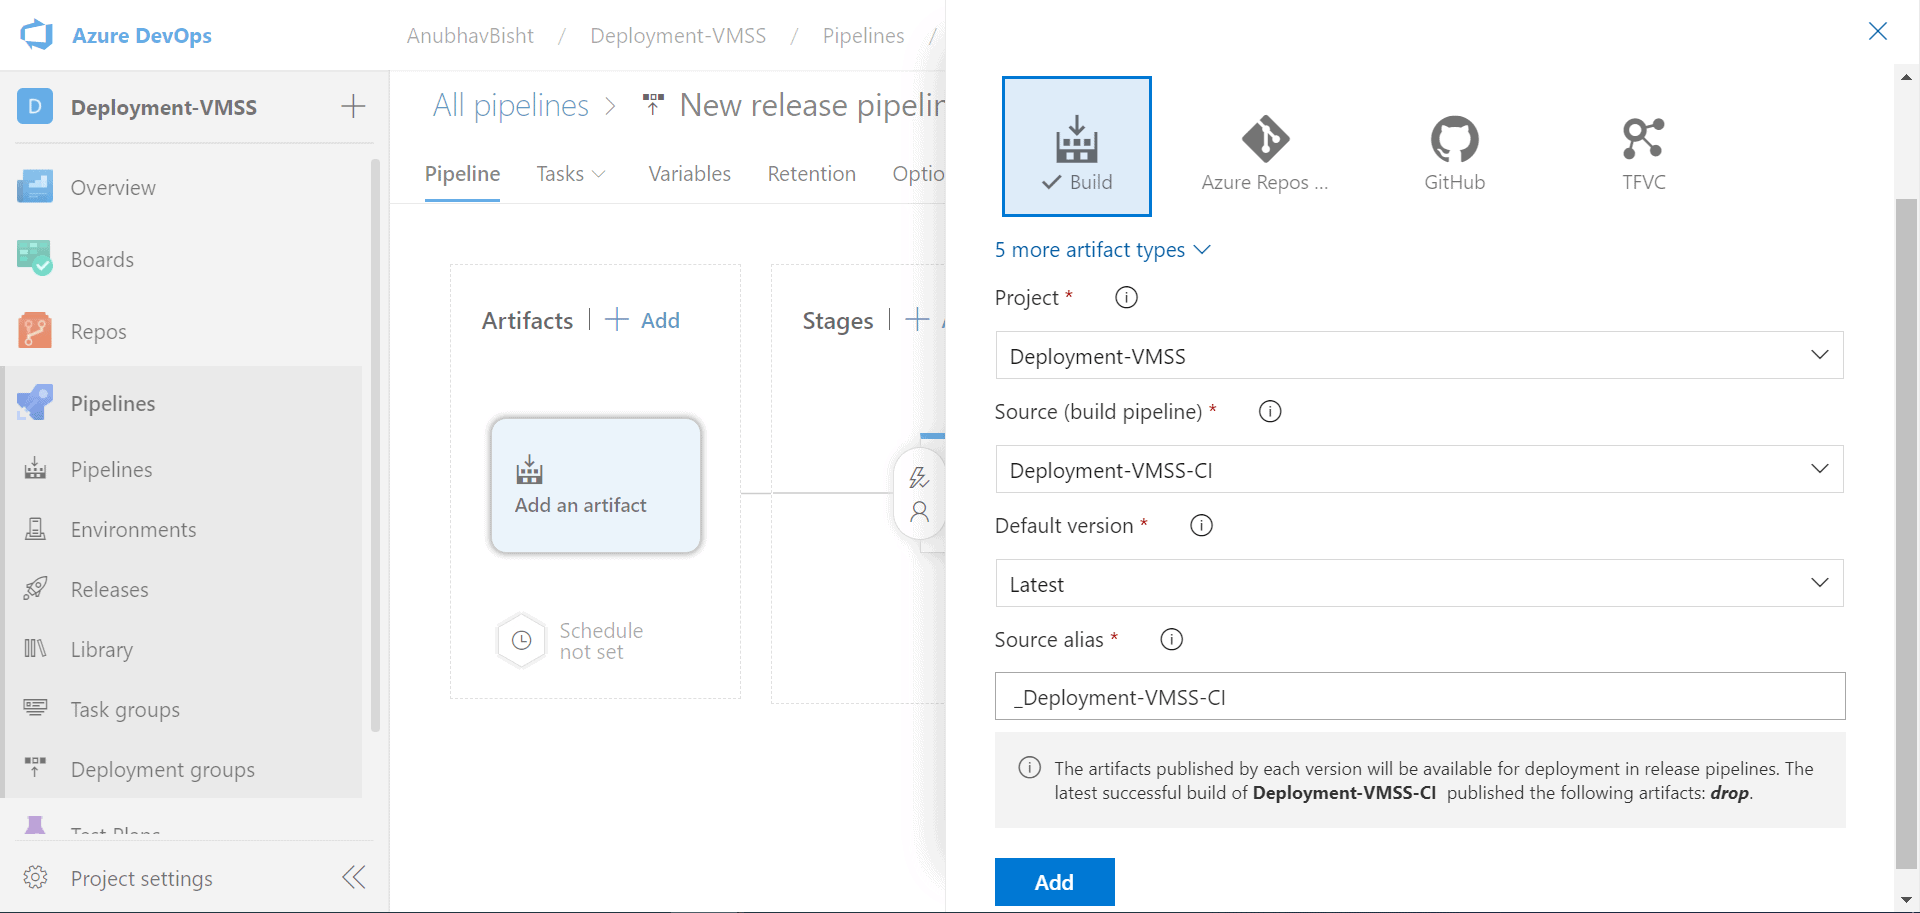
- Add the artifacts from the build that was created in the CI section
-
- Add the following tasks to the agent job
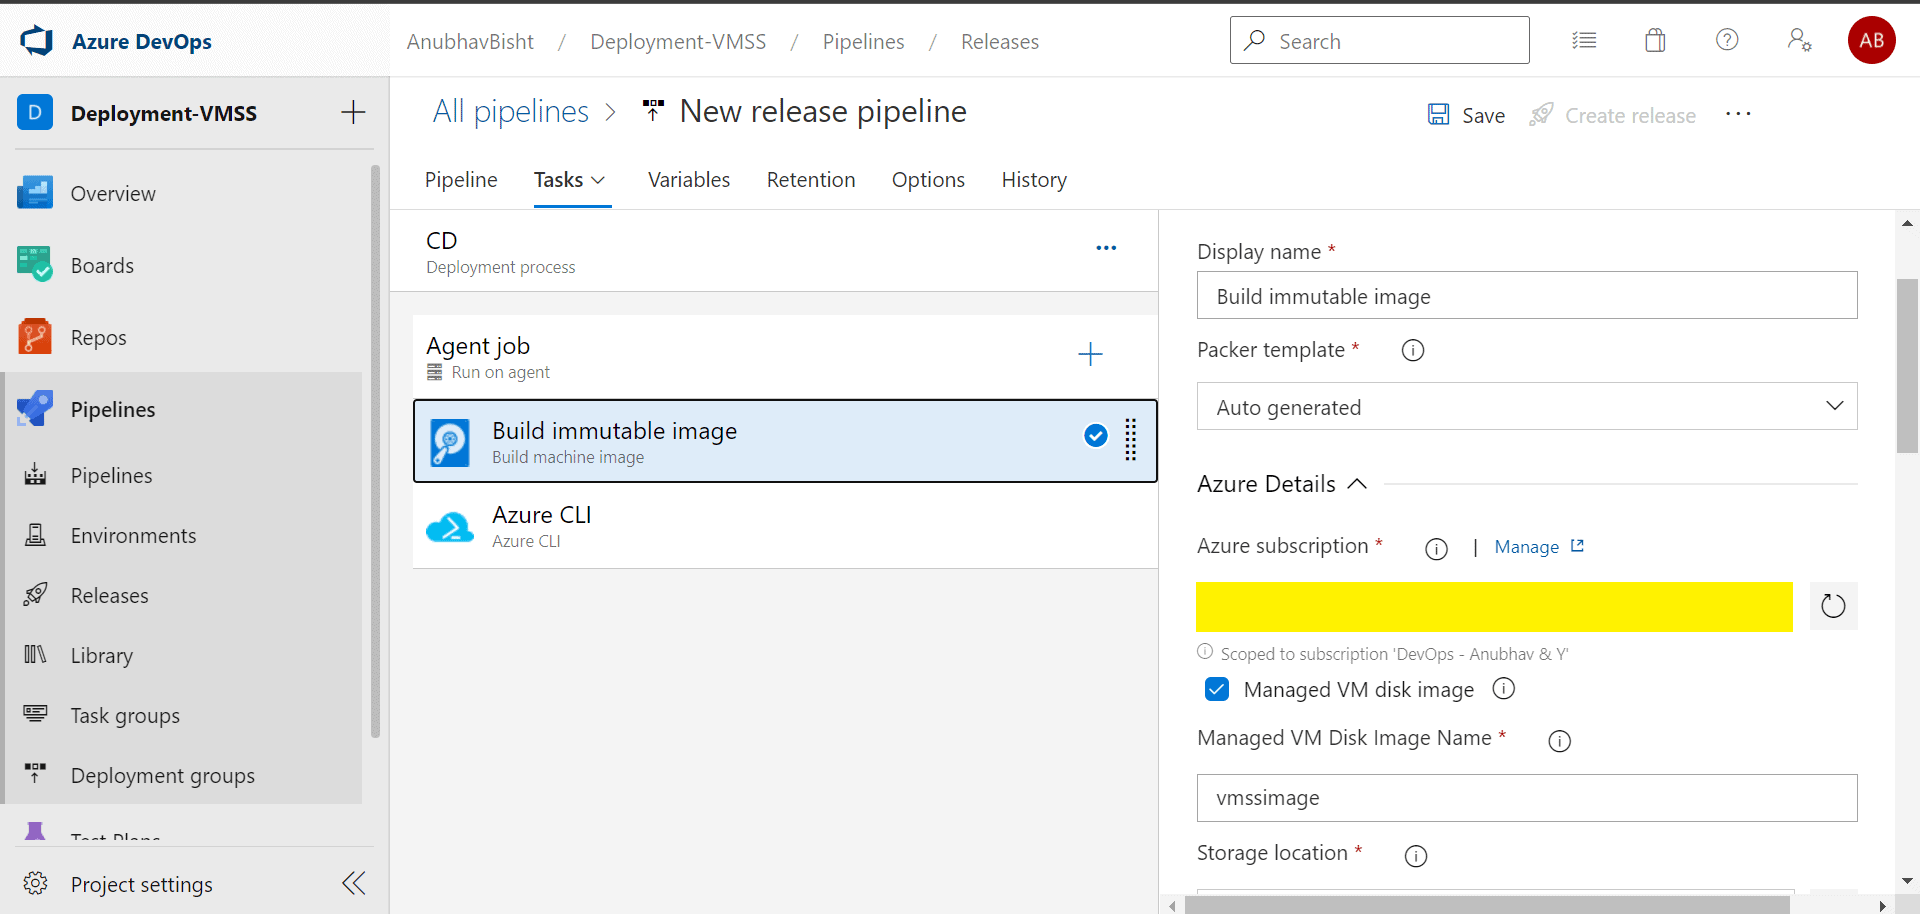
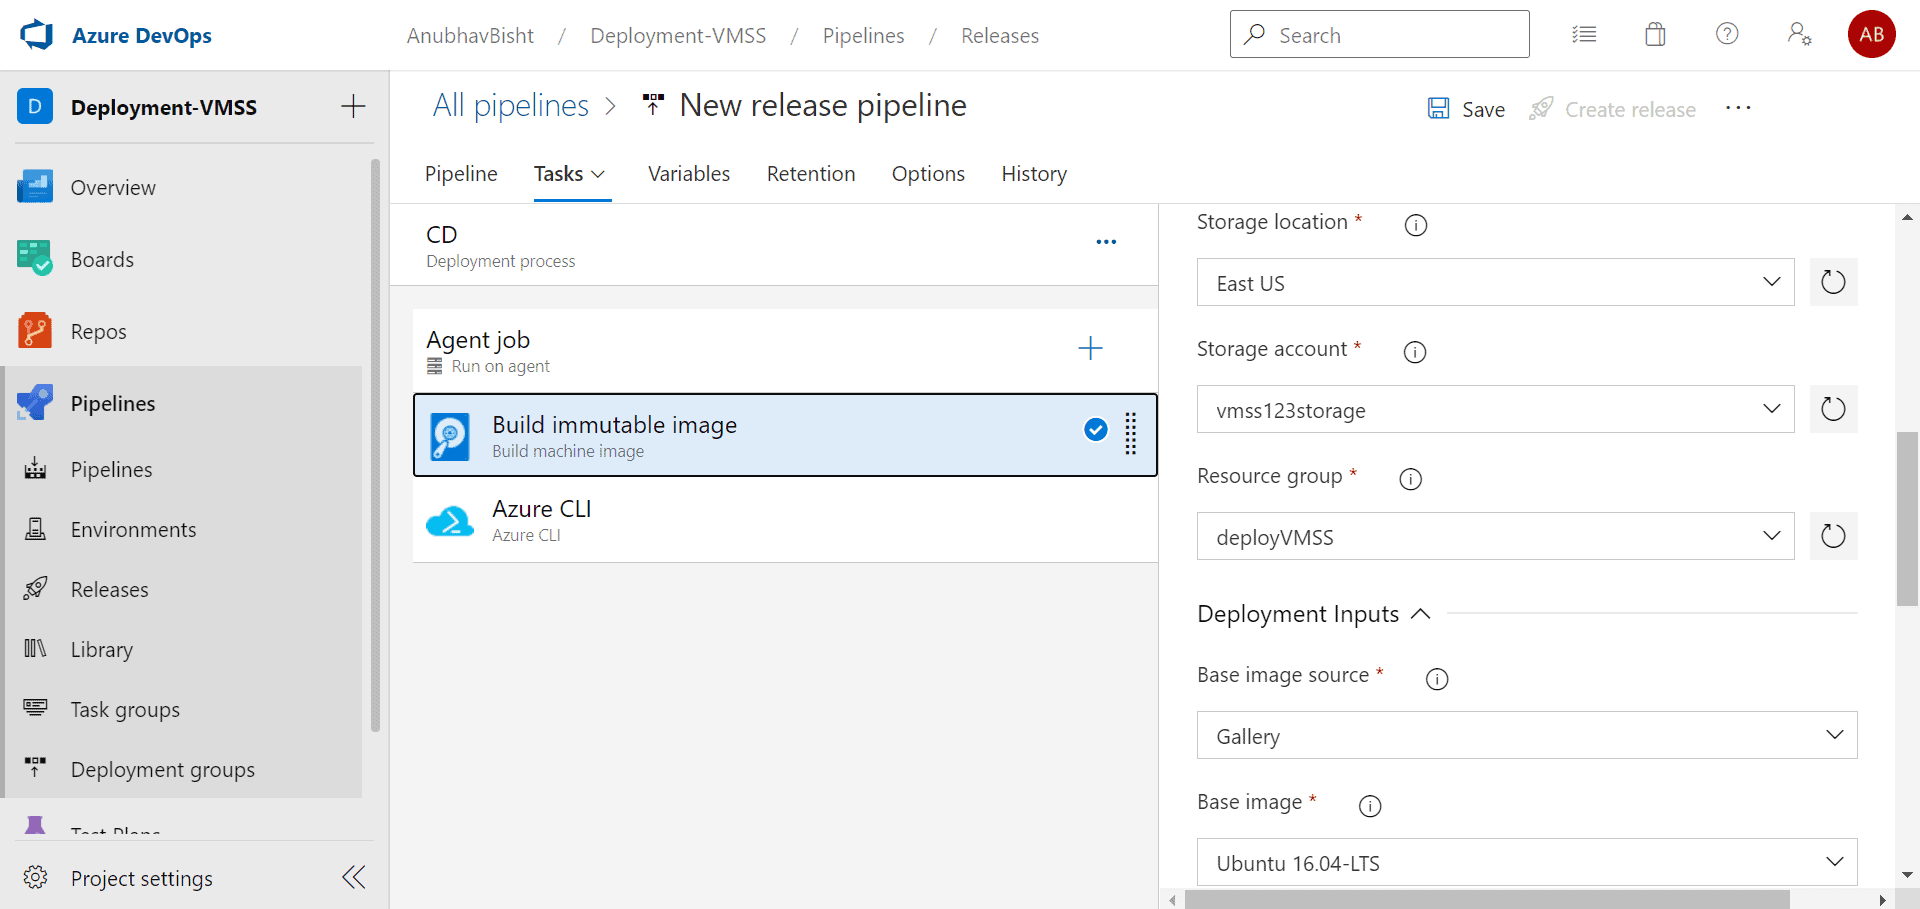
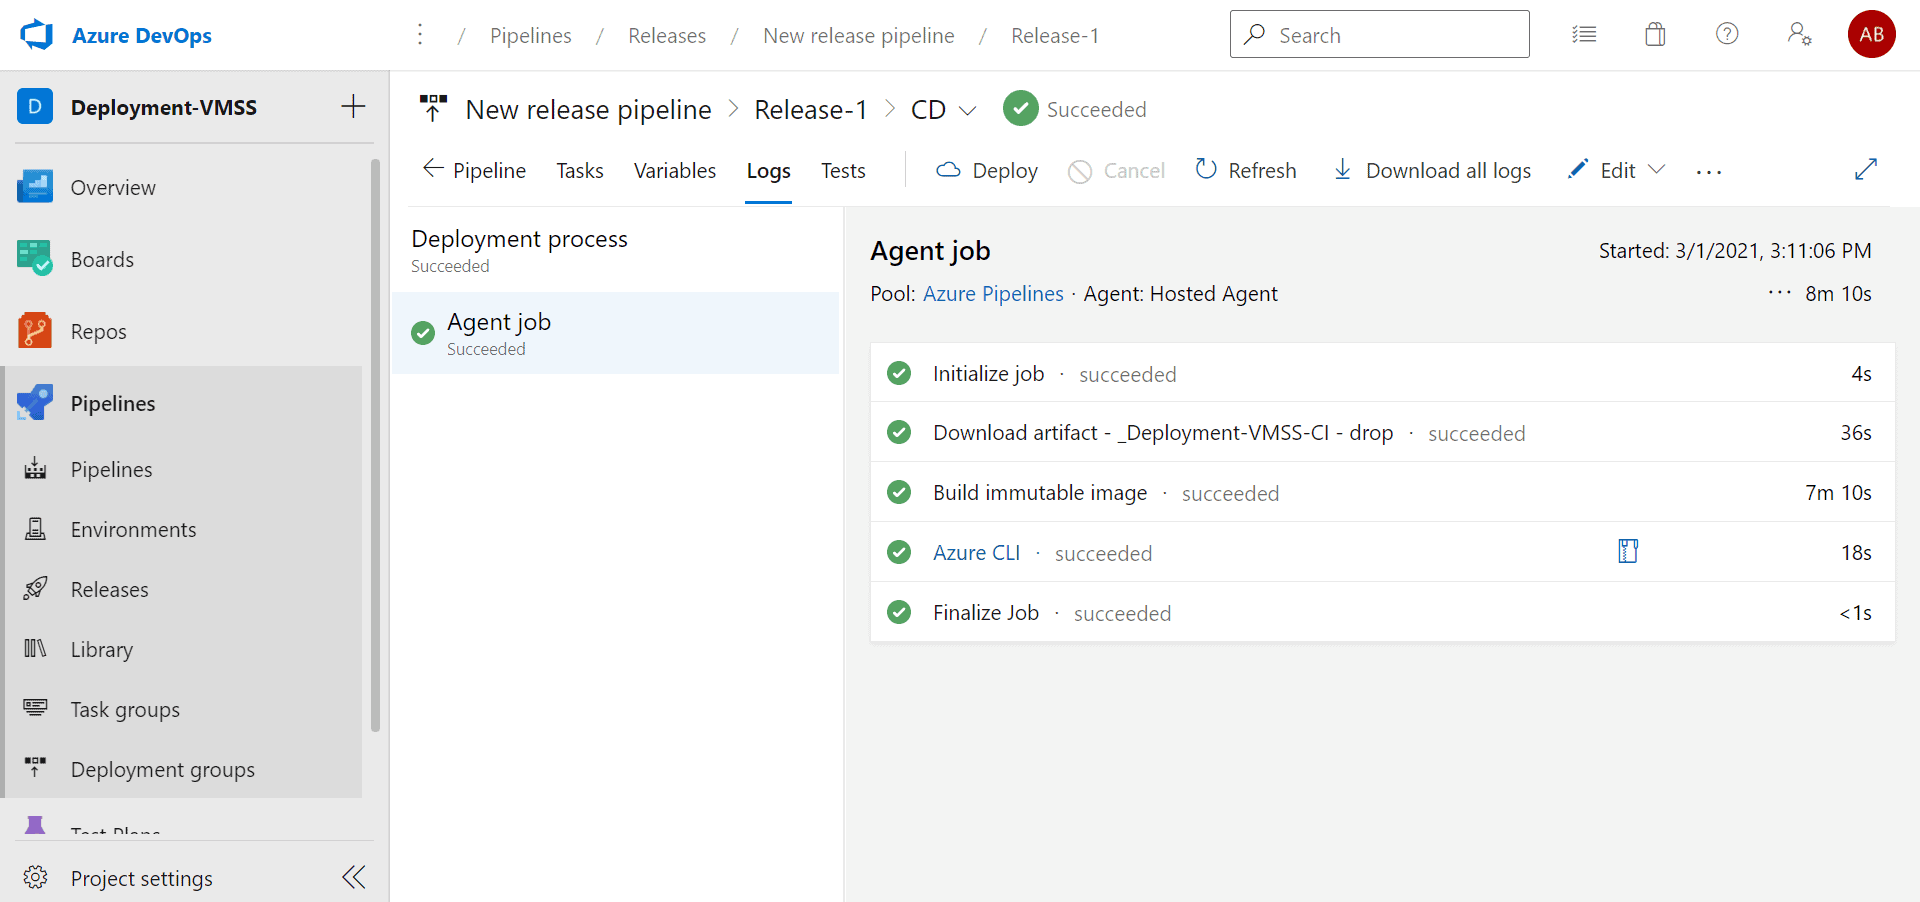
- Build Machine Image:
- Add the following tasks to the agent job
Packer template: You can use your own packer configuration json or use the auto-generate feature where the task generates a packer template for you. In this example auto-generated packer configuration is used.
Storage location: The location of the storage account where the VHD will be stored. This should be the same location where the Virtual Machine Scale Set is or will be created.
Base Image Source: You can either choose from a curated gallery of OS images or provide url of your custom image. For this example, 16.04 LTS is used.
Deployment Package: Specify the path for deployment package directory relative to System.DefaultWorkingDirectory). For example, in this deployment it will be $(System.DefaultWorkingDirectory)/_Deployment-VMSS-CI/drop.
Deployment Script: Specify the relative path to PowerShell script(for Windows) or shell script(for Linux) which deploys the package. This script should be contained in the deployment package path selected above. For example, it will be Deploy/ubuntu/deployNodejsApp.sh in our deployment.
-
-
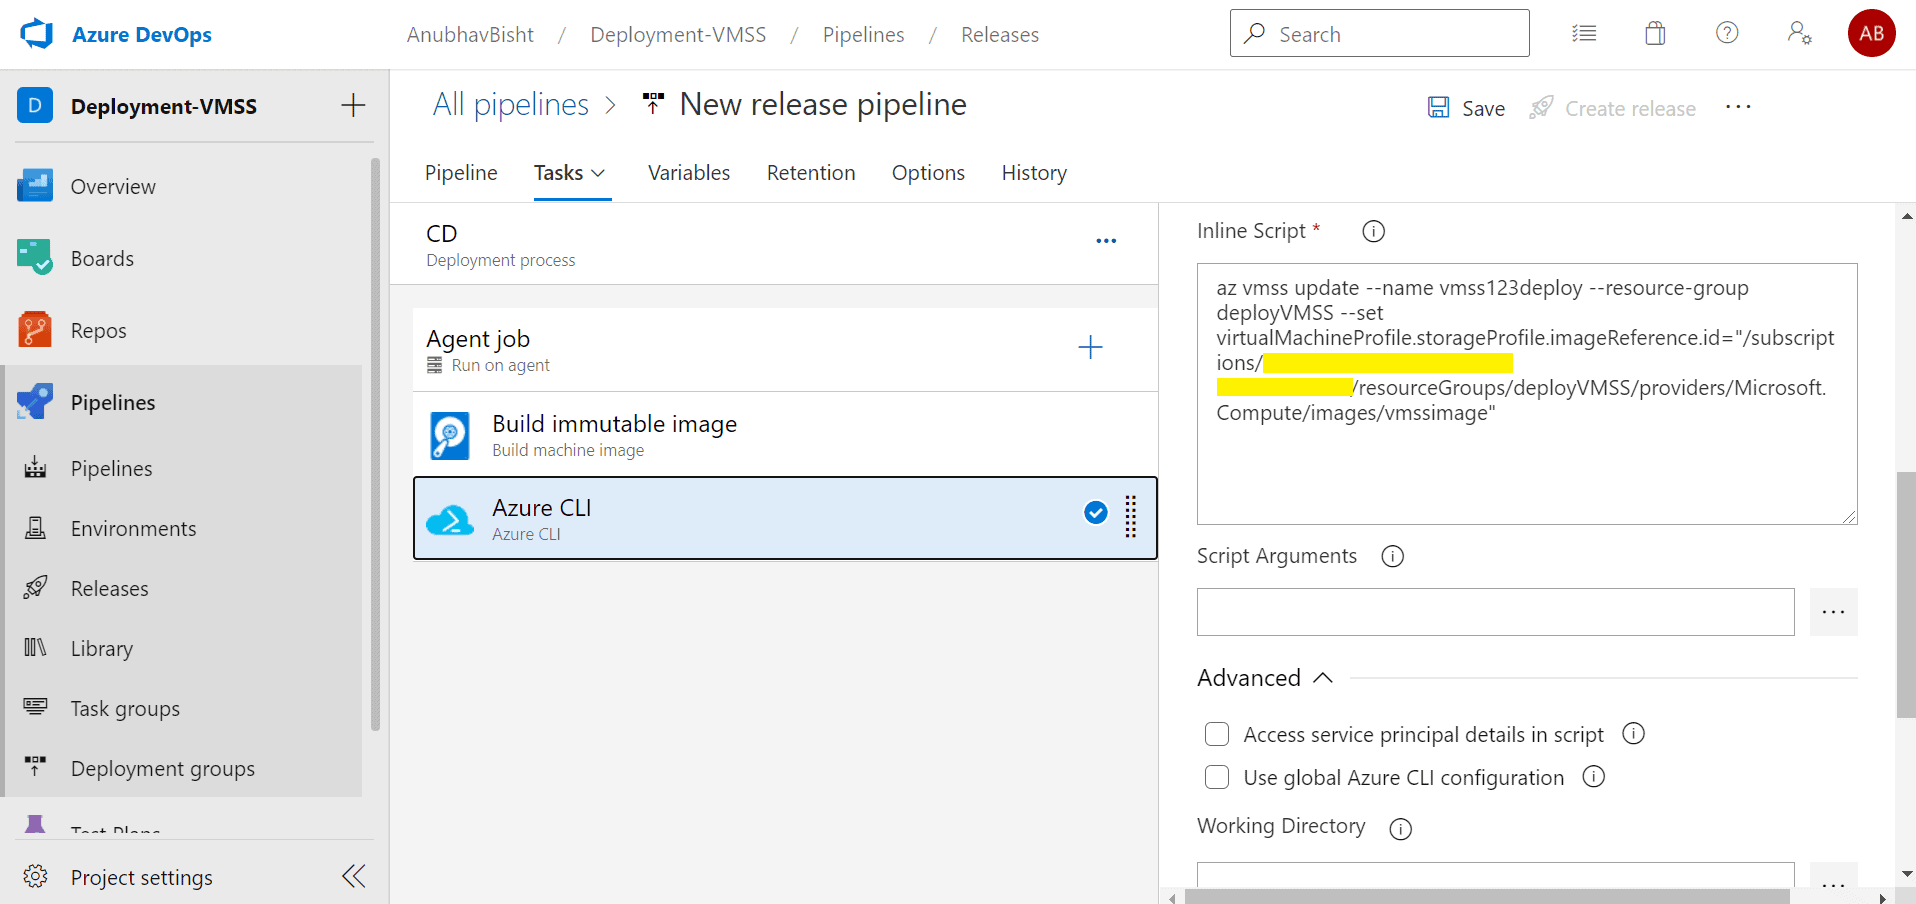
- Azure CLI: This task will update the Virtual Machine Scale Set with the new Managed Image which was created in the previous task.
-
-
- In Azure CLI task use the following command for inline script
az vmss update –name <VMSS name> –resource-group <Resource Group> –set virtualMachineProfile.storageProfile.imageReference.id="/subscriptions/<Subscription ID>/resourceGroups/deployVMSS/providers/Microsoft.Compute/images/<managed Image Name from Build Immutable Image task>"
-
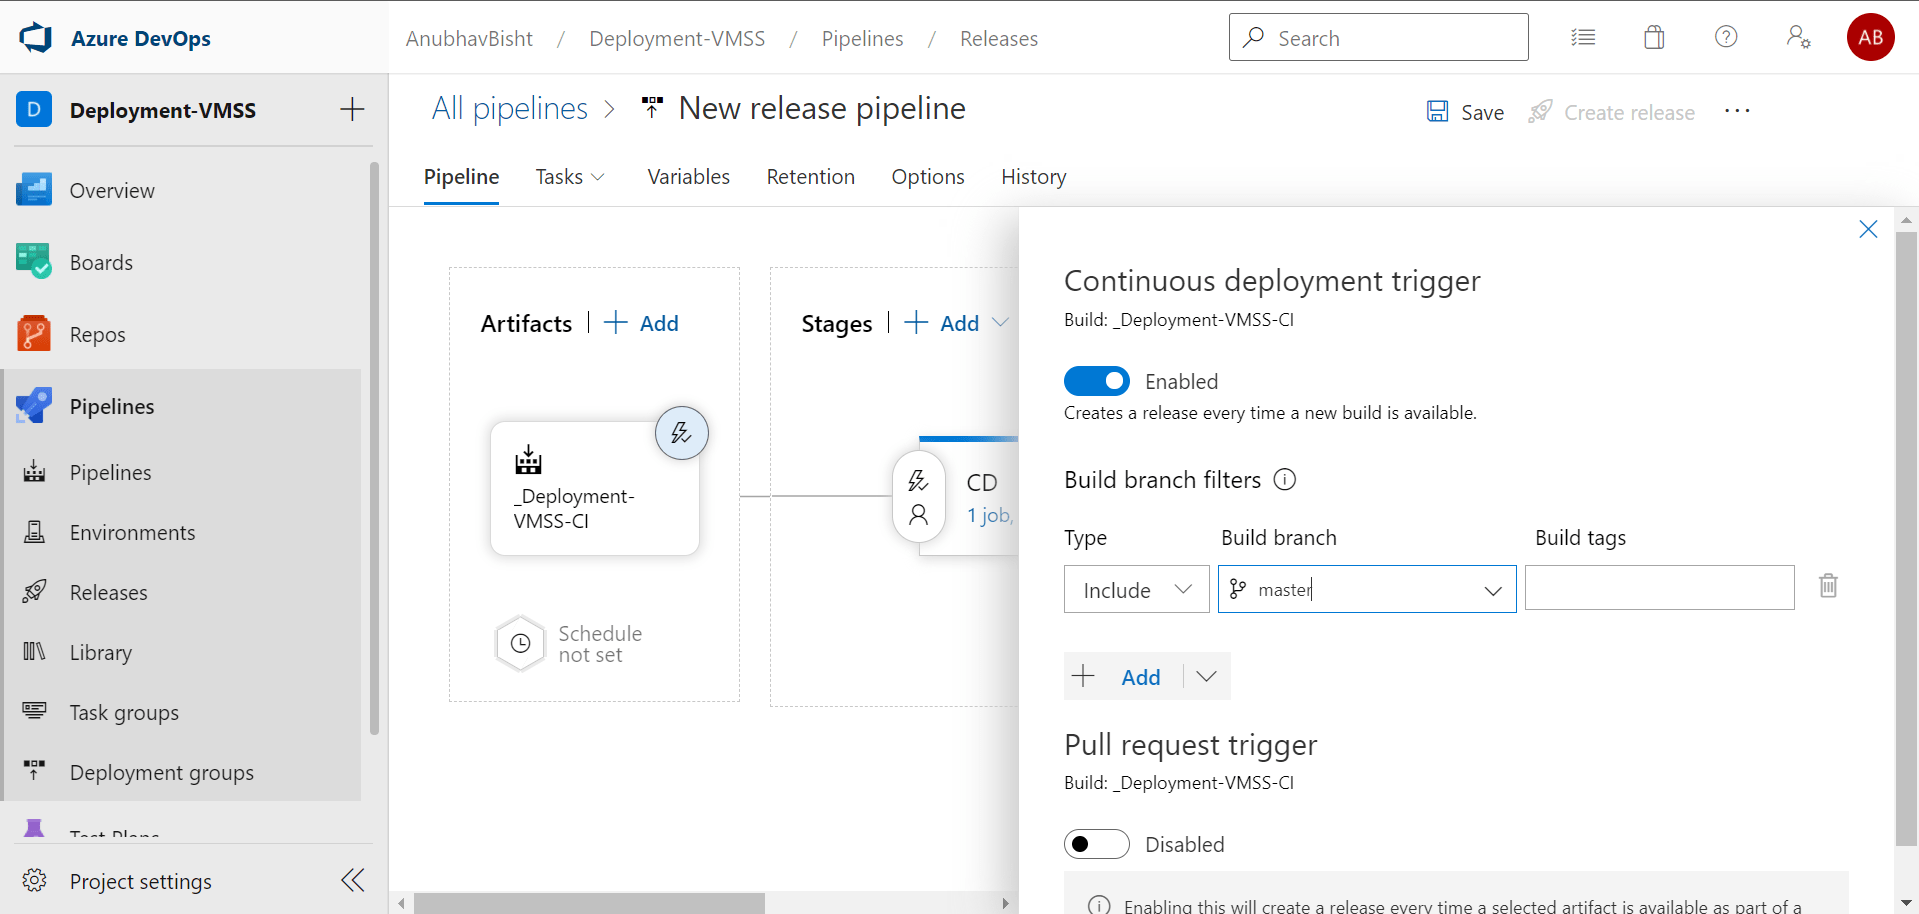
- Enable the Continuous Deployment trigger
-
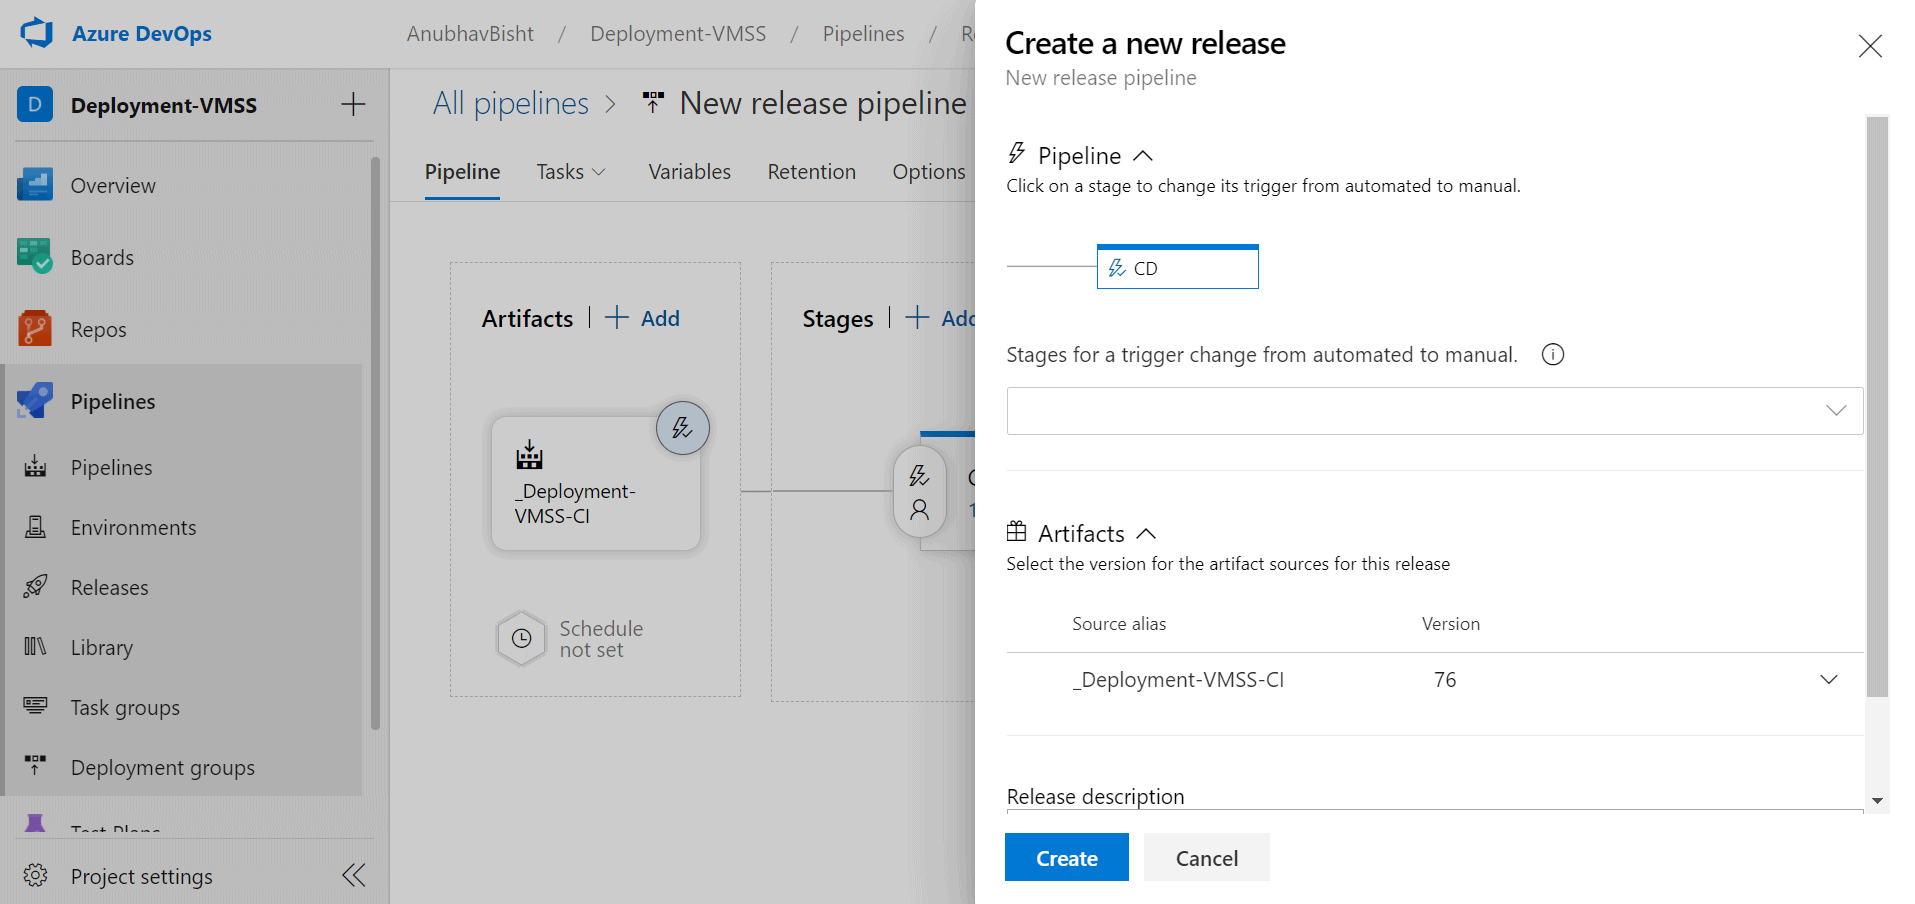
- Save and Create Release
-
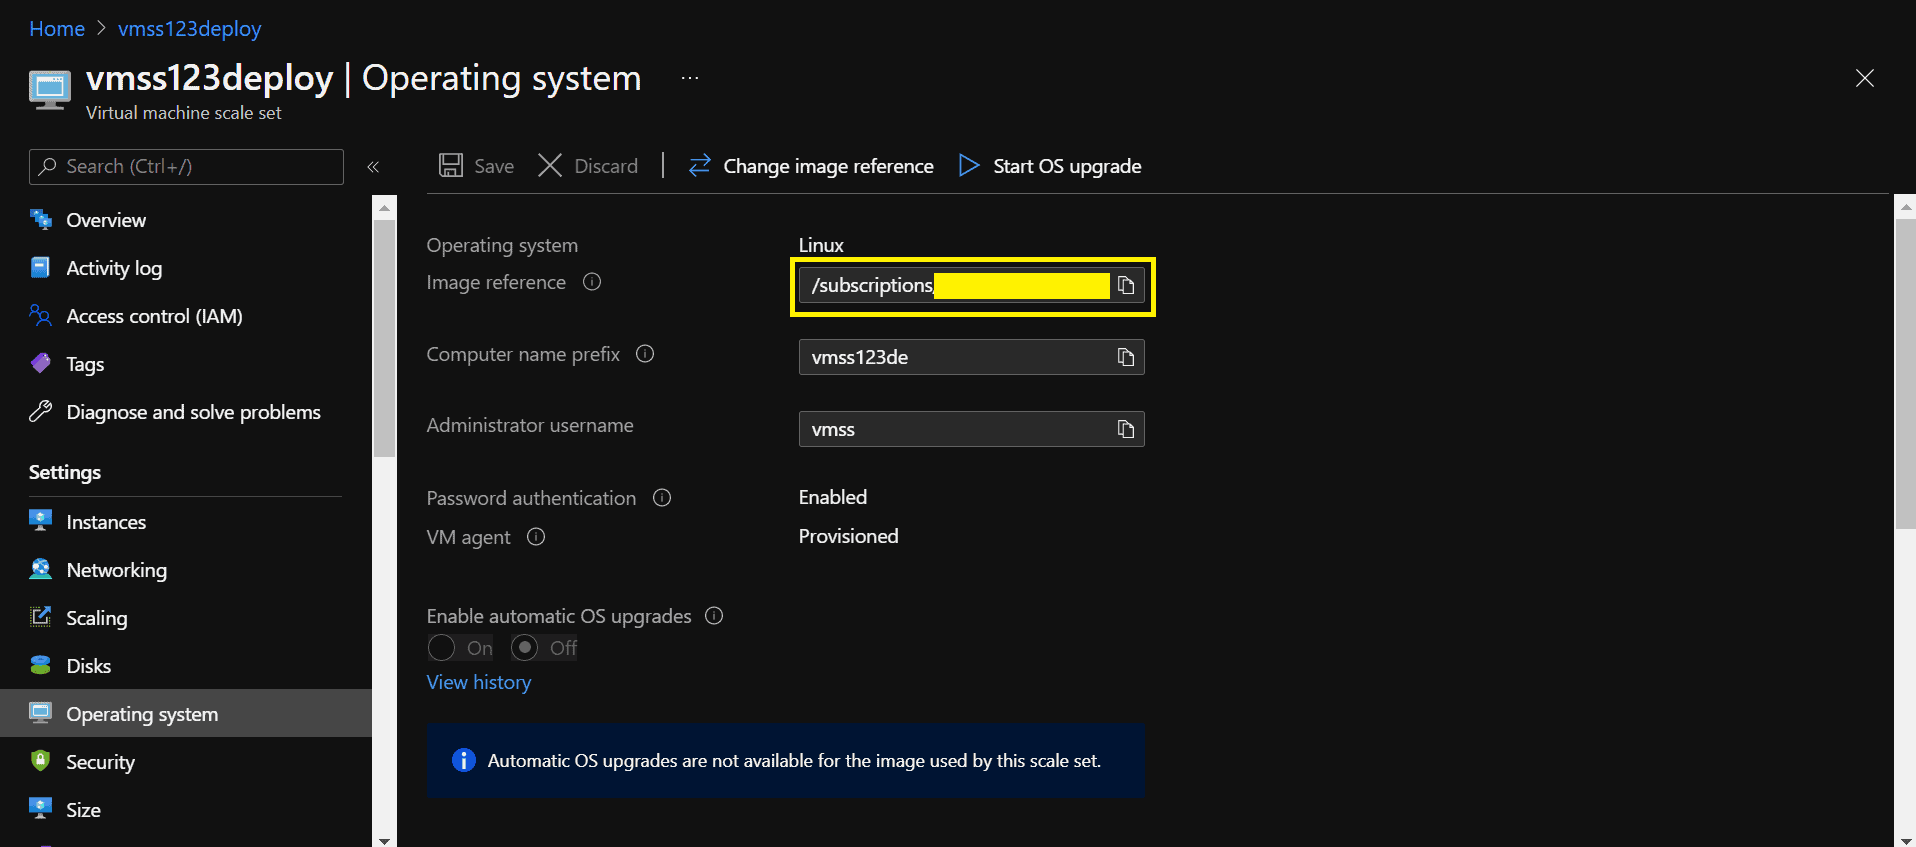
- When the job is finished we can check that the Image Reference for the VM Scale Set has been updated to that of ours Managed Image in the Azure Portal
For every update that will be done in the repository will trigger a CI CD pipeline that will first build the application and then deploy it to VM Scale Set.


