Overview
This walkthrough explains how to you can use Azure PubSub service for your real-time communication application with the help of Azure Function App. Azure Web PubSub enables you to build real-time messaging web applications using WebSockets and the publish-subscribe pattern. Any platform supporting WebSocket APIs can connect to the service.
Azure Web PubSub Service
Azure Web PubSub enables you to build real-time messaging web applications using HTTP WebSockets and the publish-subscribe pattern. Any browser platform supporting WebSocket APIs can connect to the service. WebSockets offer a two-way connection between a server and a client endpoint, with support for full duplex communications. Both the endpoint and server can send and receive data at the same time, allowing a real-time conversation between the applications and the users
Prerequisites
- Azure Function Core tool
- Visual Studio Code
- Azure subscription
- Git CLI
- Ngrok
Creating Azure web PubSub Service
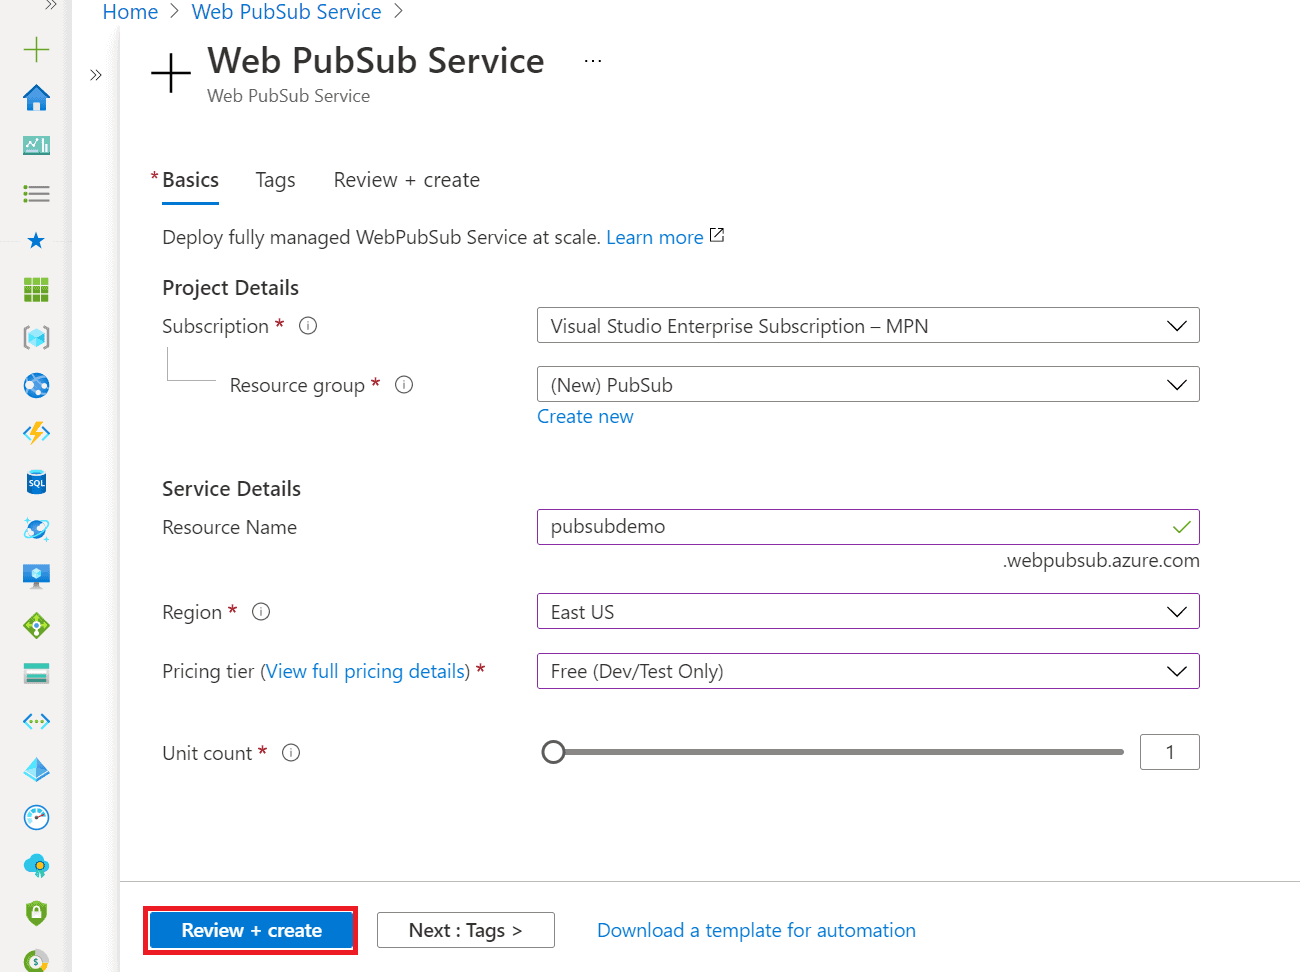
For creating a group chat application, we require an Azure PubSub service, you can follow the below give step to create a new Service.
- Login on Azure Portal
- Search PubSub in Search bar

- Click on create new
- Select your resource group name and add the PubSub service name

- Click on review and create
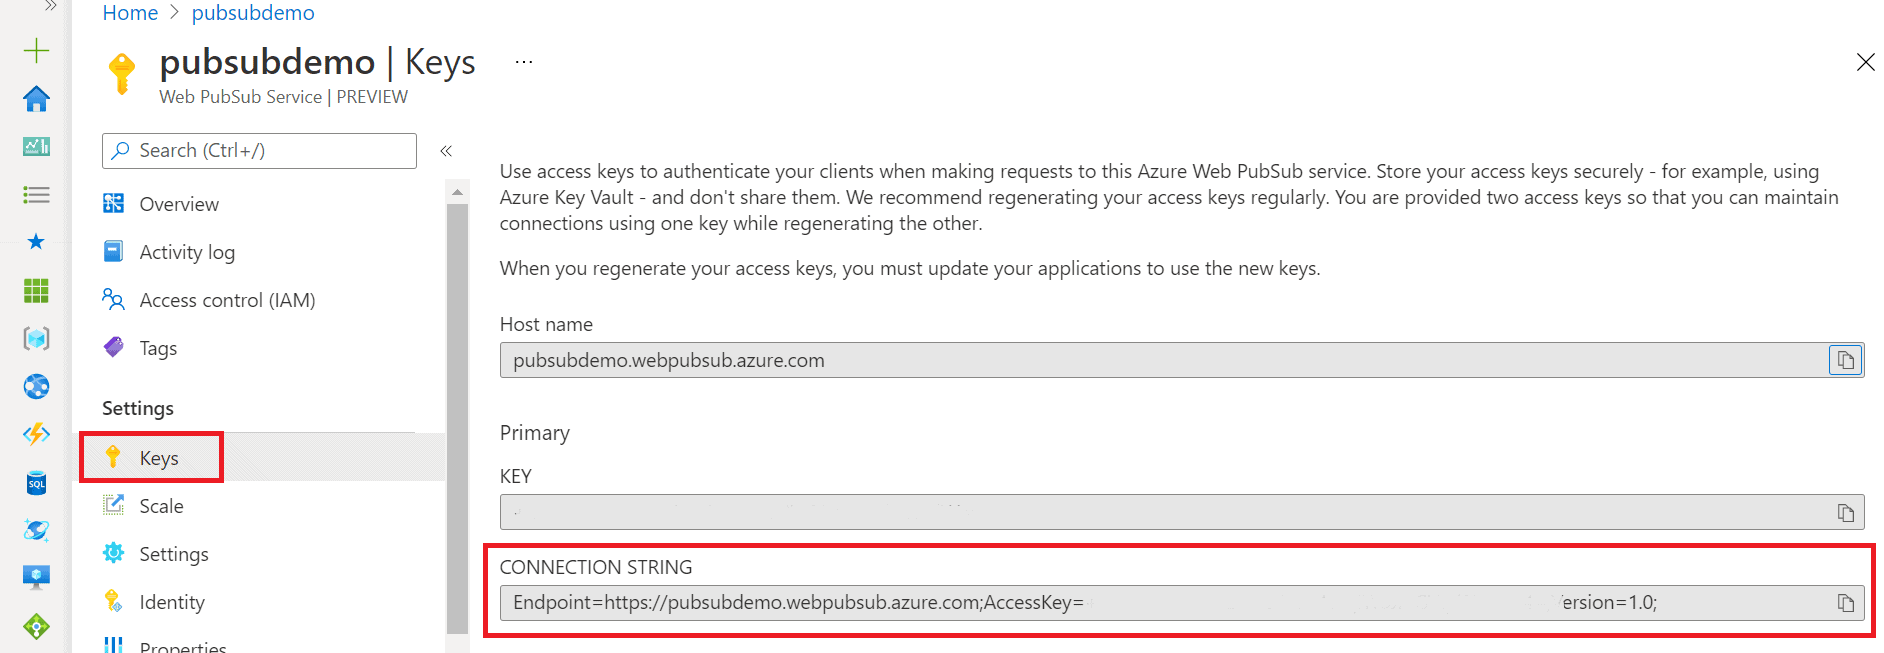
- After the deployment, click of go to resource
- Click on Key and Copy the connection string

Note: Make sure your service name should be unique.
Application configuration
For this demonstration we require an application, we are going to use an NodeJS function App, you can use the same repository for creating chat application.
$git clone https://github.com/Azure/azure-webpubsub.git
$cd azure-webpubsub\samples\functions\js\simplechat
Edit your local.settings.json file replace WebPubSubConnectionString value to your connection string
$func extensions
$func start
The Application is start executing on the port 7071. The local function will use port defined in the local.settings.json file. To make it available in public network, we need to work with ngrok to expose this endpoint.
$ngrok http 7071
After this command you’ll get a forwarding endpoint, for example: http://{ngrok-id}.ngrok.io -> http://localhost:7071.
Azure PubSub configuration
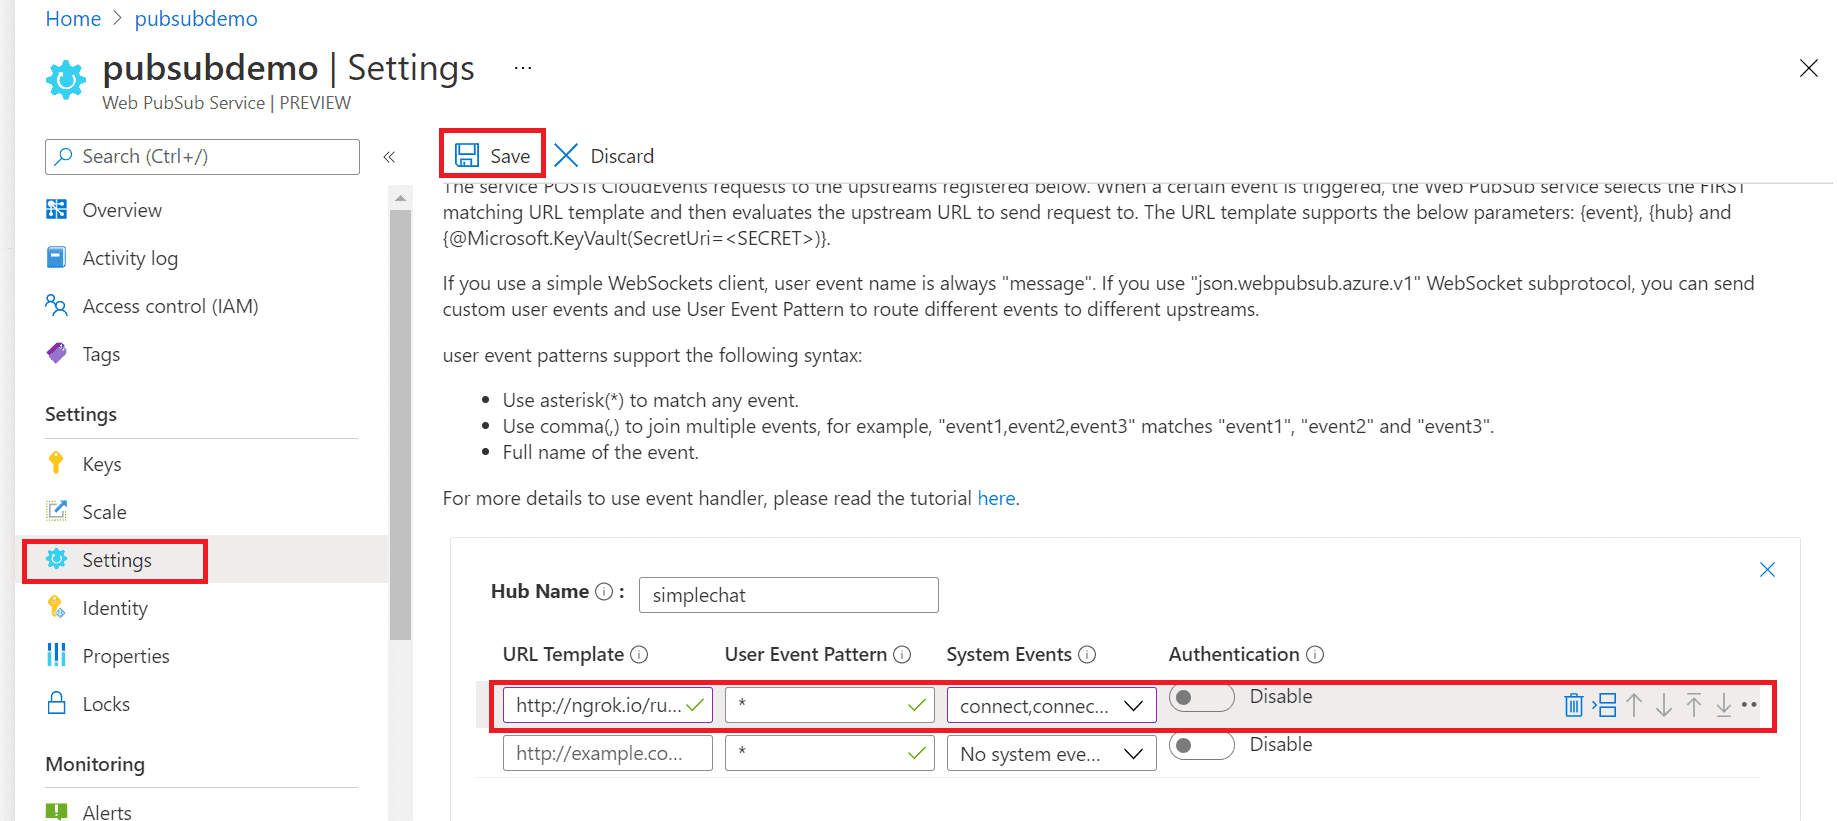
For enabling multiway communication, we will have to enable event handler. You can follow below given step for enabling event handler.
- Go to Azure portal
- Select your Web PubSub service
- Click on setting → Add event handler hub
- Add this value
- Hub Name: simplechat
- URL Template: http://{replace with ngrok-id}.ngrok.io/runtime/webhooks/webpubsub
- User Event Pattern: *
- System Events: connect, connected, disconnected.
- Click on save
Now enter the function app base URL as local: http://localhost:7071/api/index and enter a username.
Open another instance of the web application in a different browser window. You will see that any messages sent will appear in all instances of the application.
Now we have created a group chat application with the help of azure web PubSub service and using Azure Function app


