 Author- Anubhav Bisht (Cloud Engineer)
Continuous integration (CI) and continuous deployment (CD) form a pipeline by which you can build, release, and deploy your code. Azure DevOps Services provides a complete, fully featured set of CI/CD automation tools for deployment to Azure. WordPress (WP, WordPress.org) is a free and open-source content management system (CMS) written in PHP and paired with a MySQL or MariaDB database.
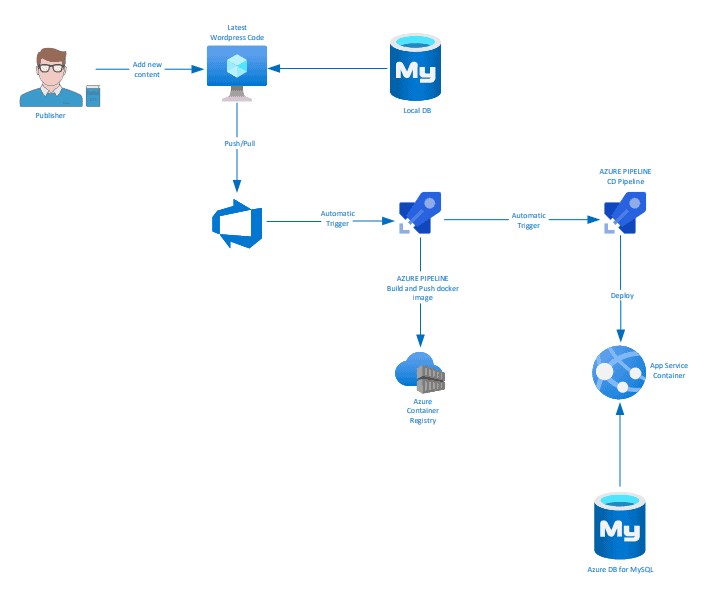
This post describes how to setup a CI/CD pipeline using Azure DevOps for deploying a containerized custom WordPress website working with Azure WebApp for Containers and Azure Database for MySQL.
Prerequisites:
- An Azure account with following services:
- An instance of Azure Container Registry.
- An instance of Azure Database for MySQL with an empty database.
- An instances of Azure WebApp for Containers.
- An Azure DevOps account for performing CI/CD.
Code Structure:
You can find the Sample Code here, create a new project in Azure DevOps and import the code there.
- HTML Directory: contains the WordPress structured files and directories like wp-config.php, wp-content, etc.
- Dockerfile: contains the commands for building the containerized image:
FROM wordpress:4.9.1-apache
COPY html /var/www/html
RUN chown -R www-data:www-data /var/www/html/
ENTRYPOINT ["apache2-foreground"]
Building Project Pipeline:
- Continuous Integration:
-
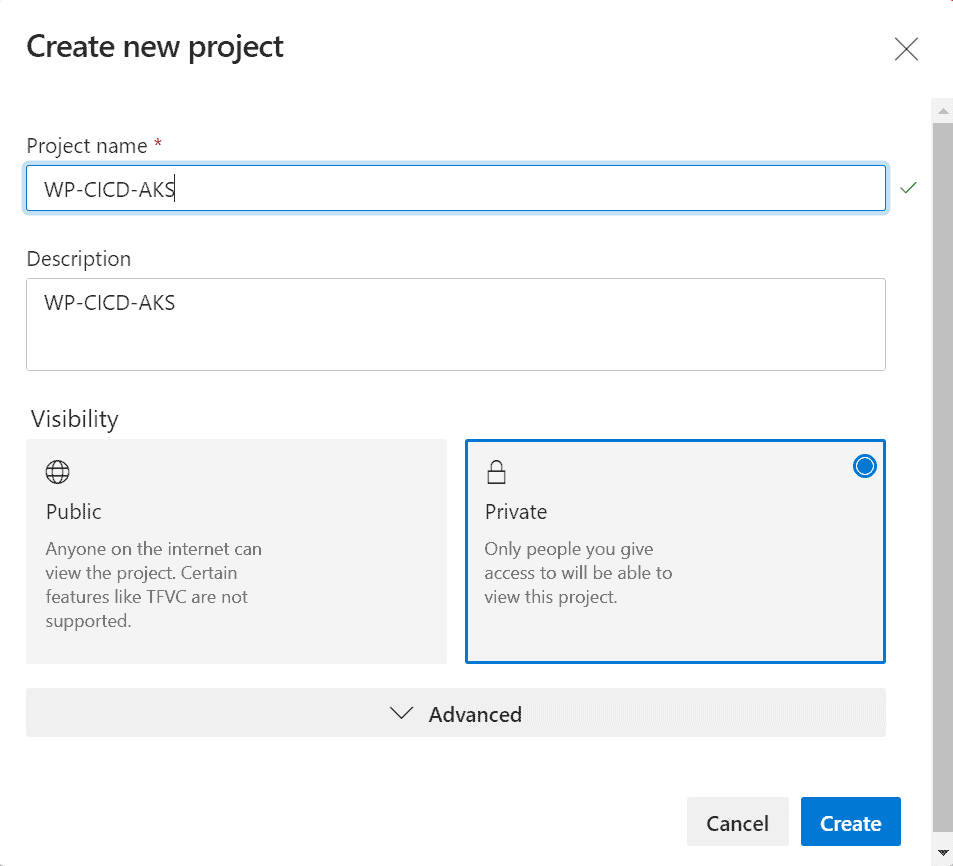
- Create a new project in Azure DevOps
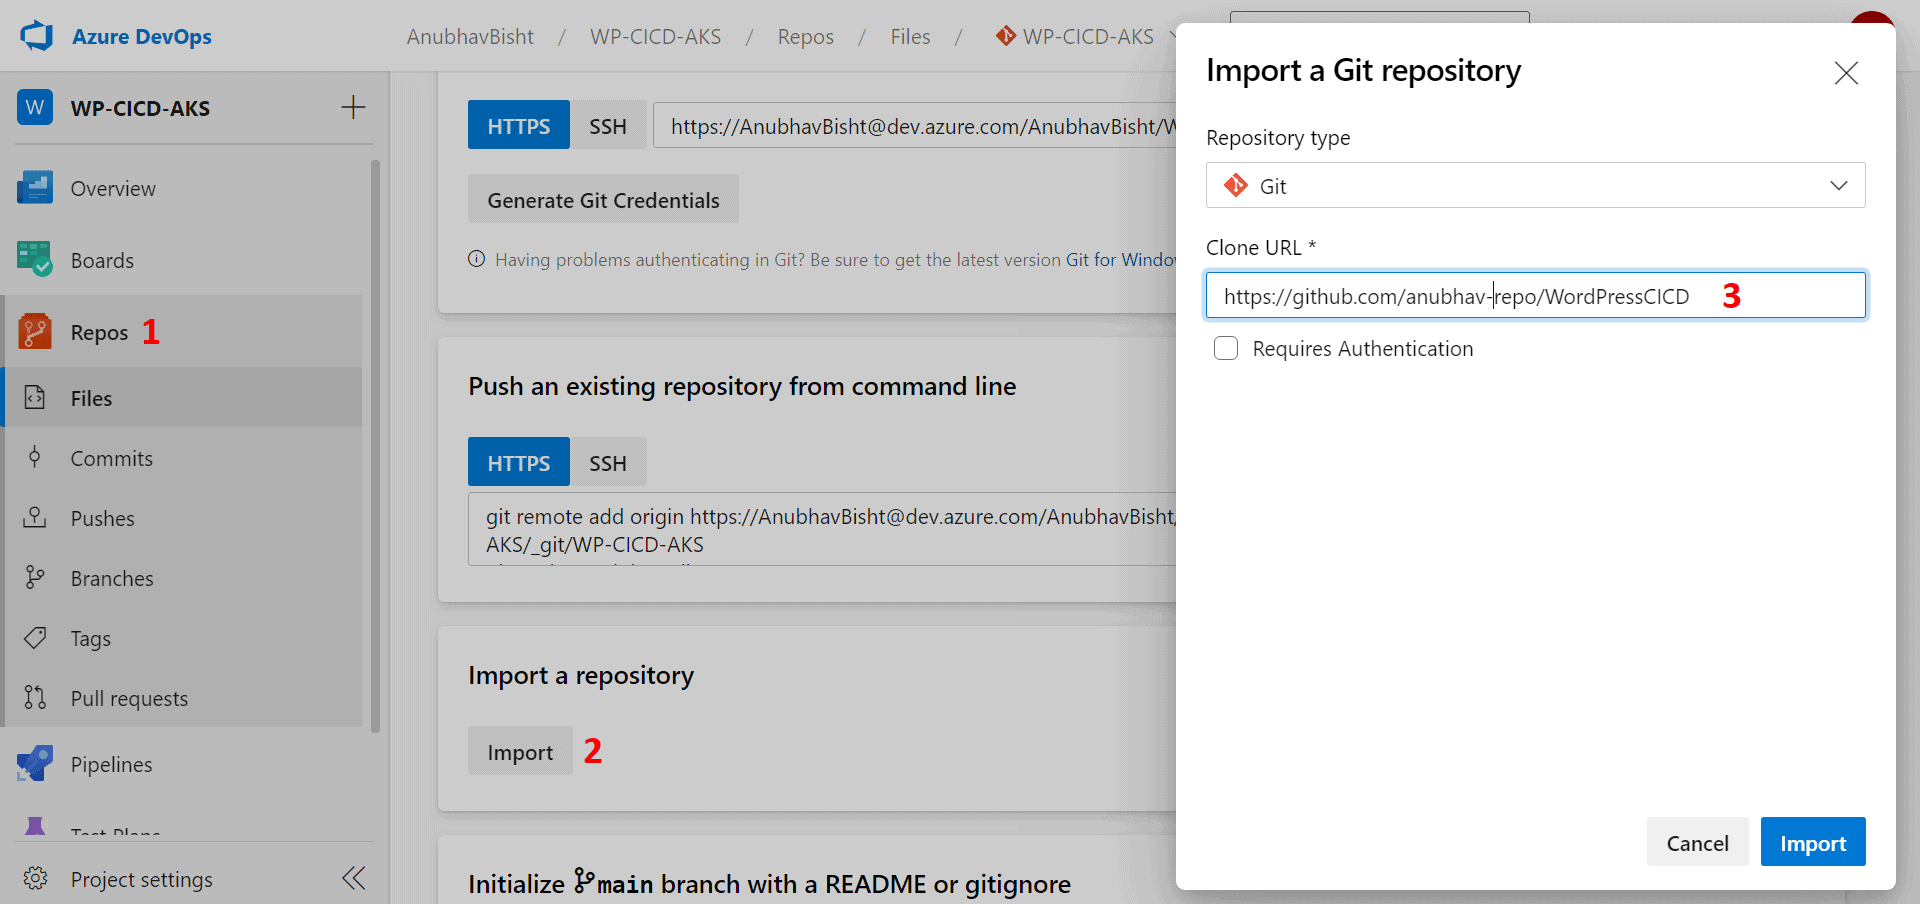
- In the Repos section, select Import to import the repository from Github
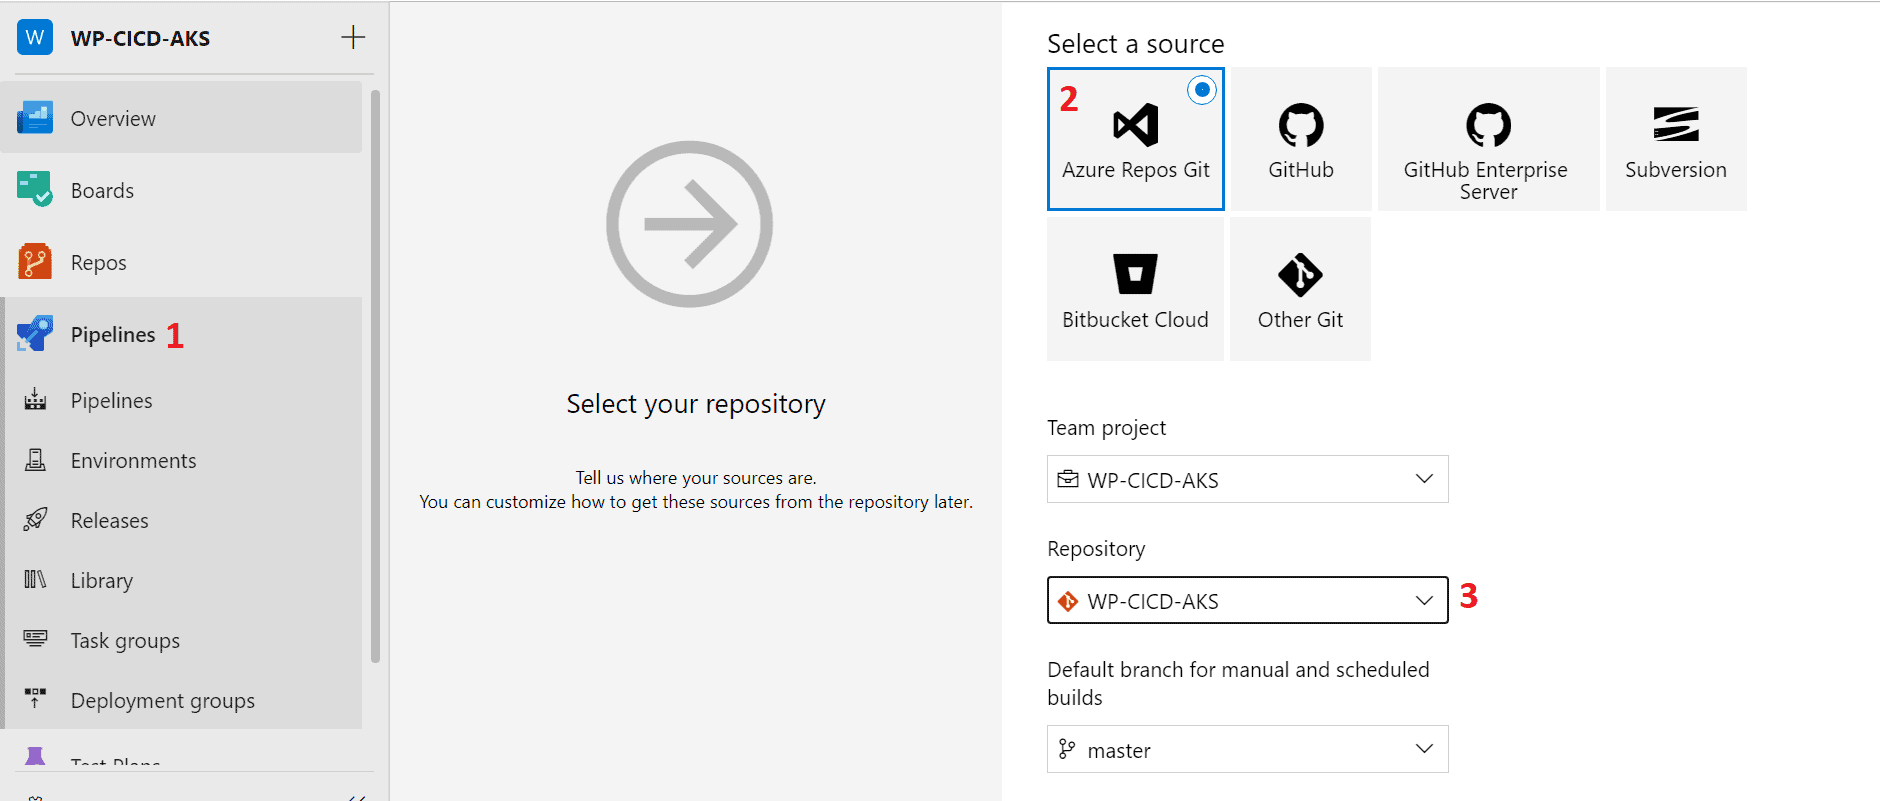
- Now ,in the Pipelines section, create a new pipeline and select your repository that has the code
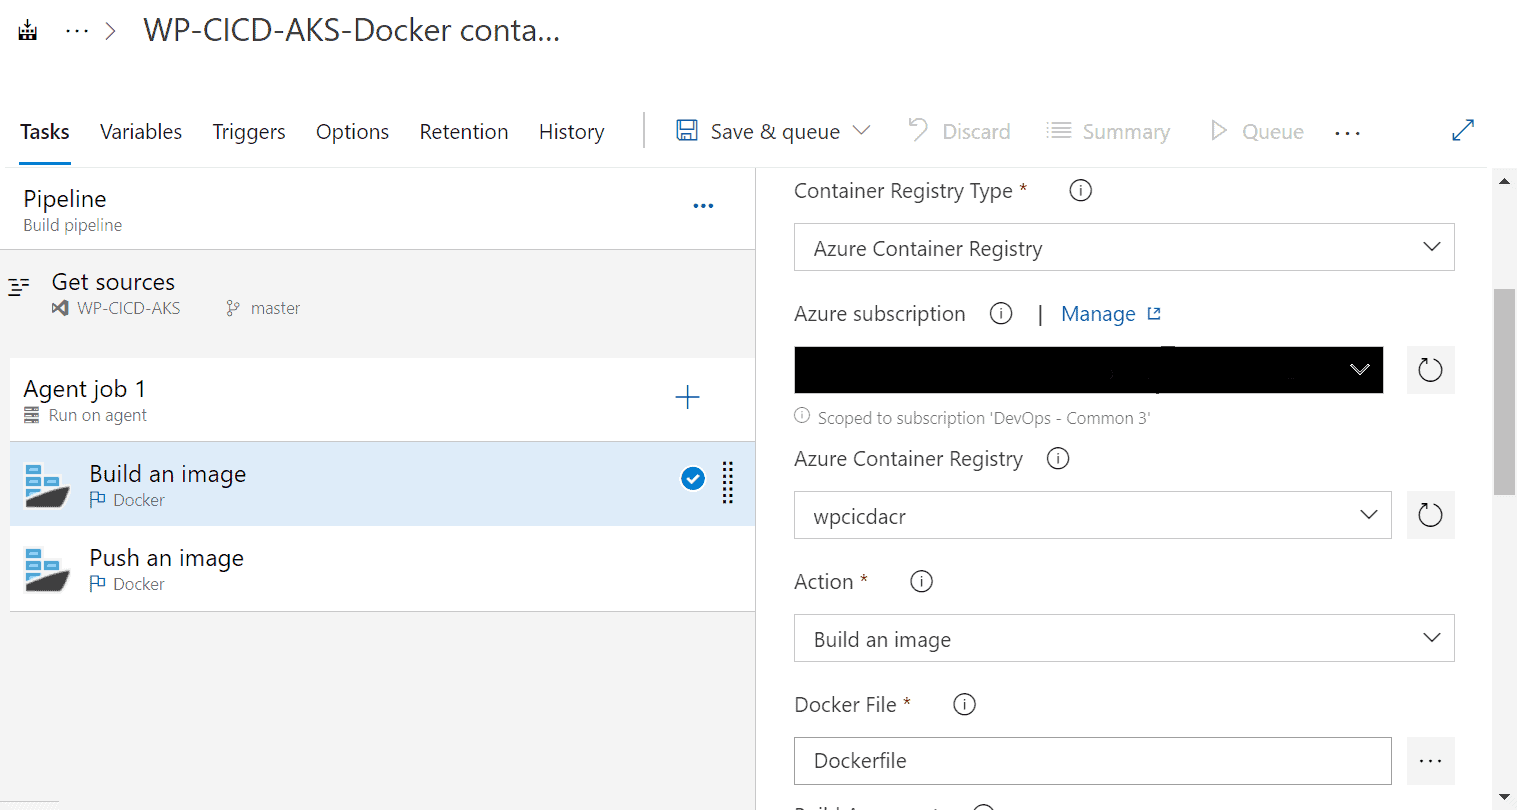
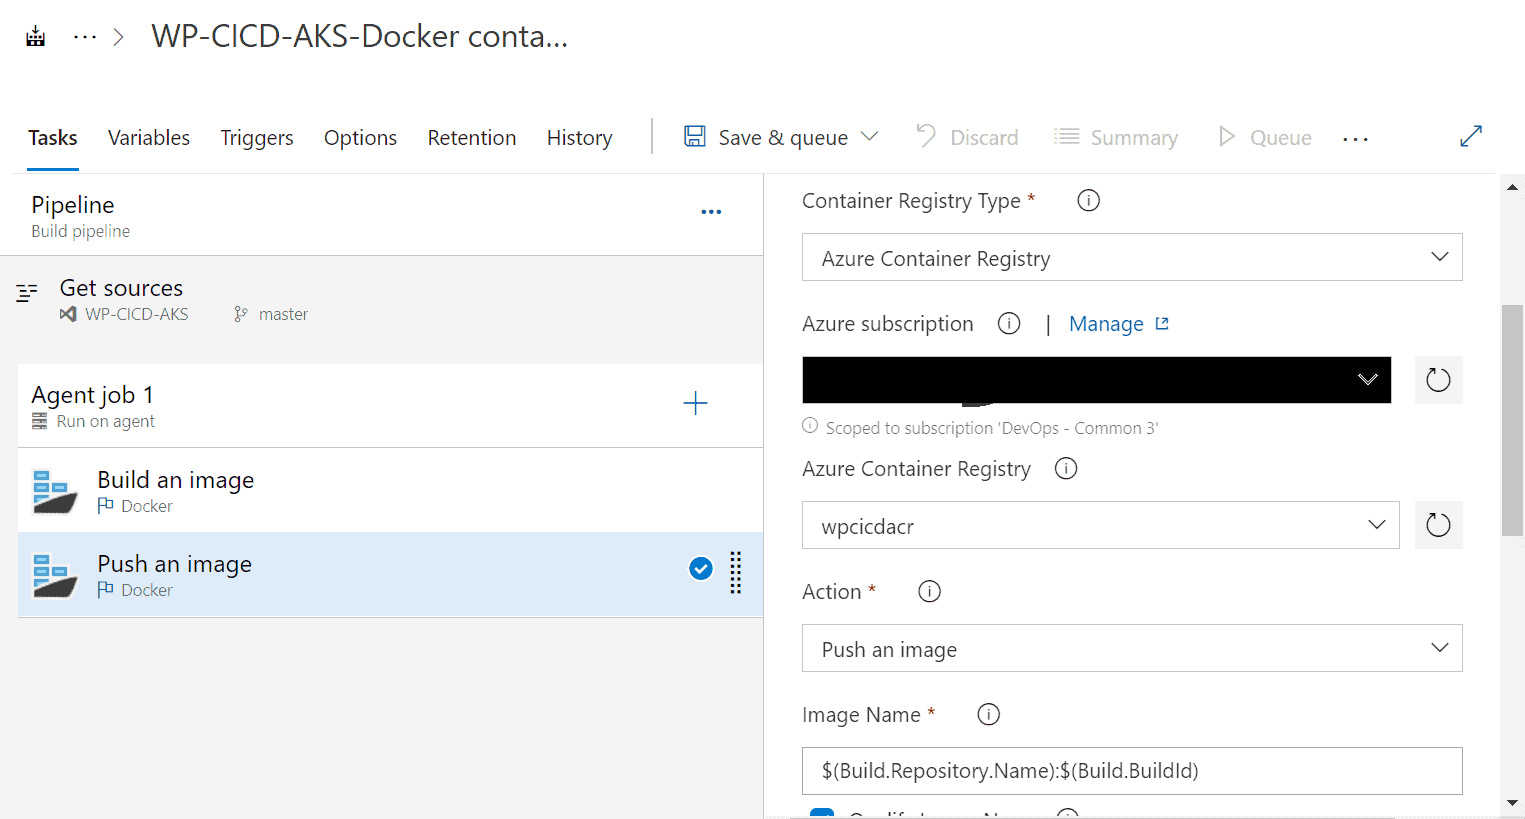
- Search and select the Docker Container job to build and push the image to Azure Container Registry

- Select the Azure Pool and Agent Specification according to the requirement, and in the two tasks add the information accordingly
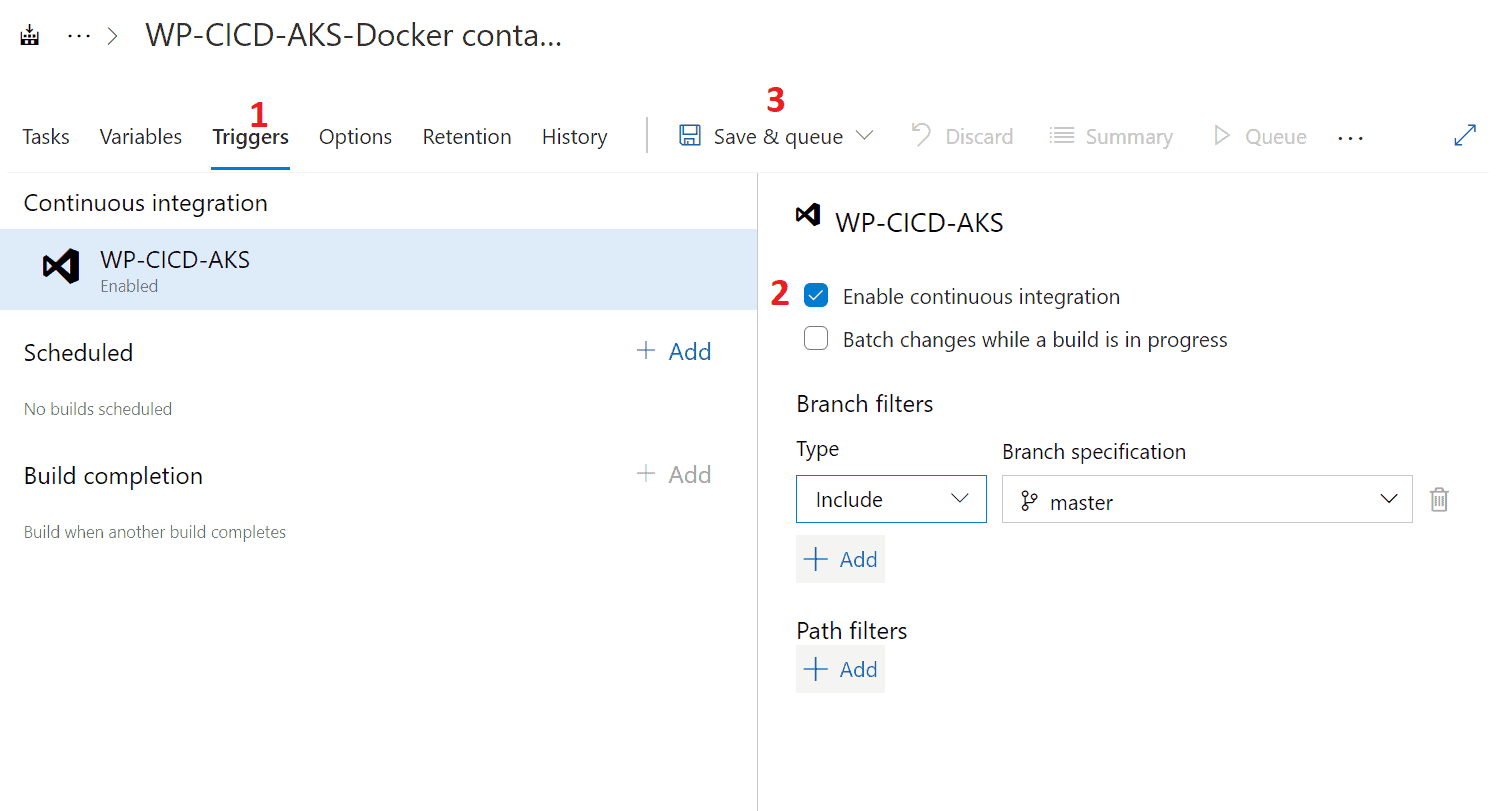
- In the Triggers, enable Continuous Integration and Save & Queue the pipeline
-
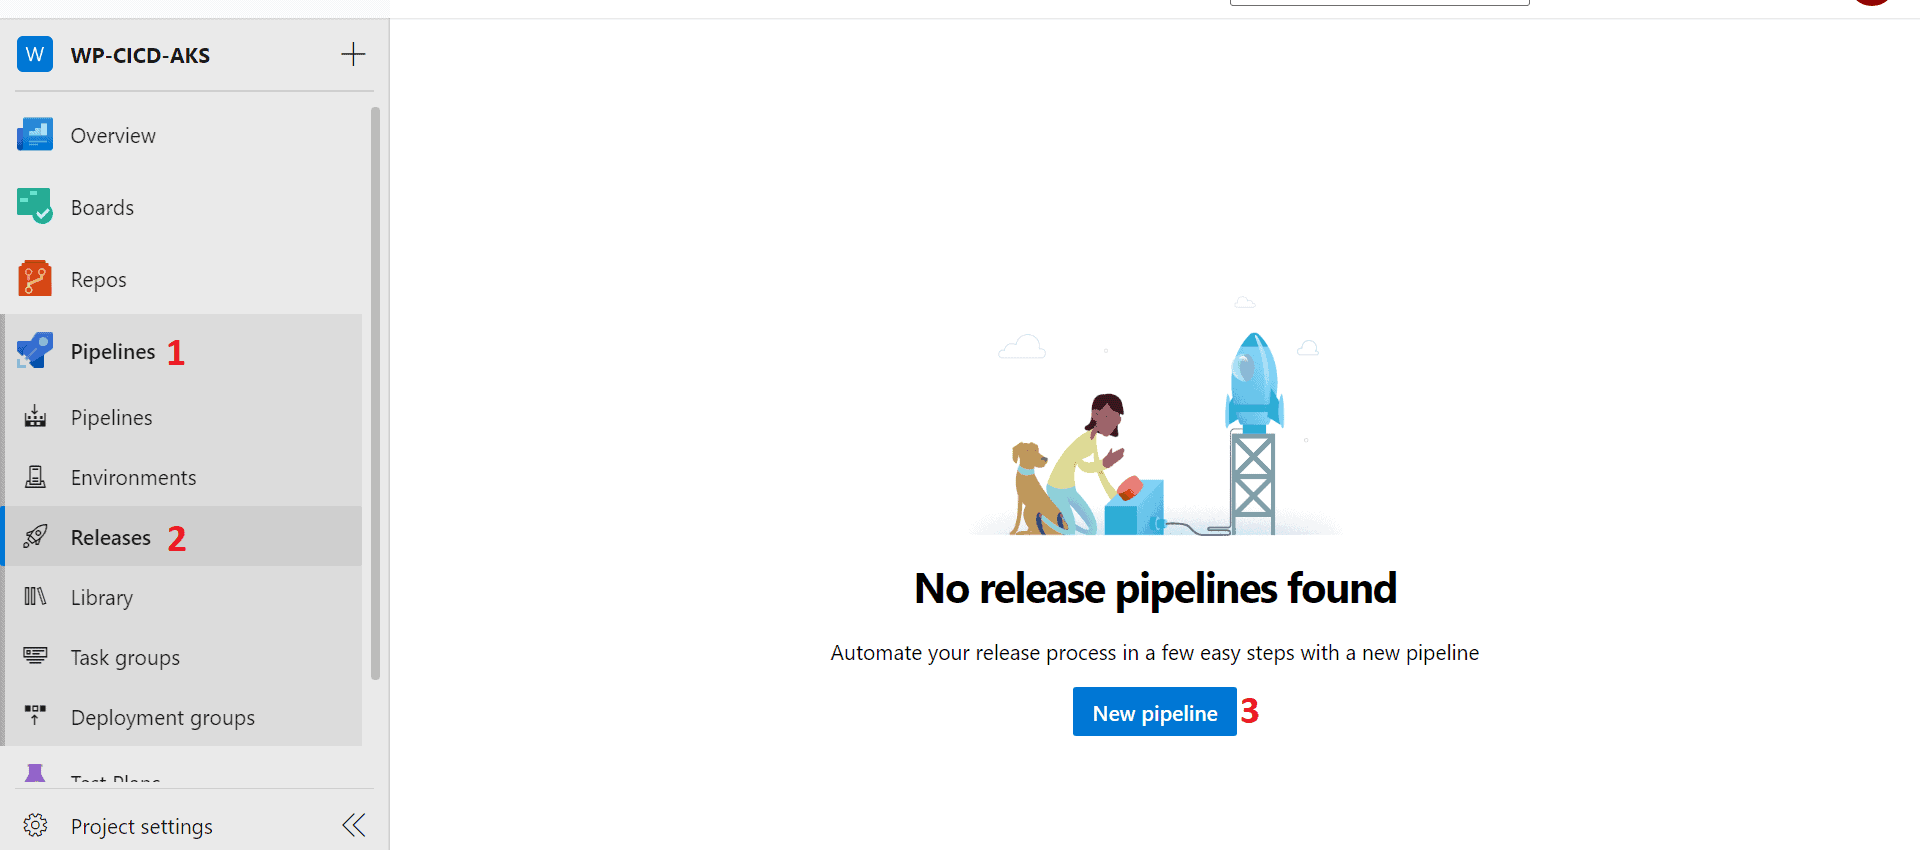
- In Azure DevOps, go to the Pipeline section and select Release and create a New Pipeline
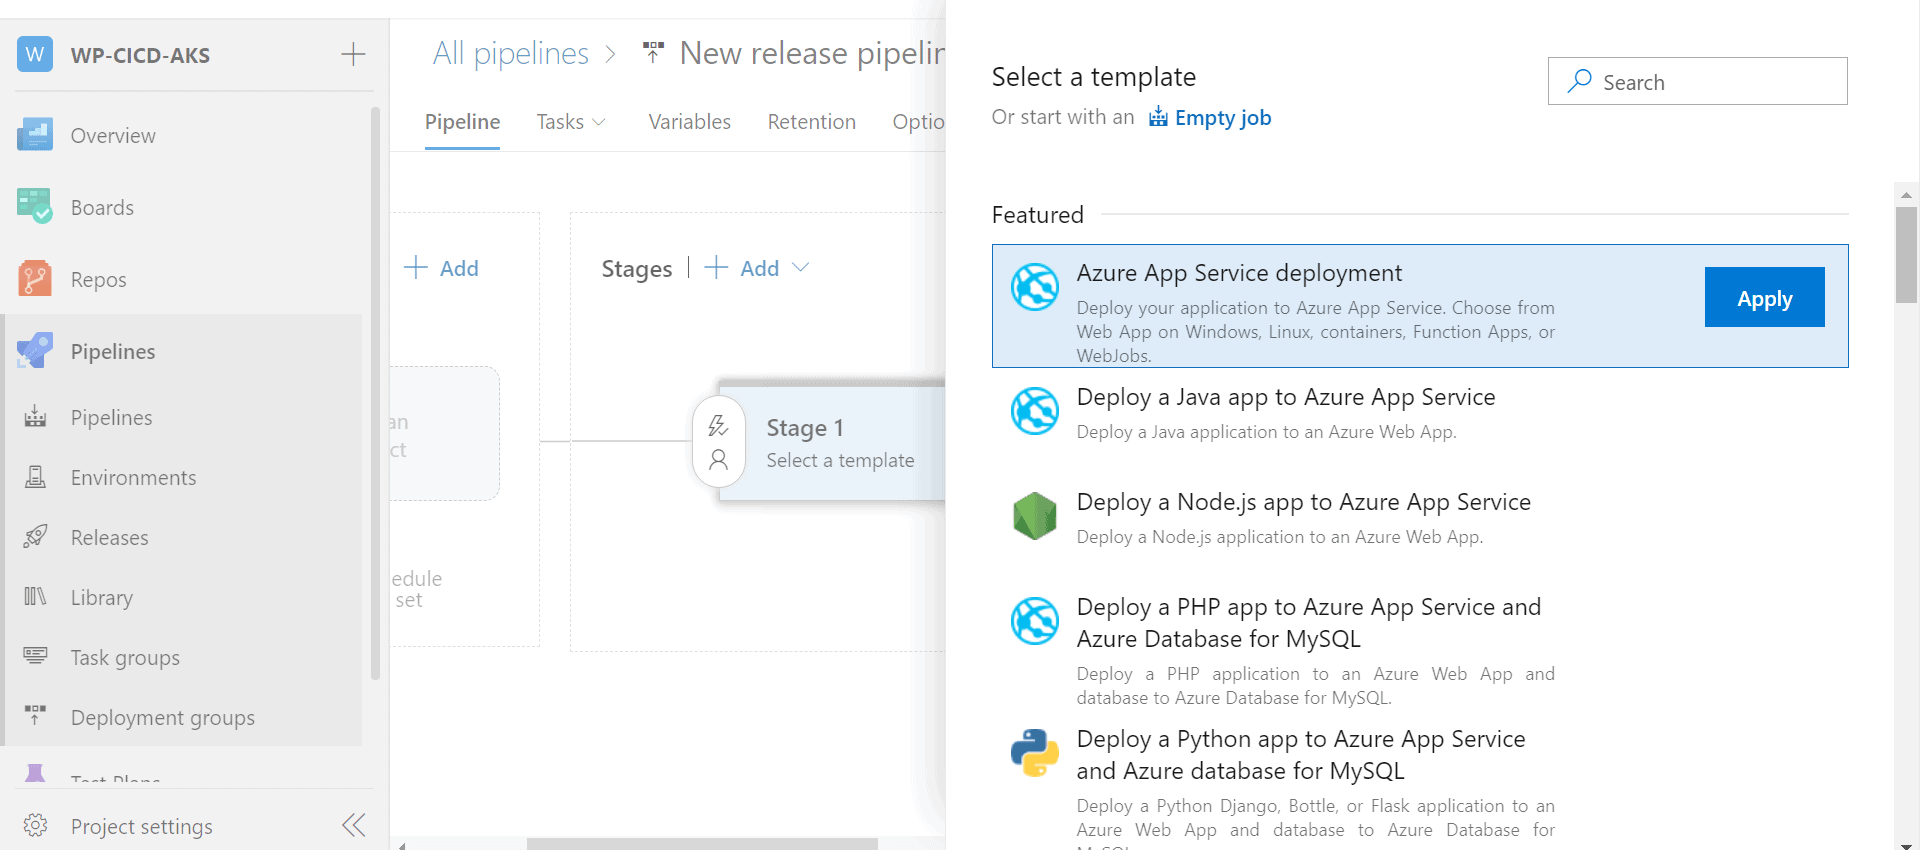
- Select Azure App Service Deployment as the CD job
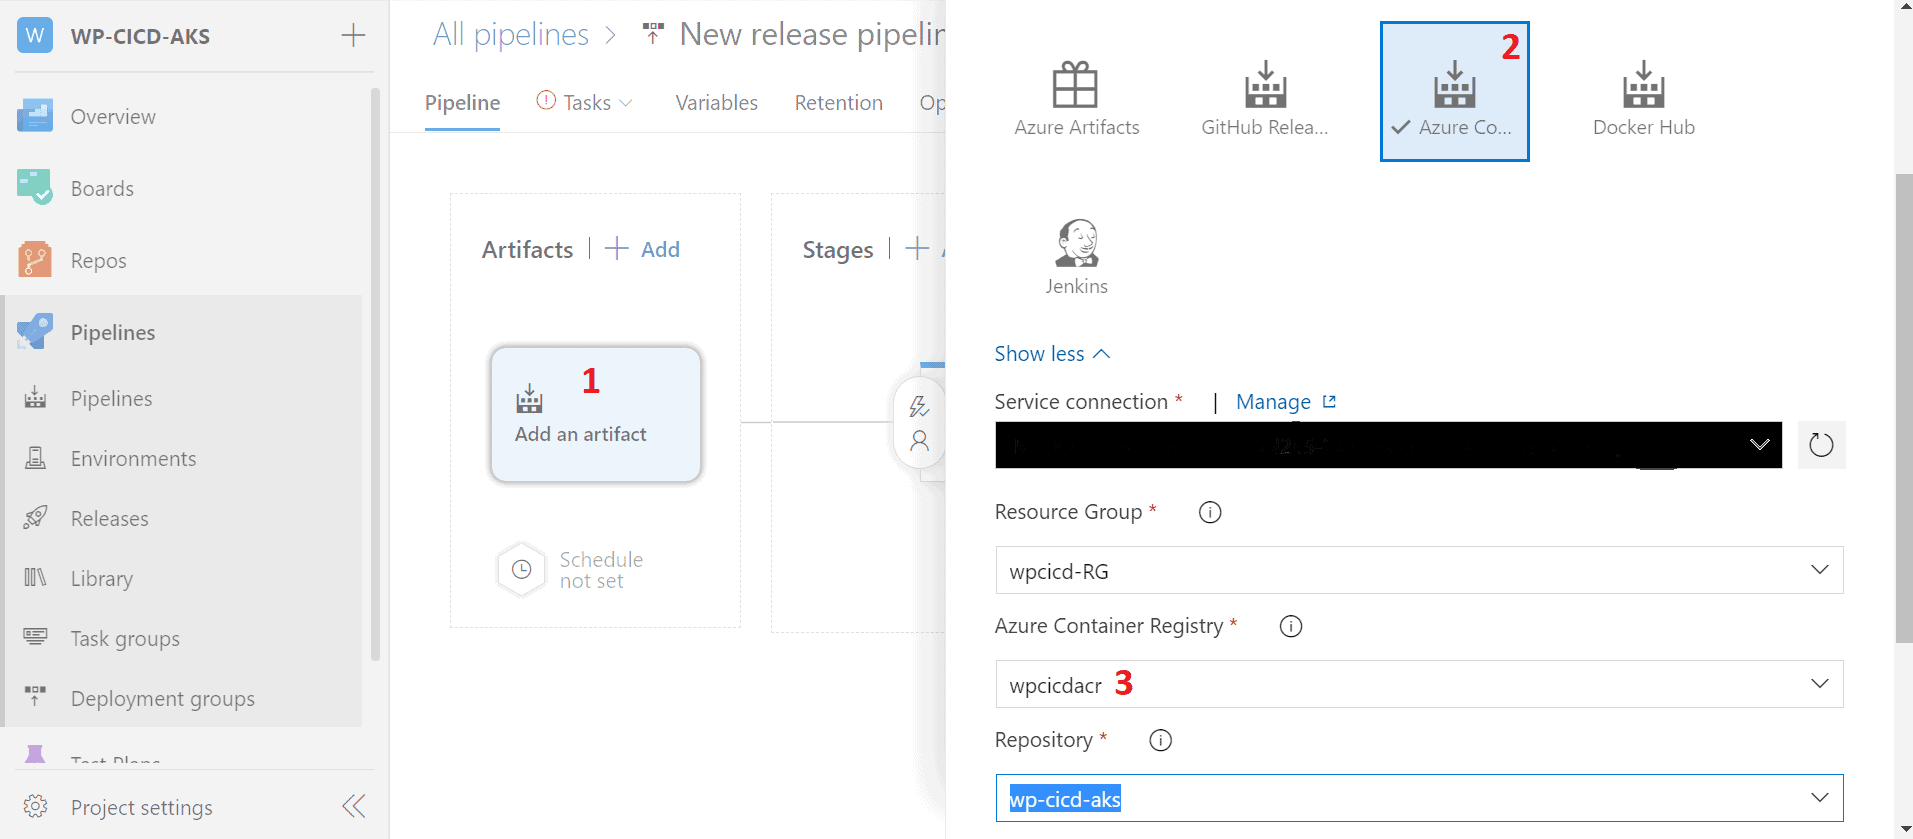
- Select the Artifact source as Azure Container Registry and select the registry and repository
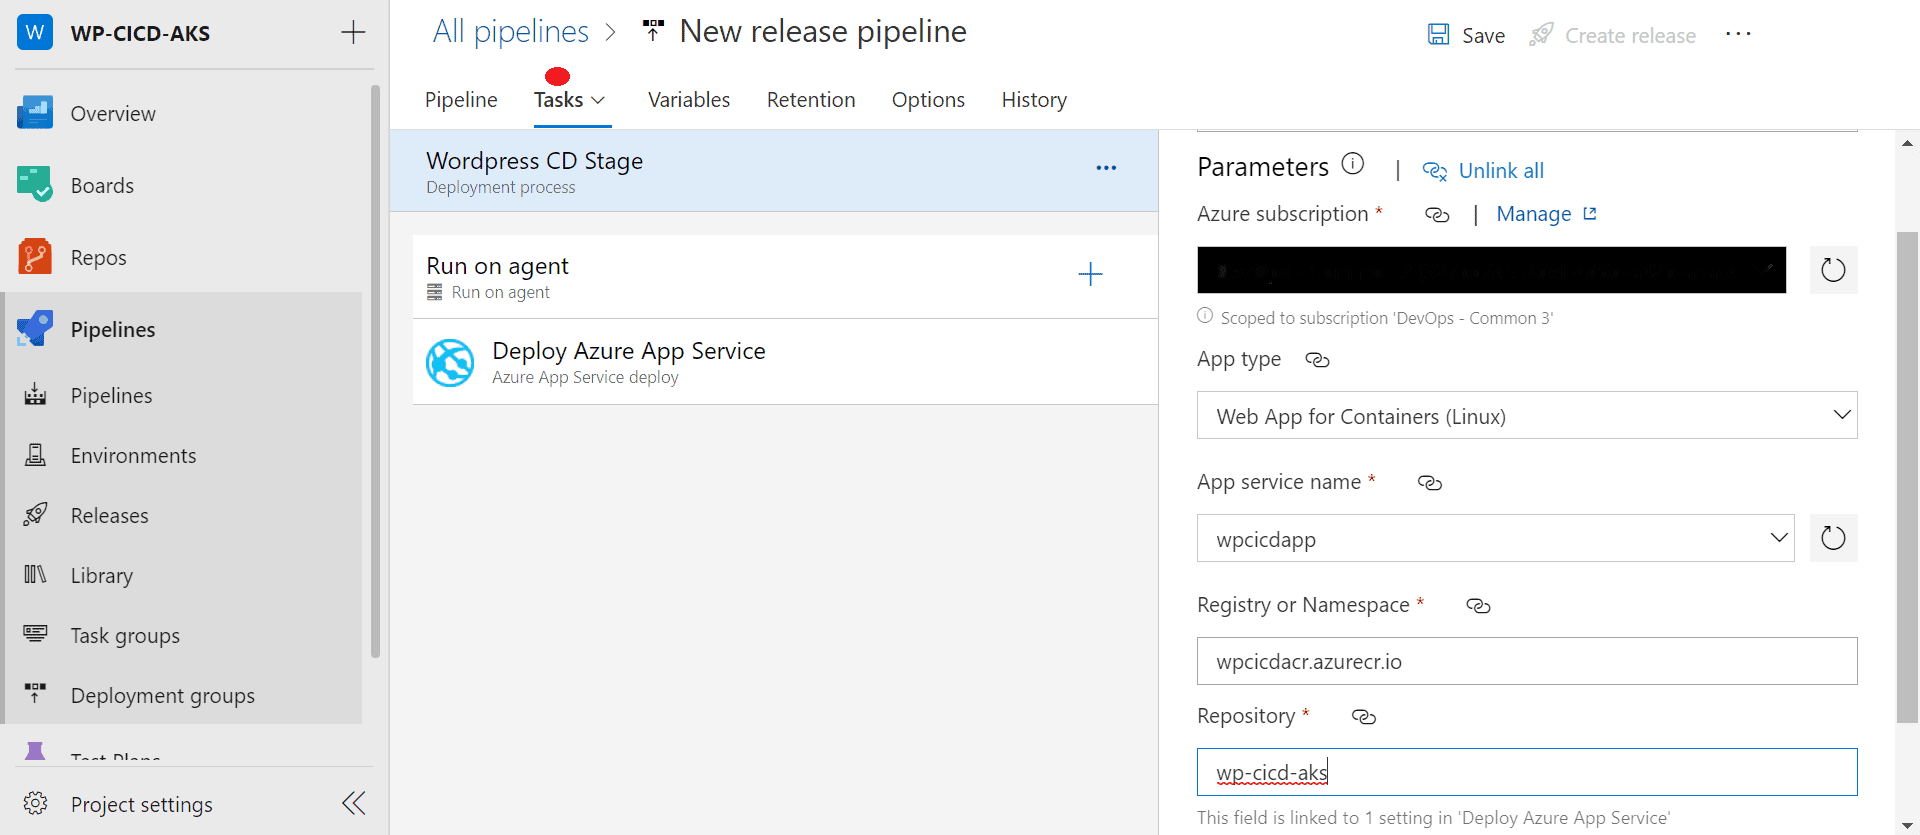
- Select the Agent Pool and Agent Specifications according to requirements and configure the remaining task accordingly
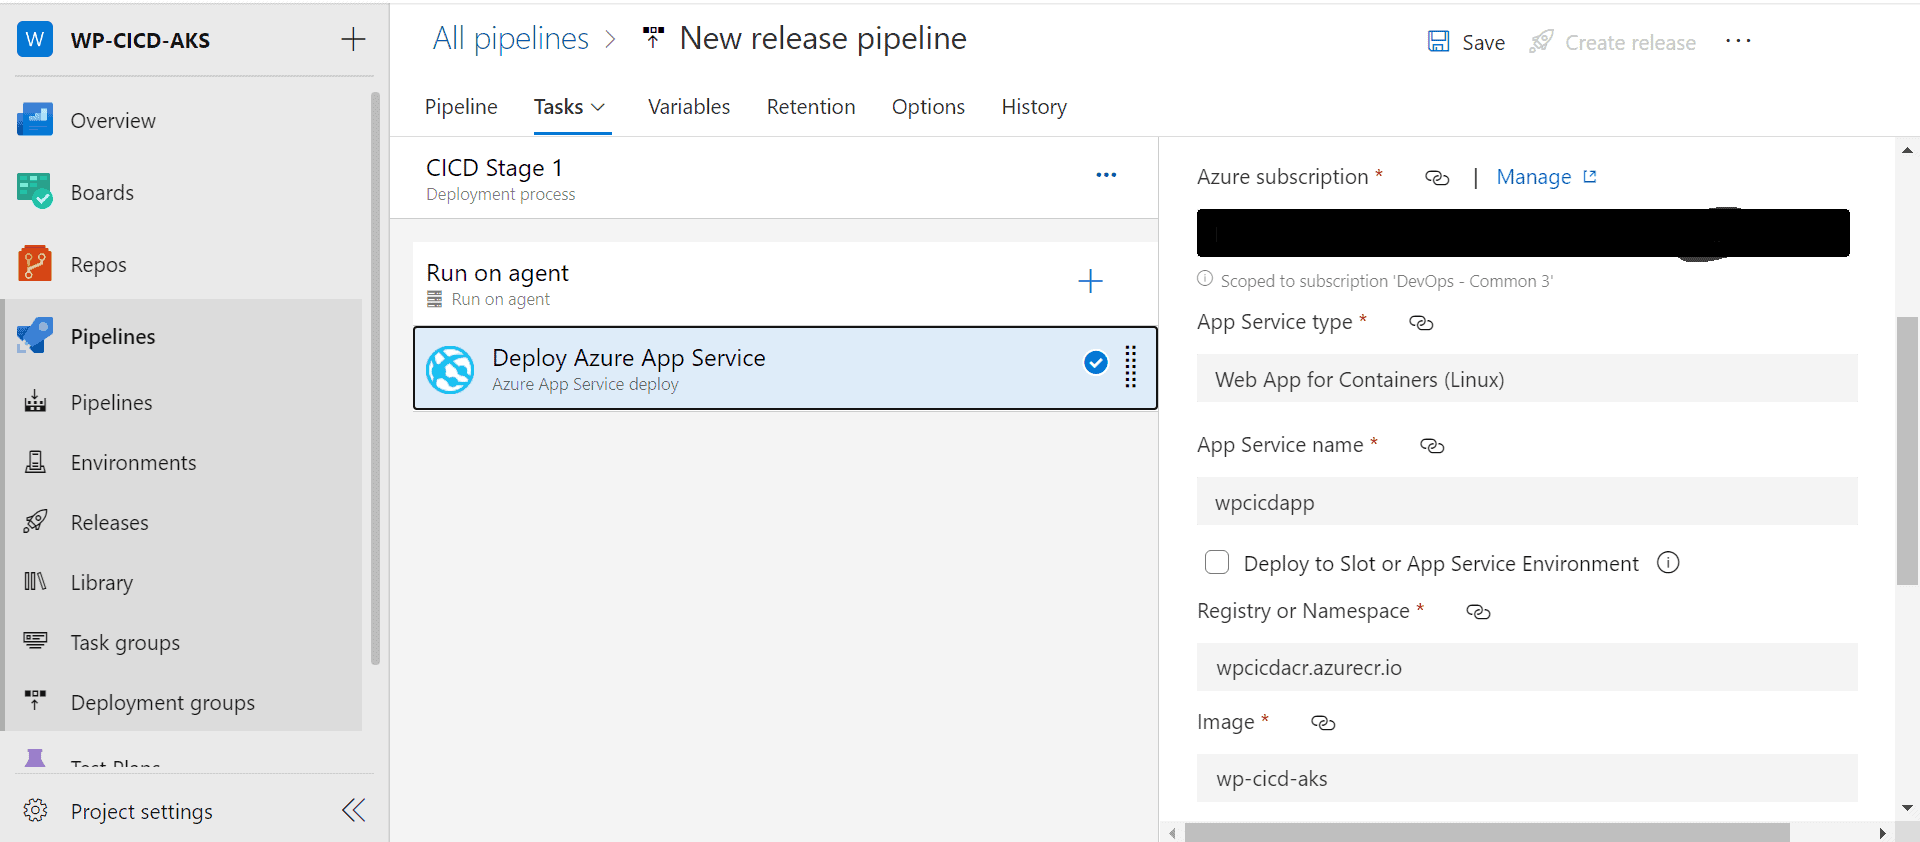
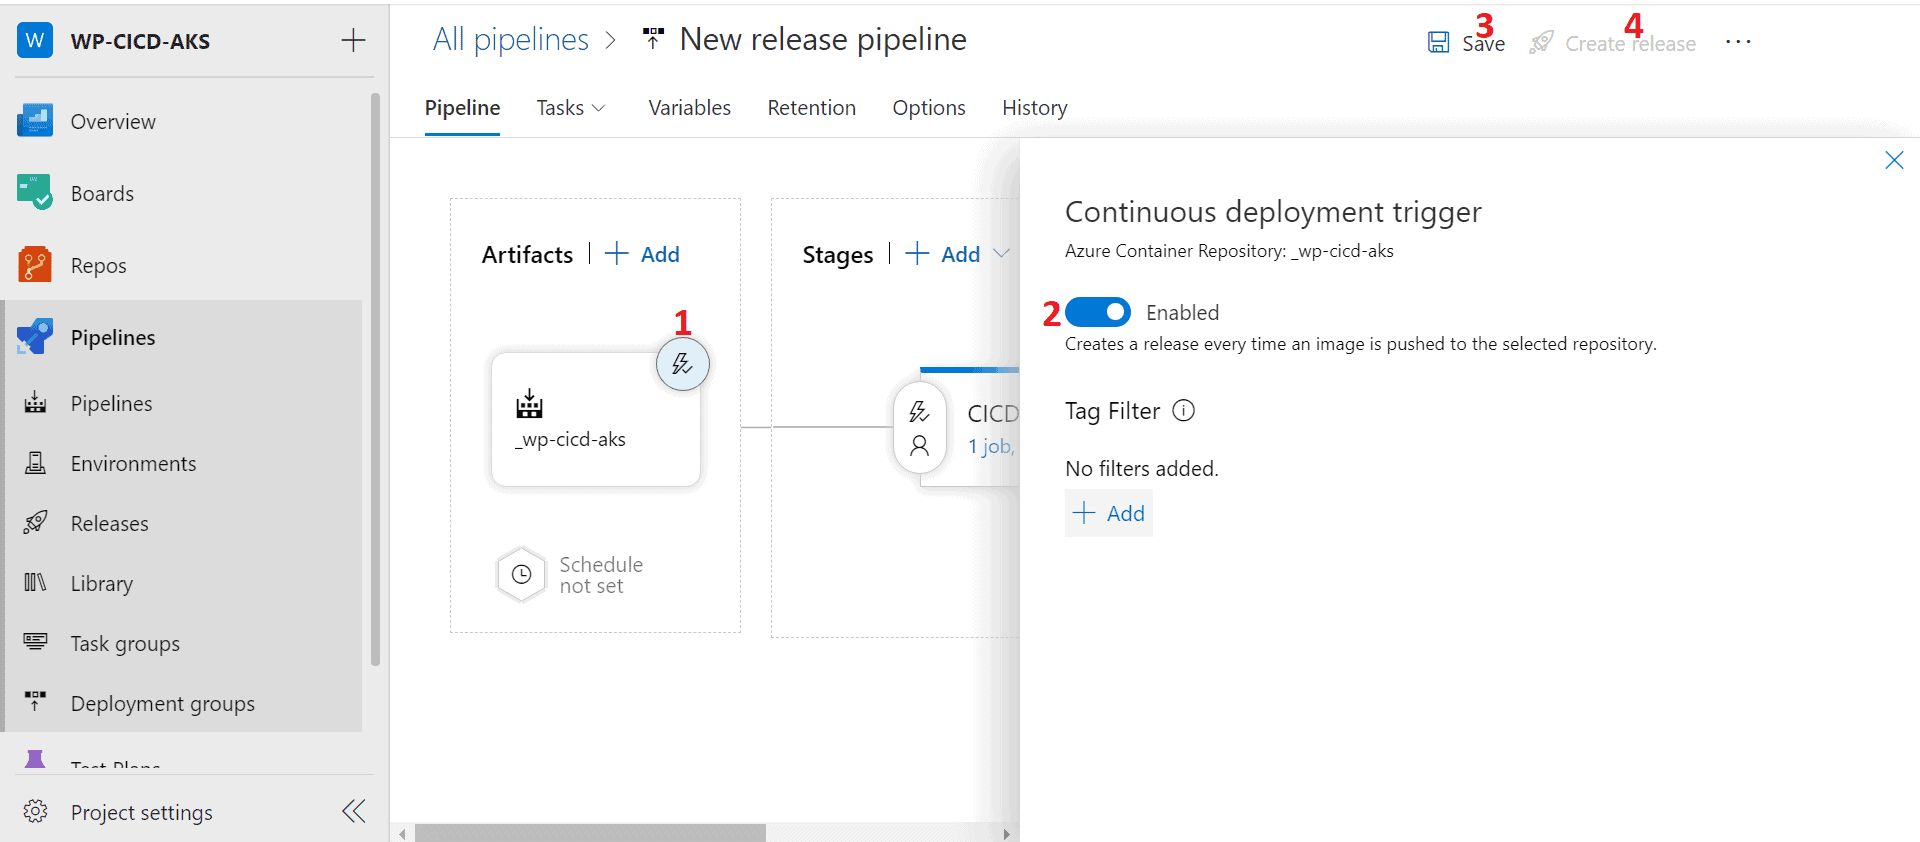
- Enable Continuous Deployment trigger, save the pipeline and select Create Release to run it
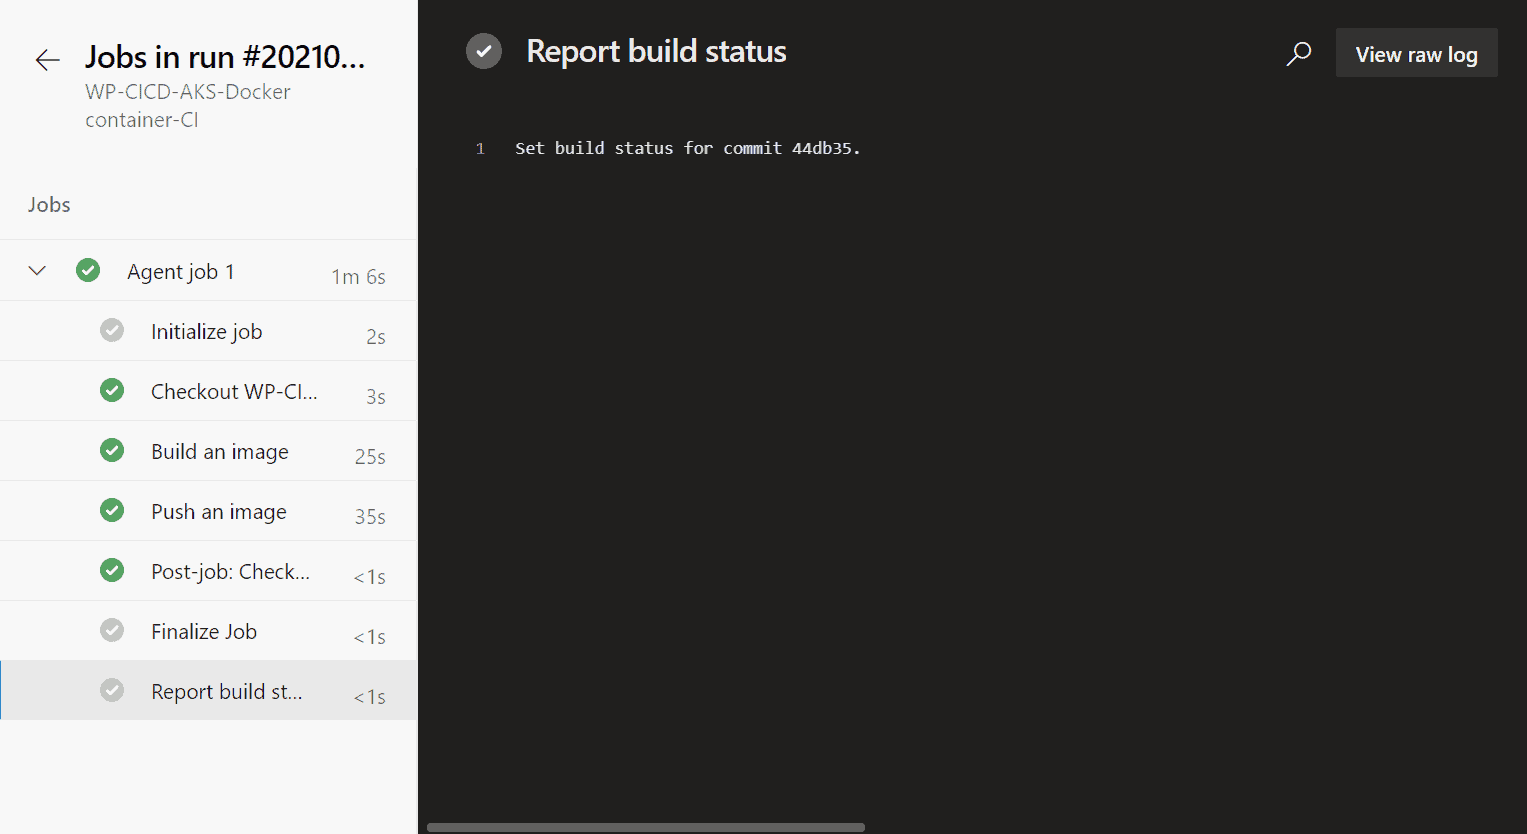
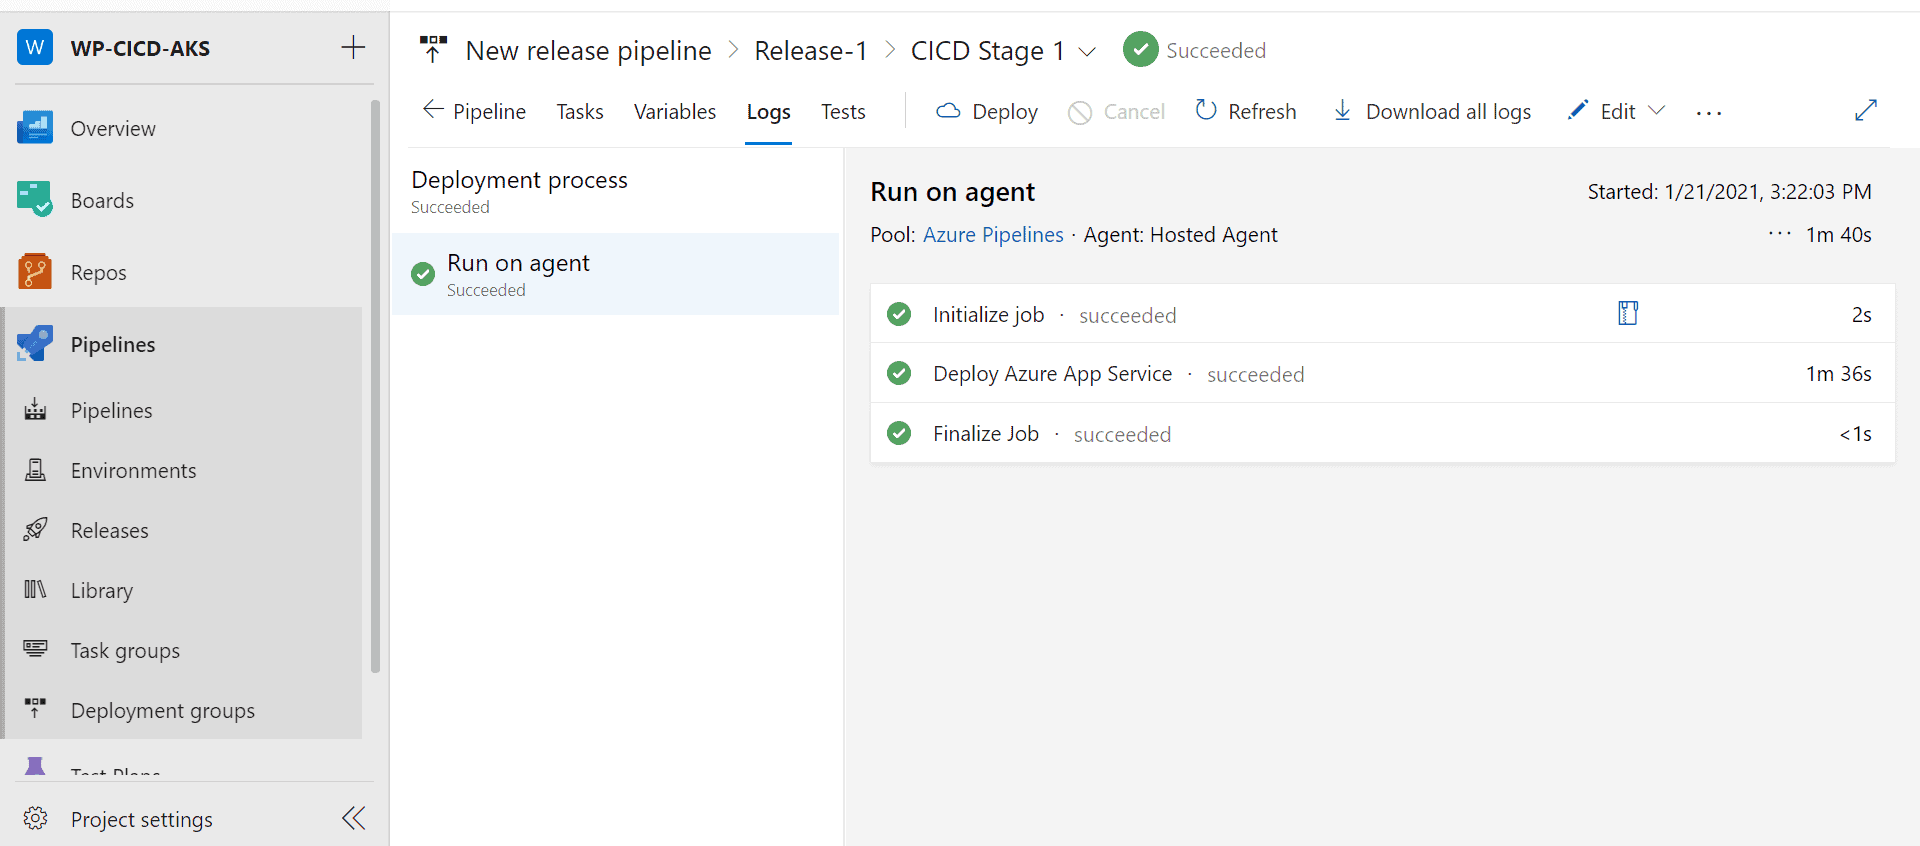
- After completion of the Release pipeline, we can view the logs details of steps involved in the pipeline
Installing WordPress:
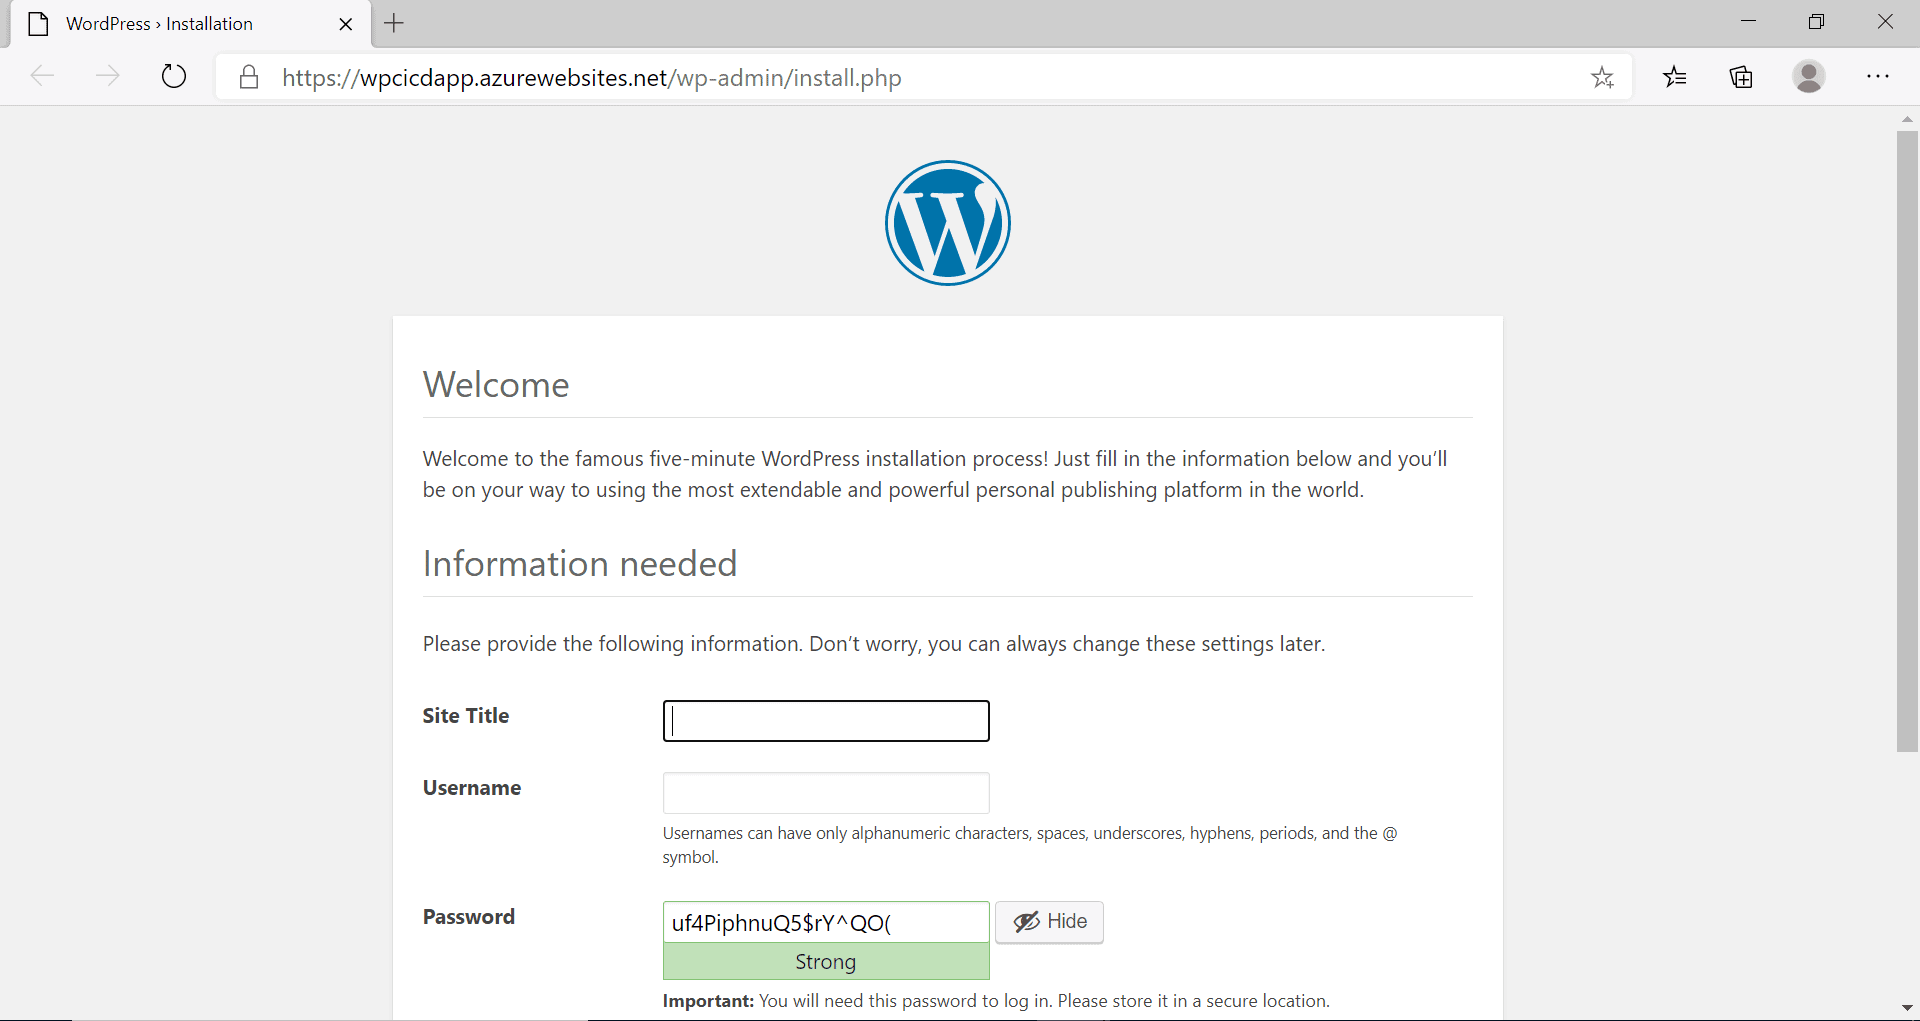
- Go to the app service in Azure Portal which has wordpress deployed in it and click on Browse
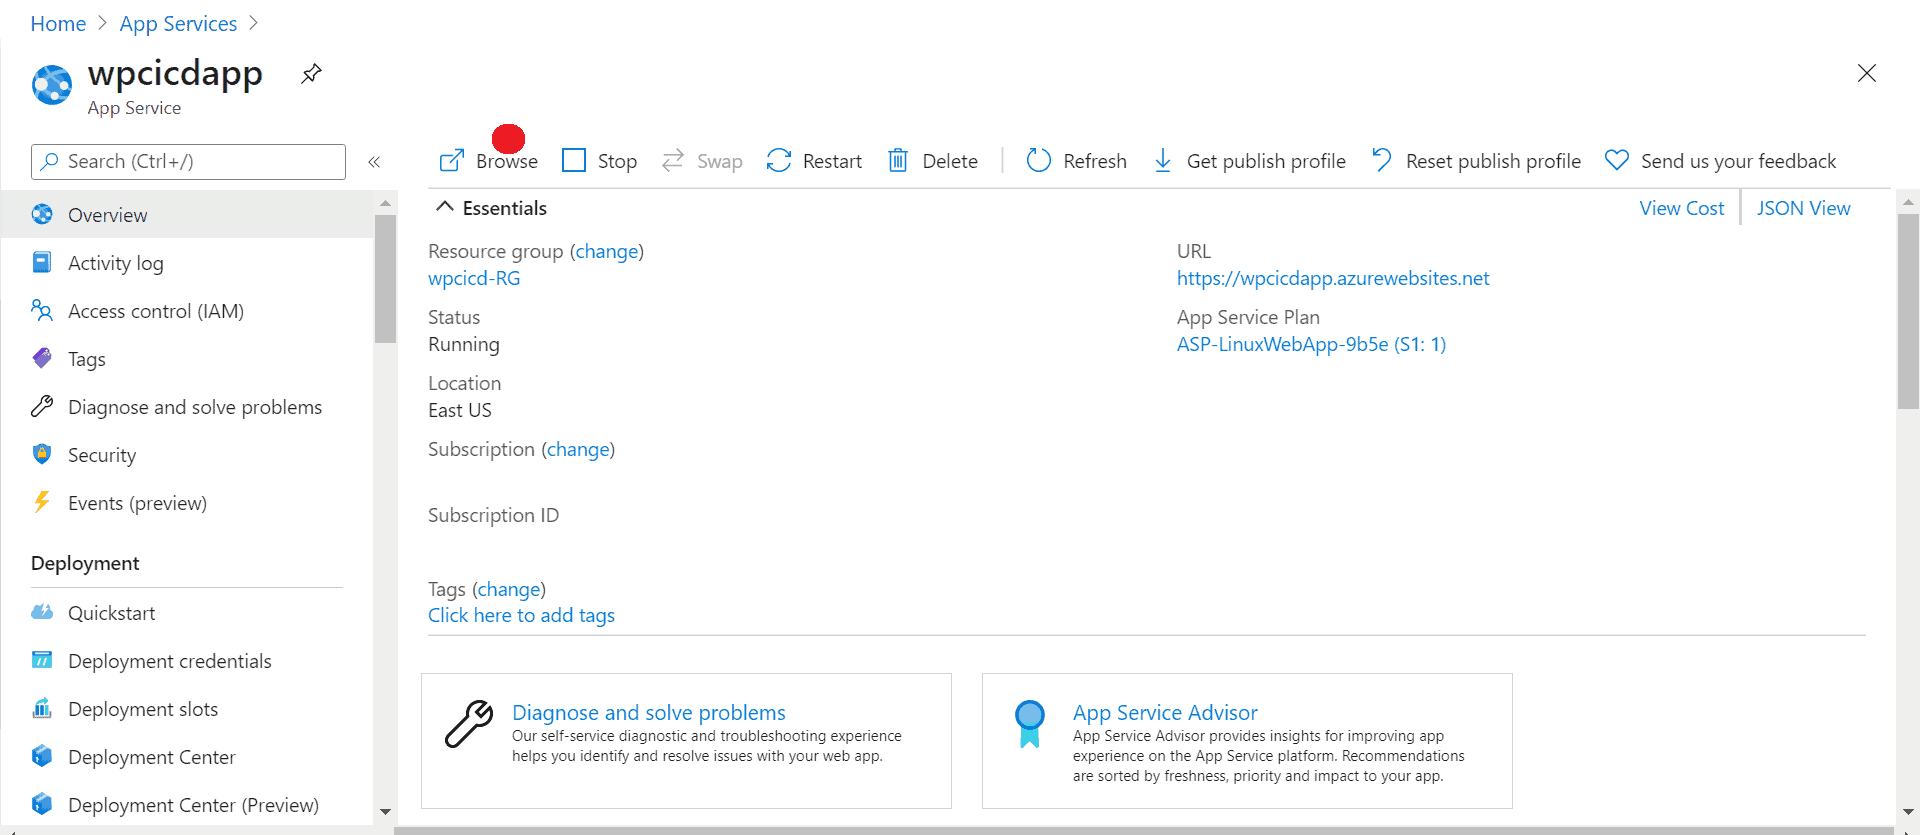
- Now we can install WordPress
 For every update that is pushed to the Repo in Azure DevOps, a Continuous Integration will be triggered followed by Continuous Deployment of the Containerized Image to the Azure Container Registry and App Service.
Ready to get started?
As a Microsoft partner with expertise in application migration and modernization, we’re ready to help you move your apps to the cloud.


