Author- Anubhav Bisht (Cloud Engineer)
Continuous integration (CI) and continuous deployment (CD) form a pipeline by which you can build, release, and deploy your code. Azure DevOps Services provides a complete, fully featured set of CI/CD automation tools for deployment to Azure. WordPress (WP, WordPress.org) is a free and open-source content management system (CMS) written in PHP and paired with a MySQL or MariaDB database.
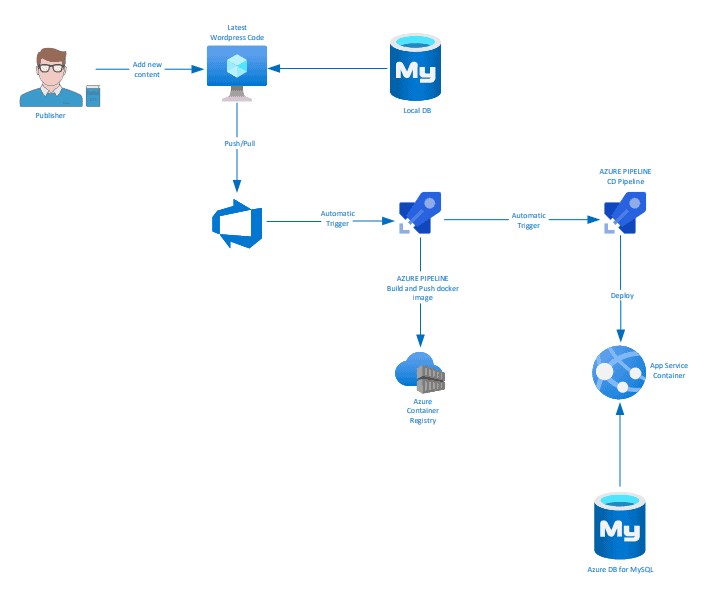
This post describes how to setup a CI/CD pipeline using Azure DevOps for deploying a containerized custom WordPress website working with Azure WebApp for Containers and Azure Database for MySQL.
Prerequisites:
- An Azure account with following services:
- An instance of Azure Container Registry.
- An instance of Azure Database for MySQL with an empty database.
- An instances of Azure WebApp for Containers.
- An Azure DevOps account for performing CI/CD.
Code Structure:
You can find the Sample Code here, create a new project in Azure DevOps and import the code there.
- HTML Directory: contains the WordPress structured files and directories like wp-config.php, wp-content, etc.
- Dockerfile: contains the commands for building the containerized image:
FROM wordpress:4.9.1-apache
COPY html /var/www/html
RUN chown -R www-data:www-data /var/www/html/
ENTRYPOINT ["apache2-foreground"]
Building Project Pipeline:
- Continuous Integration:
-
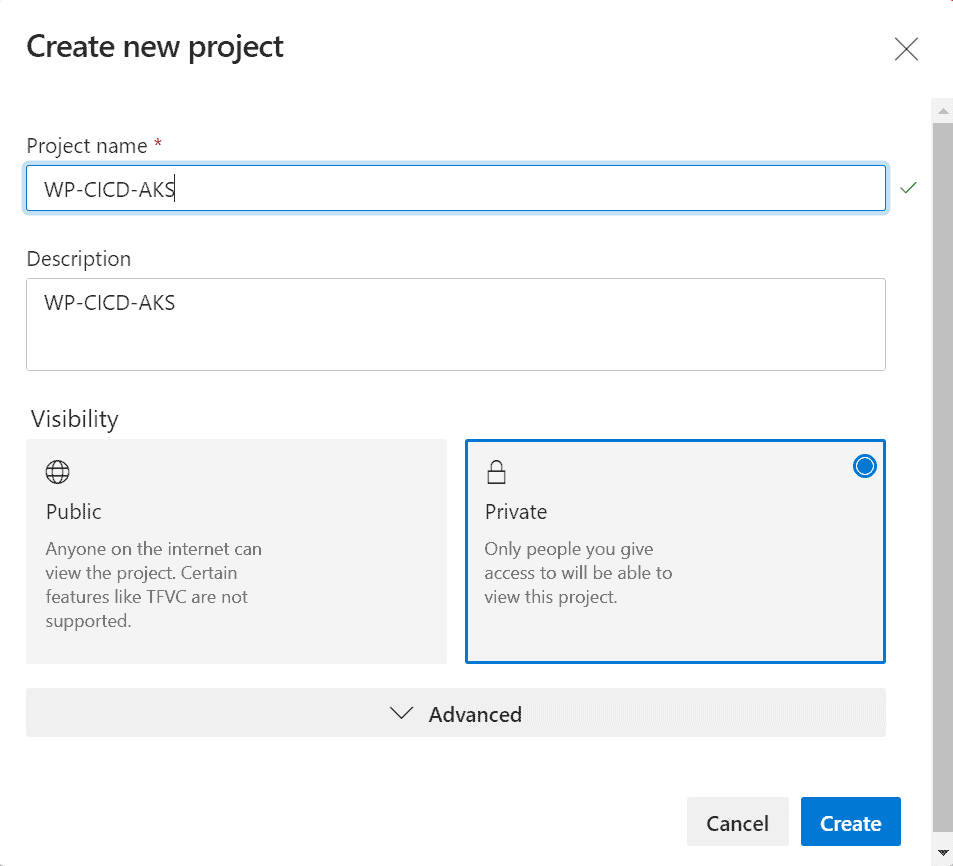
- Create a new project in Azure DevOps
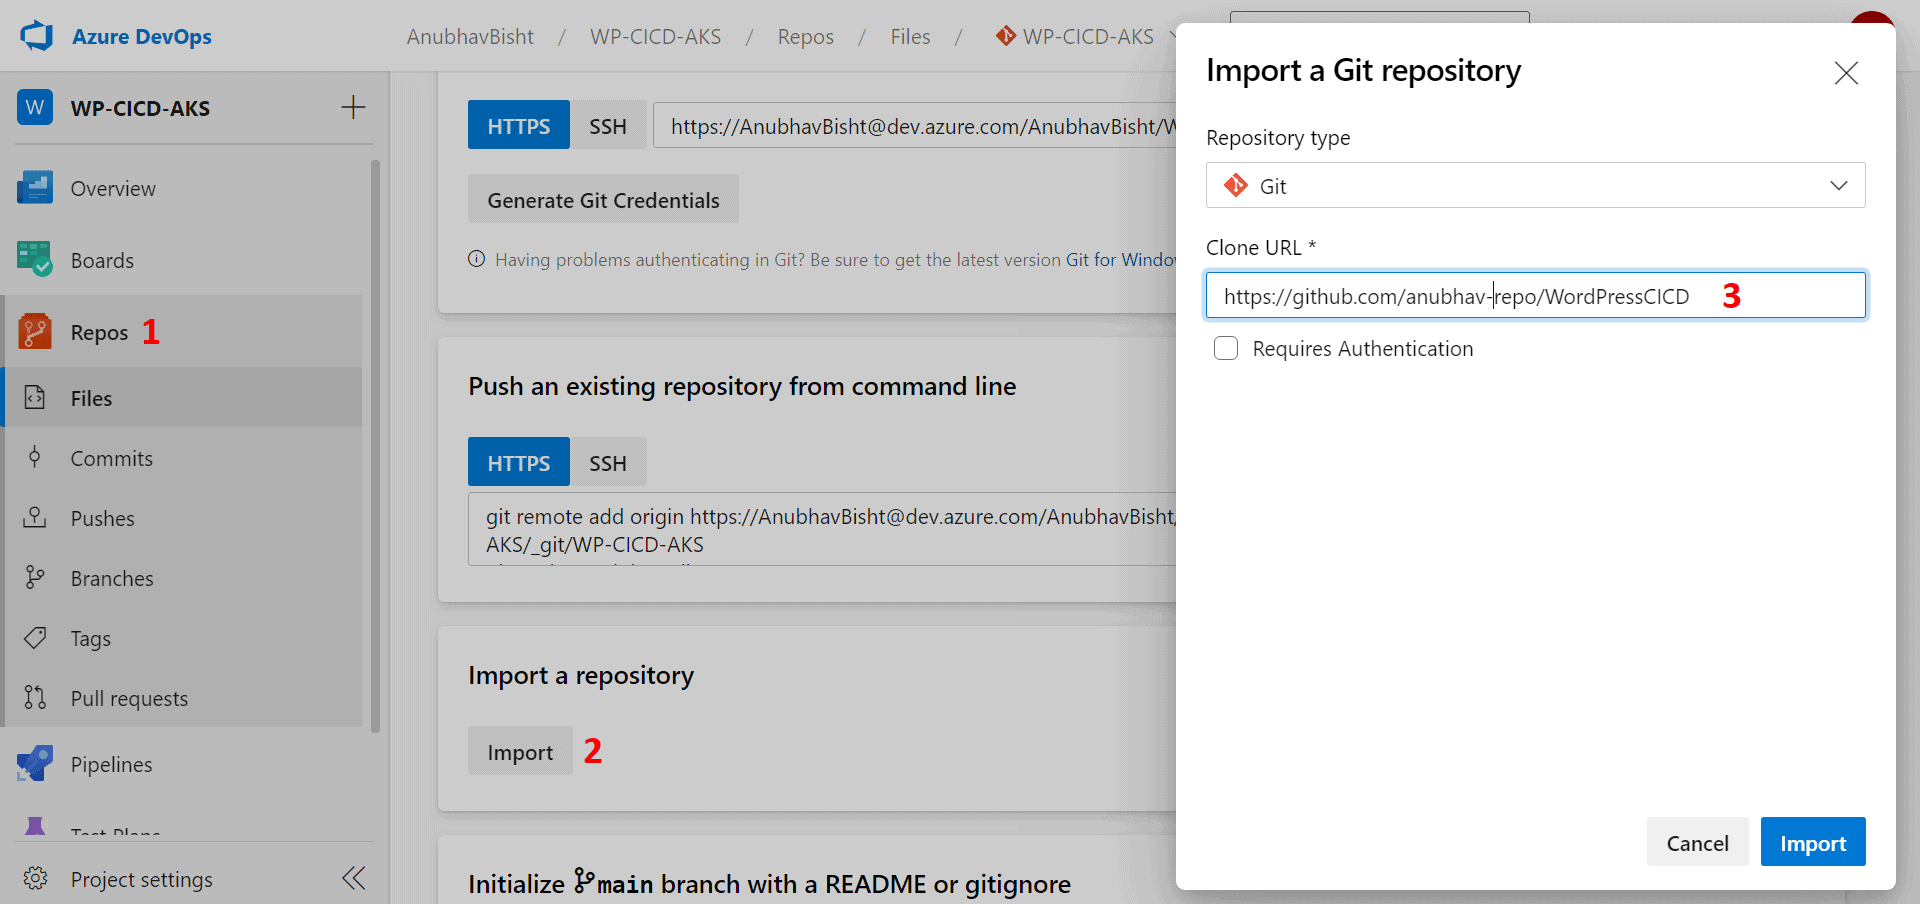
- In the Repos section, select Import to import the repository from Github
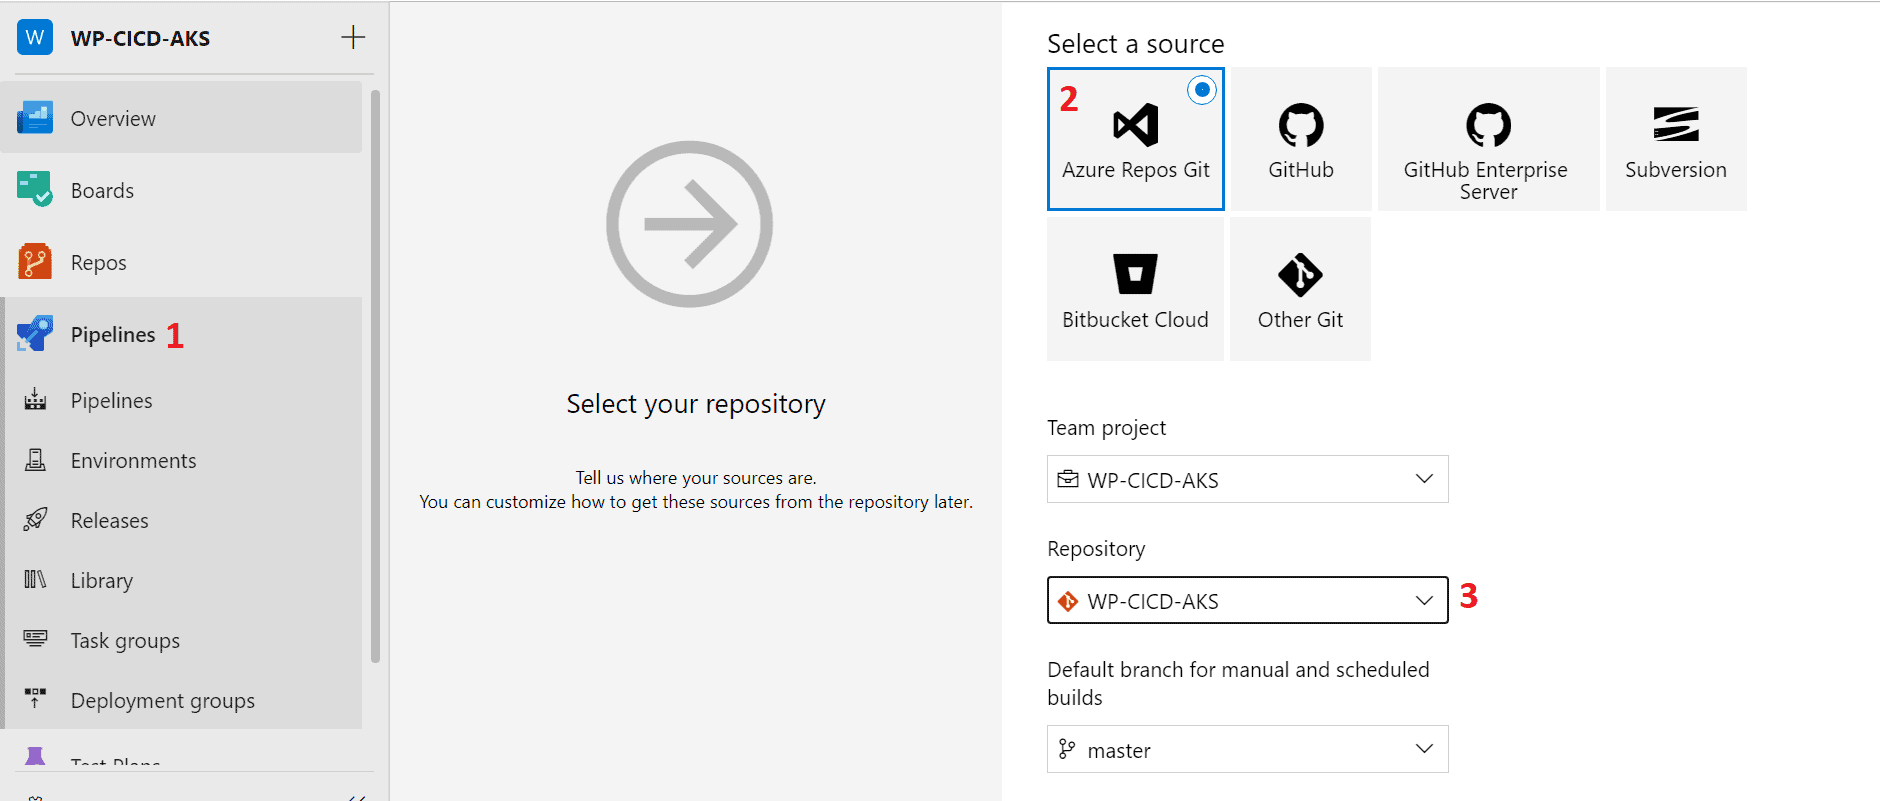
- Now ,in the Pipelines section, create a new pipeline and select your repository that has the code
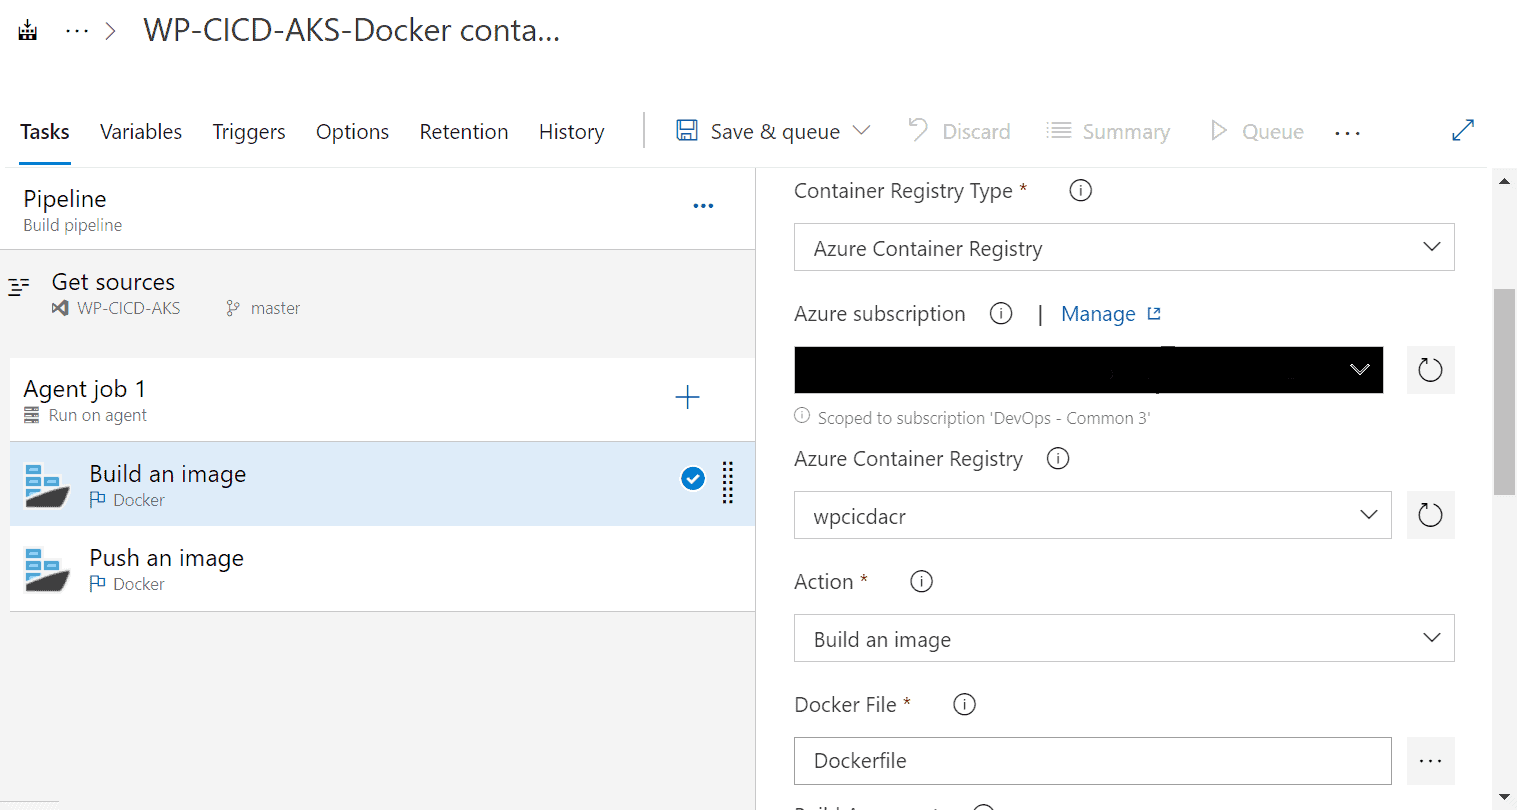
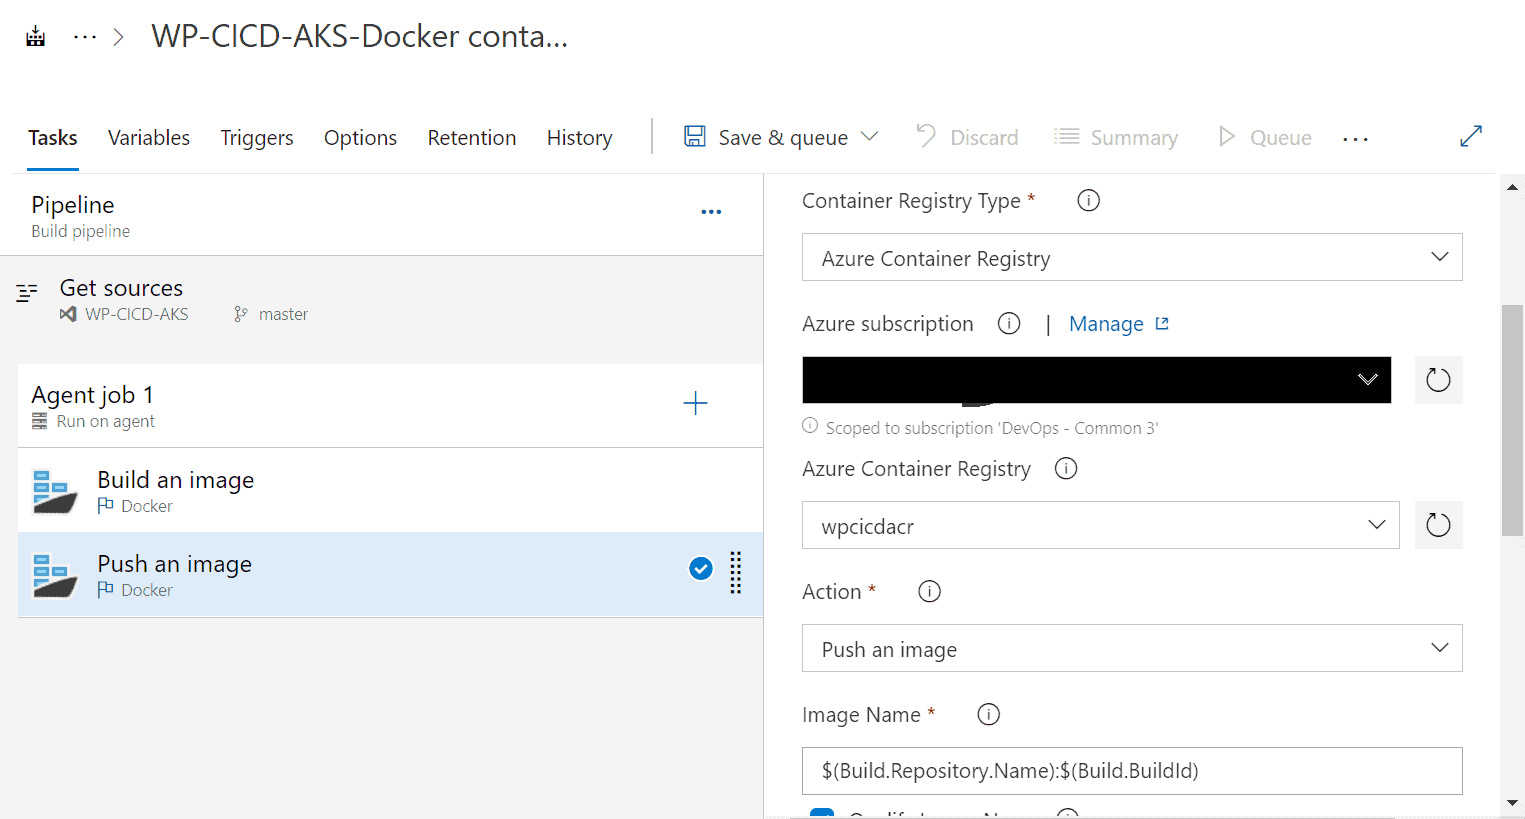
- Search and select the Docker Container job to build and push the image to Azure Container Registry

- Select the Azure Pool and Agent Specification according to the requirement, and in the two tasks add the information accordingly
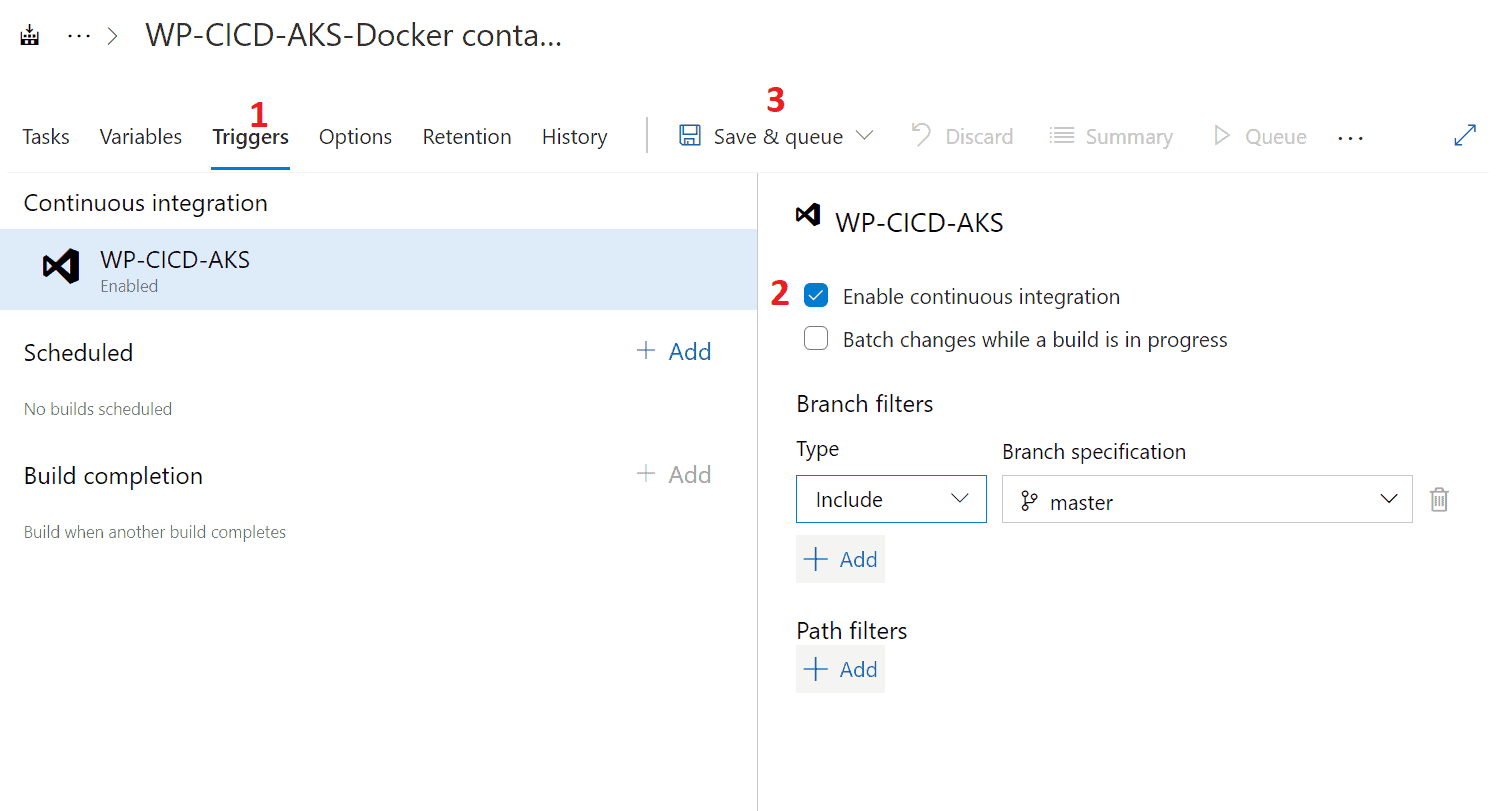
- In the Triggers, enable Continuous Integration and Save & Queue the pipeline
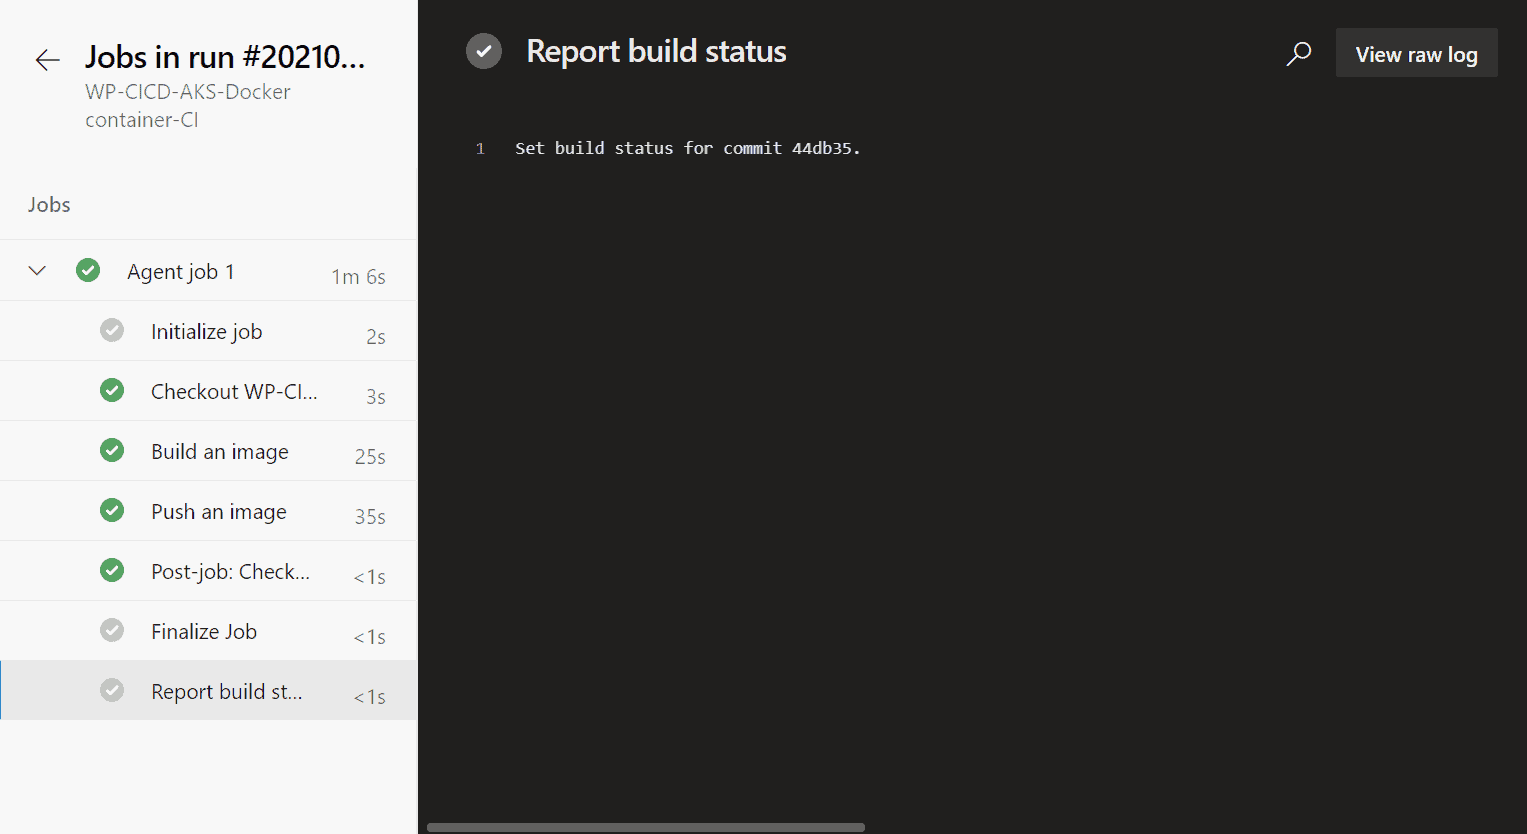
So, after the successful building and pushing of the containerized image to the Azure Container Registry, our Continuous integration part is competed. Now, let’s move on for the Continuous Deployment.
2. Continuous Deployment:
-
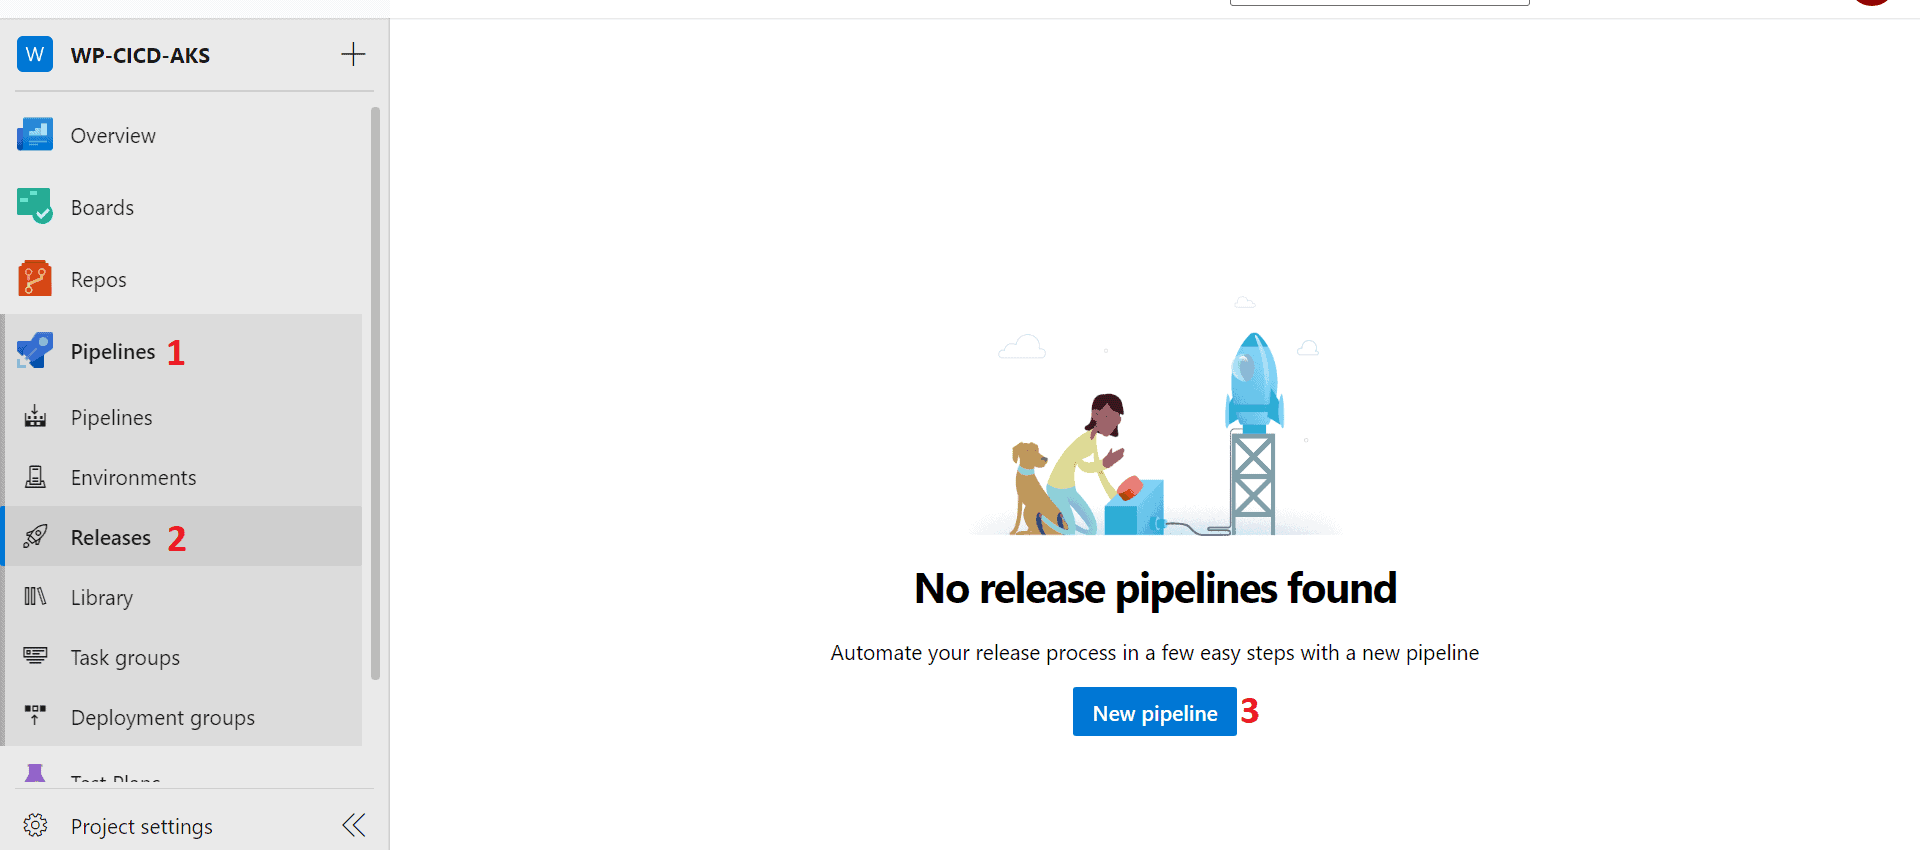
- In Azure DevOps, go to the Pipeline section and select Release and create a New Pipeline
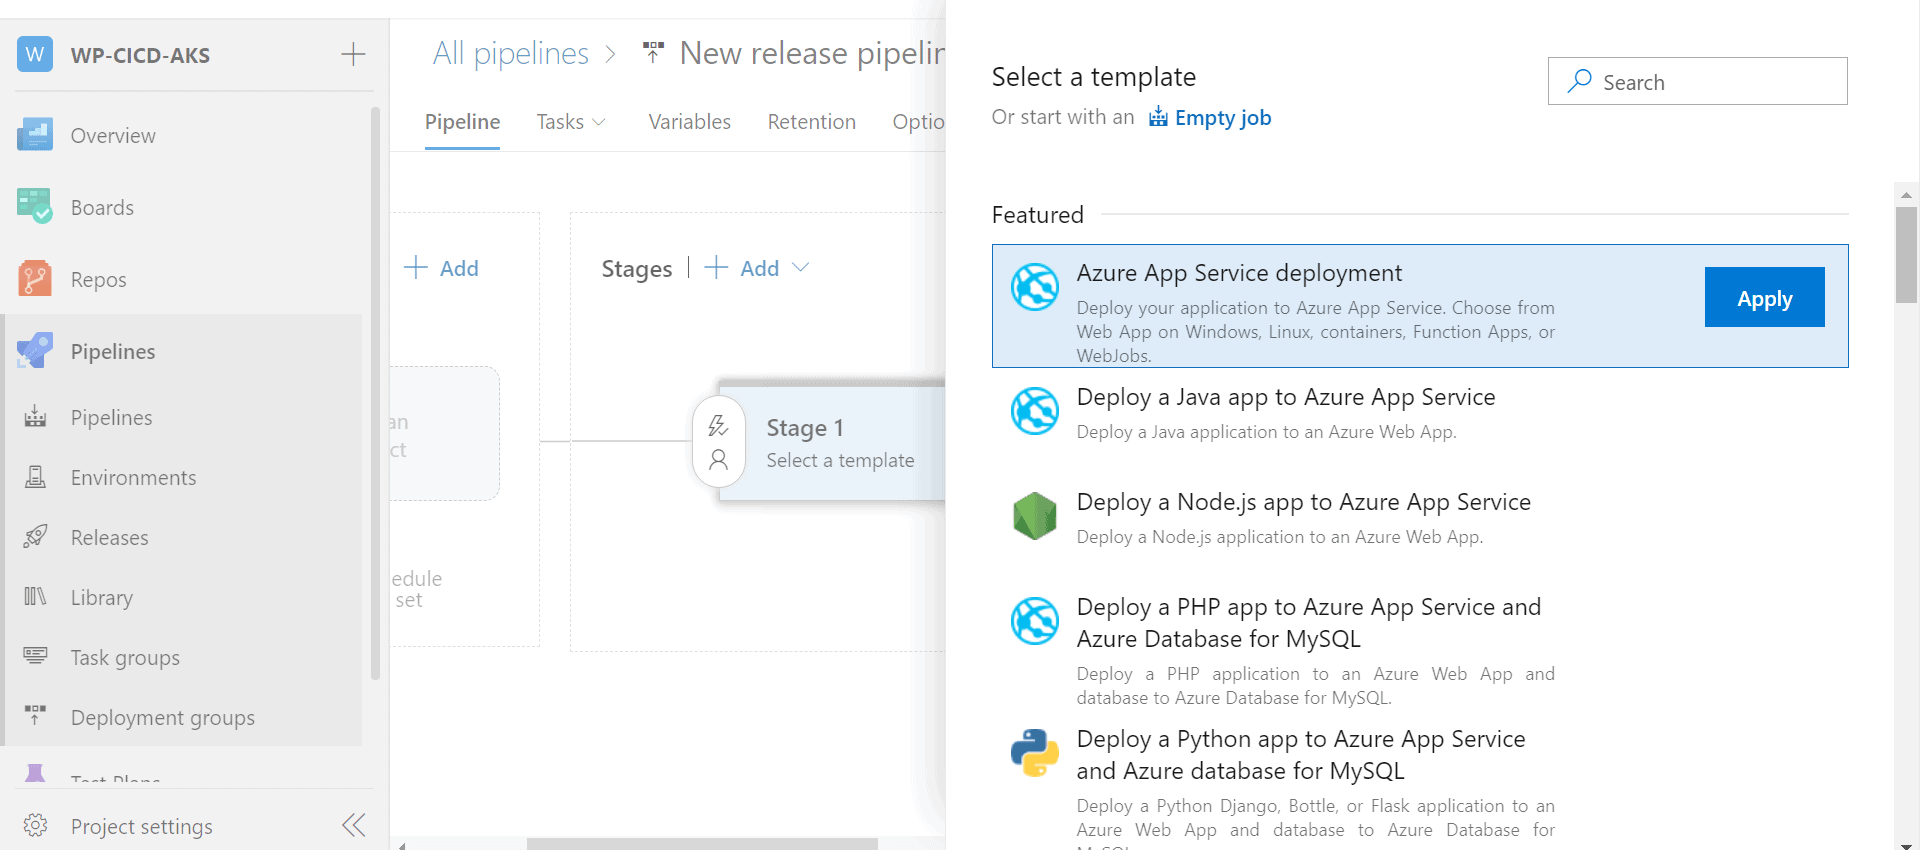
- Select Azure App Service Deployment as the CD job
- Select the Artifact source as Azure Container Registry and select the registry and repository
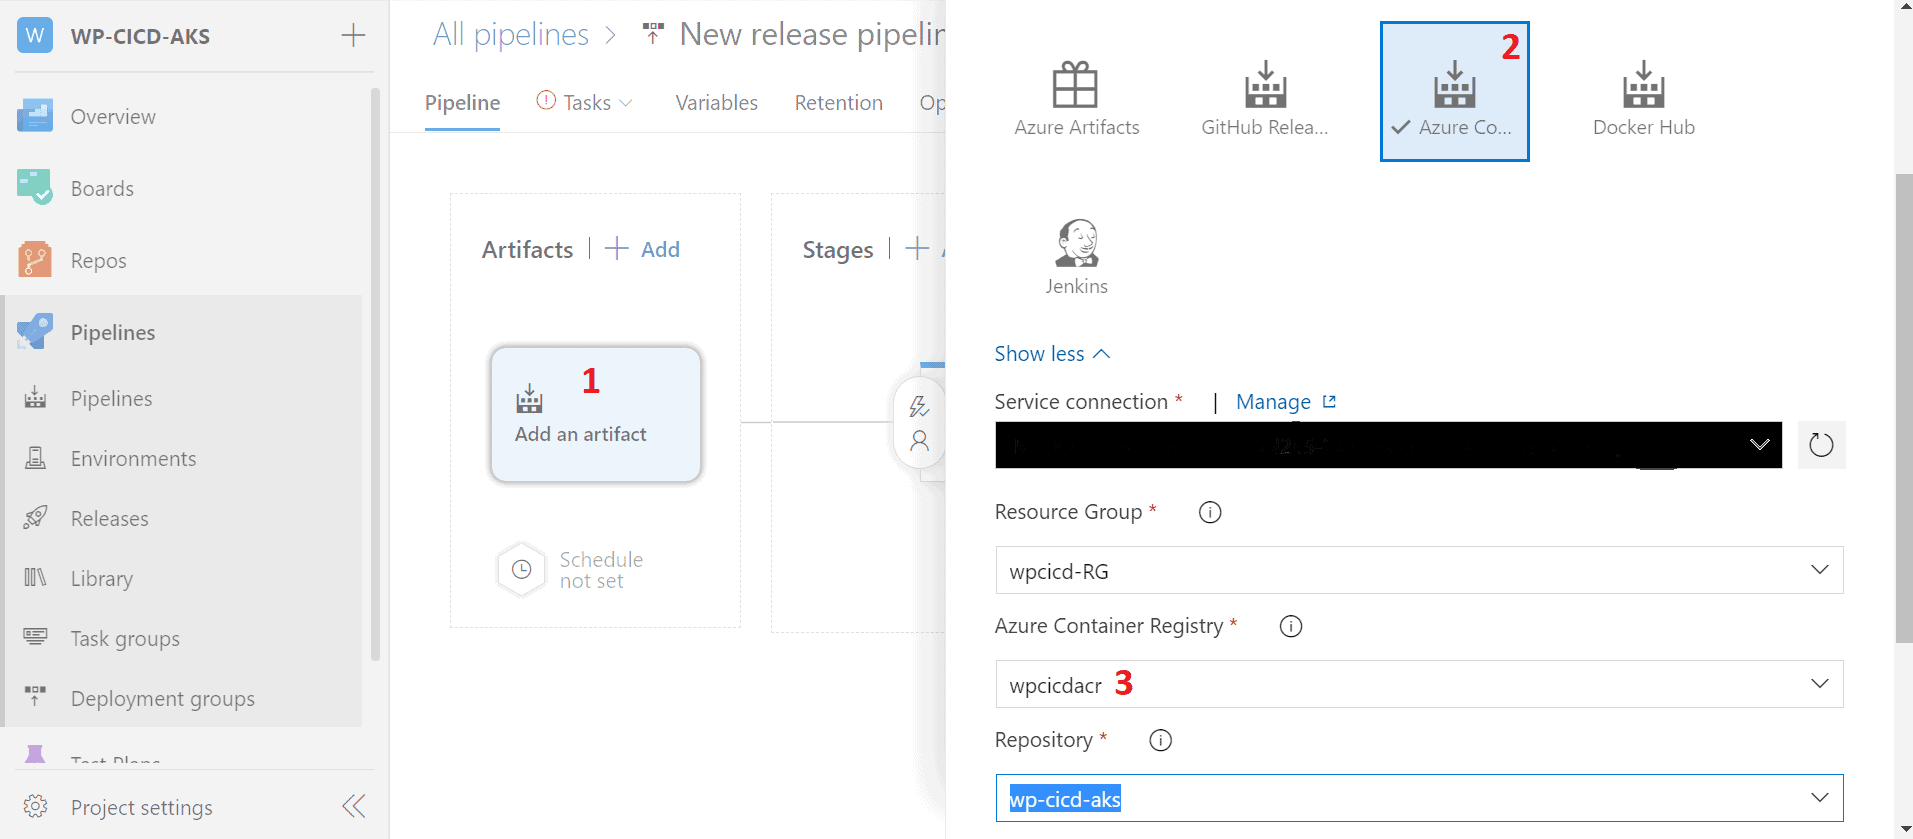
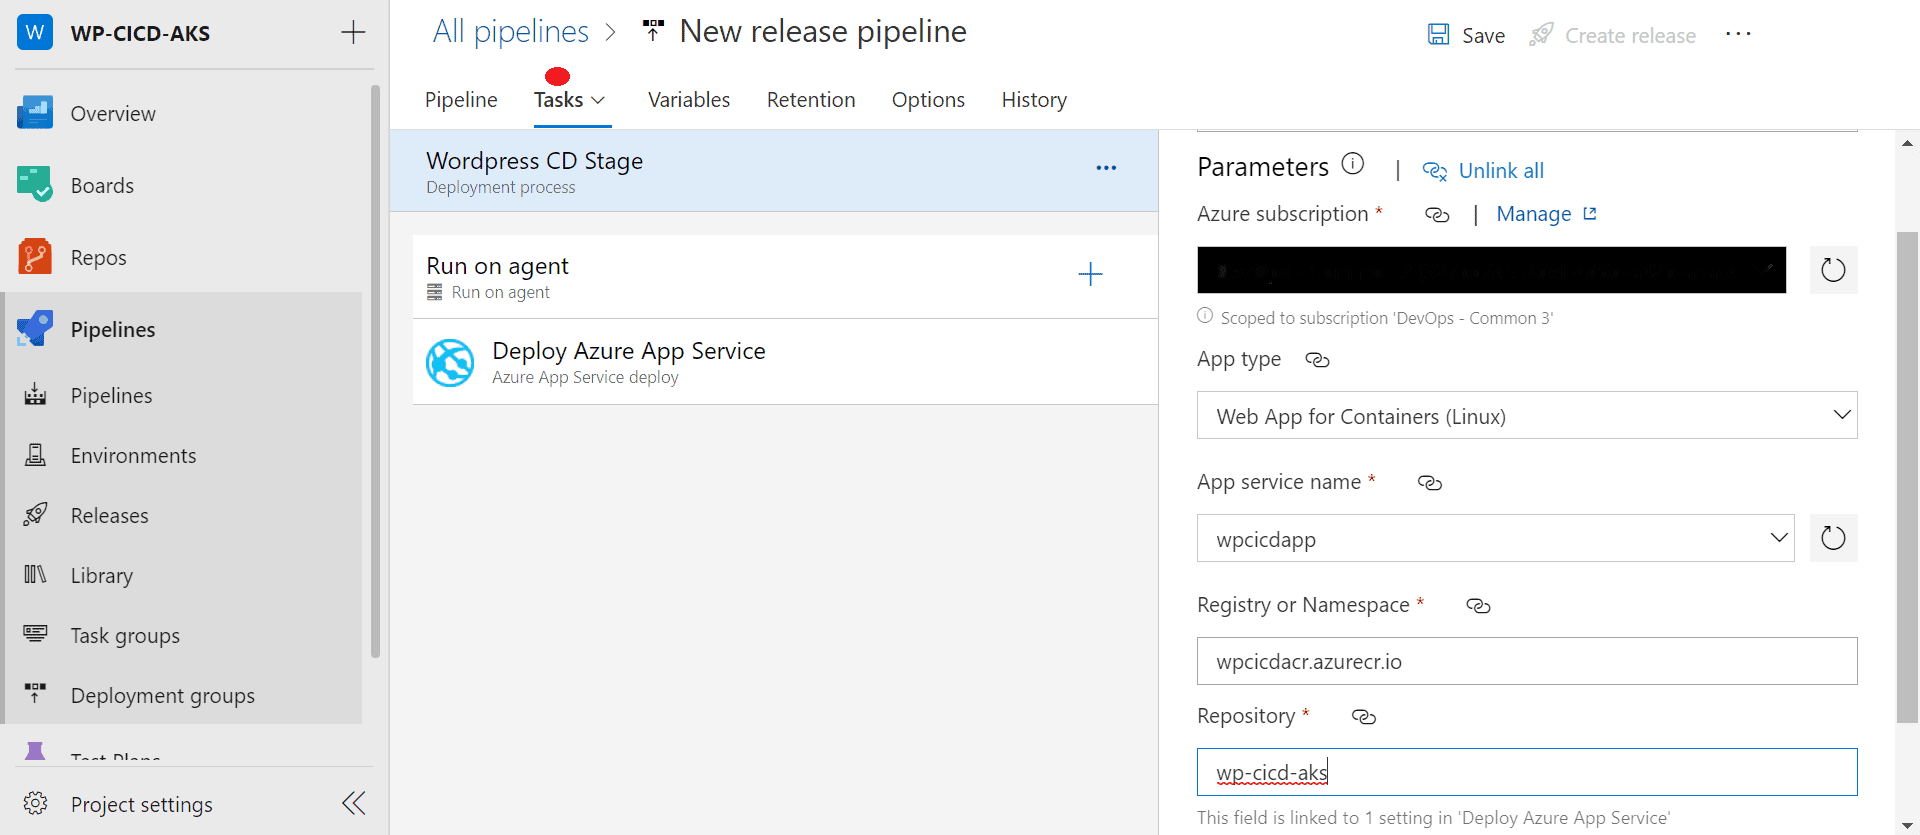
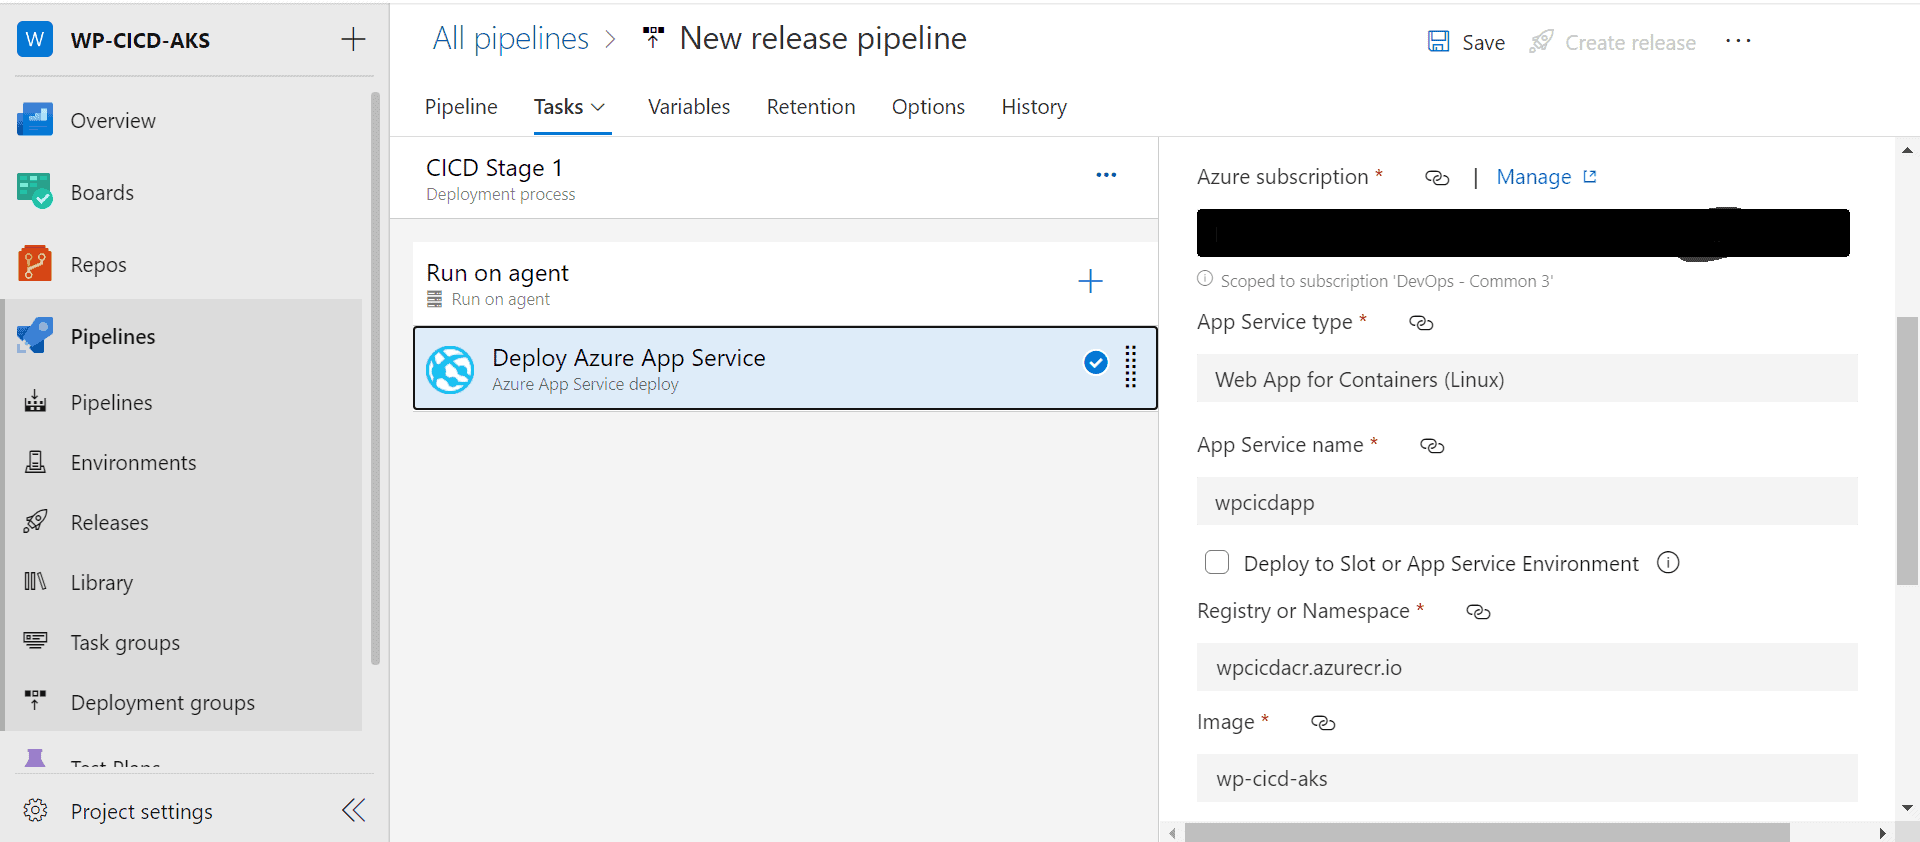
- Select the Agent Pool and Agent Specifications according to requirements and configure the remaining task accordingly
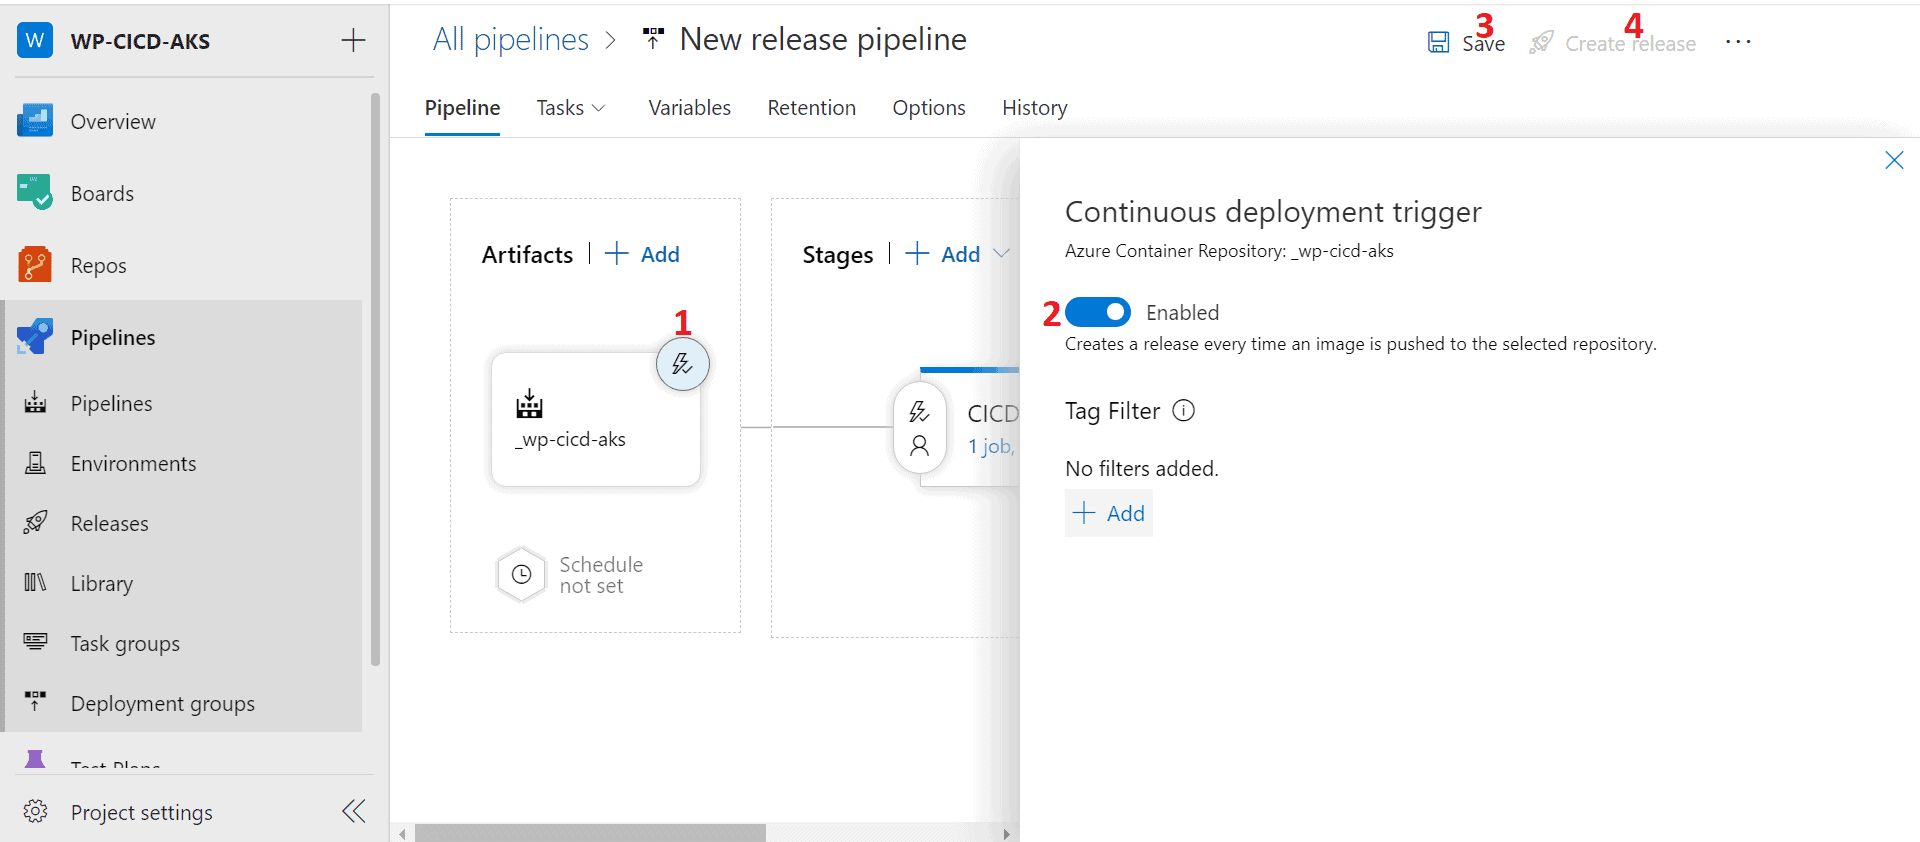
- Enable Continuous Deployment trigger, save the pipeline and select Create Release to run it
- After completion of the Release pipeline, we can view the logs details of steps involved in the pipeline
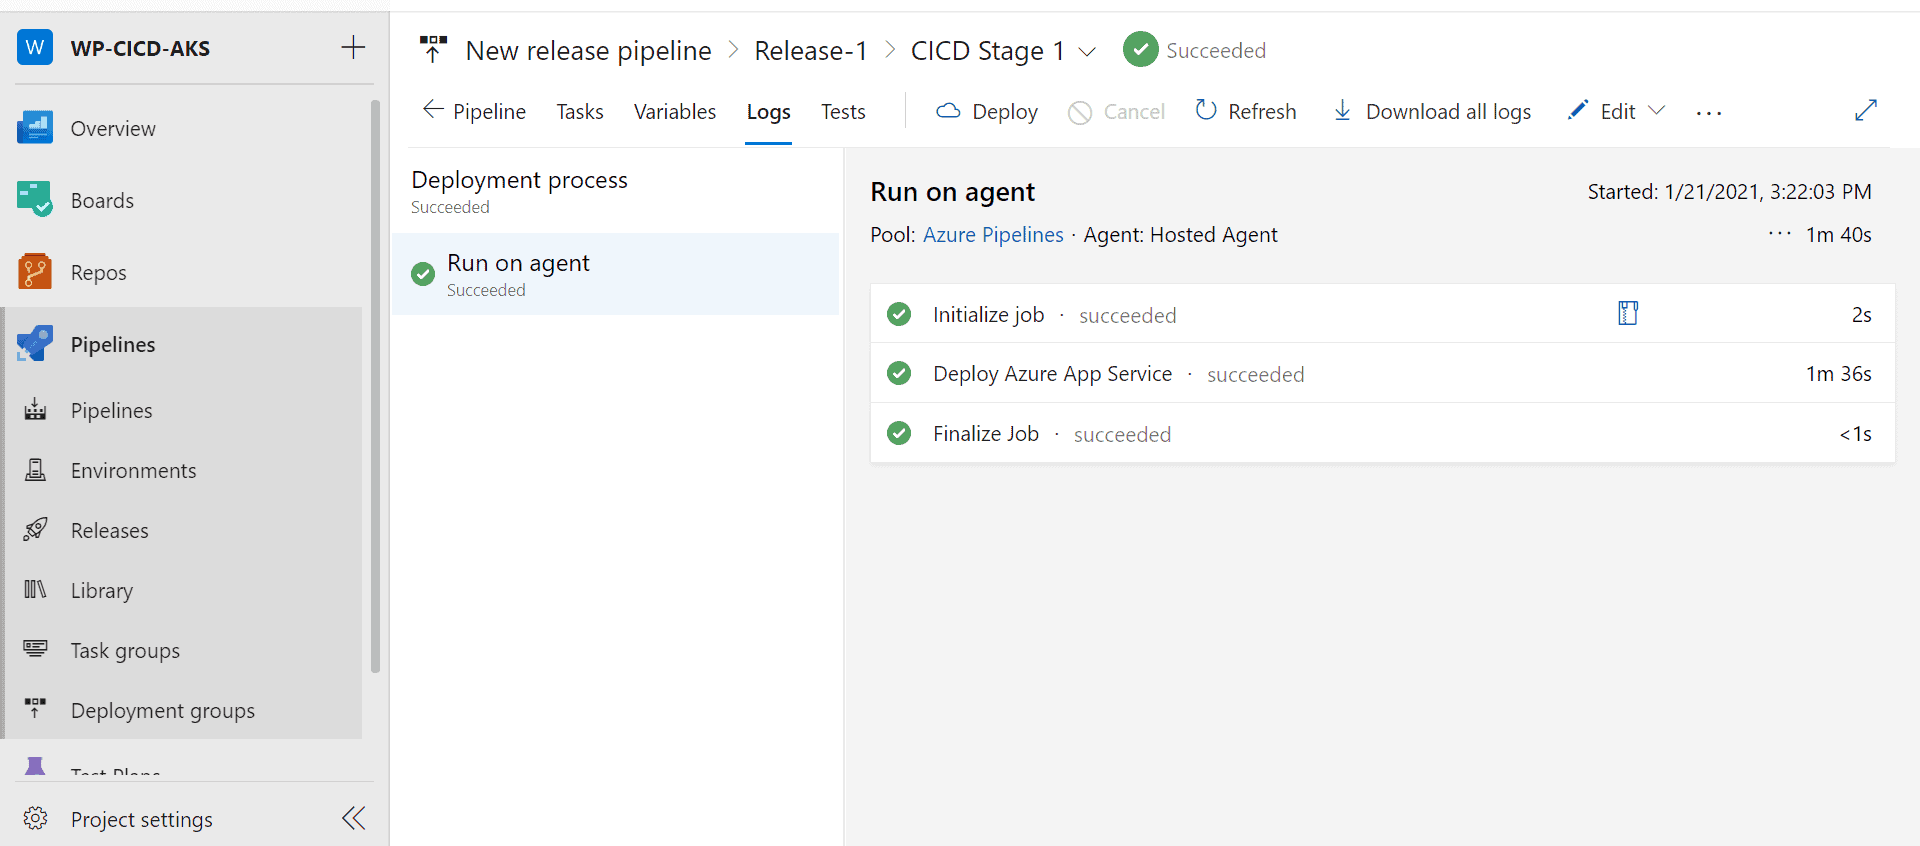
Installing WordPress:
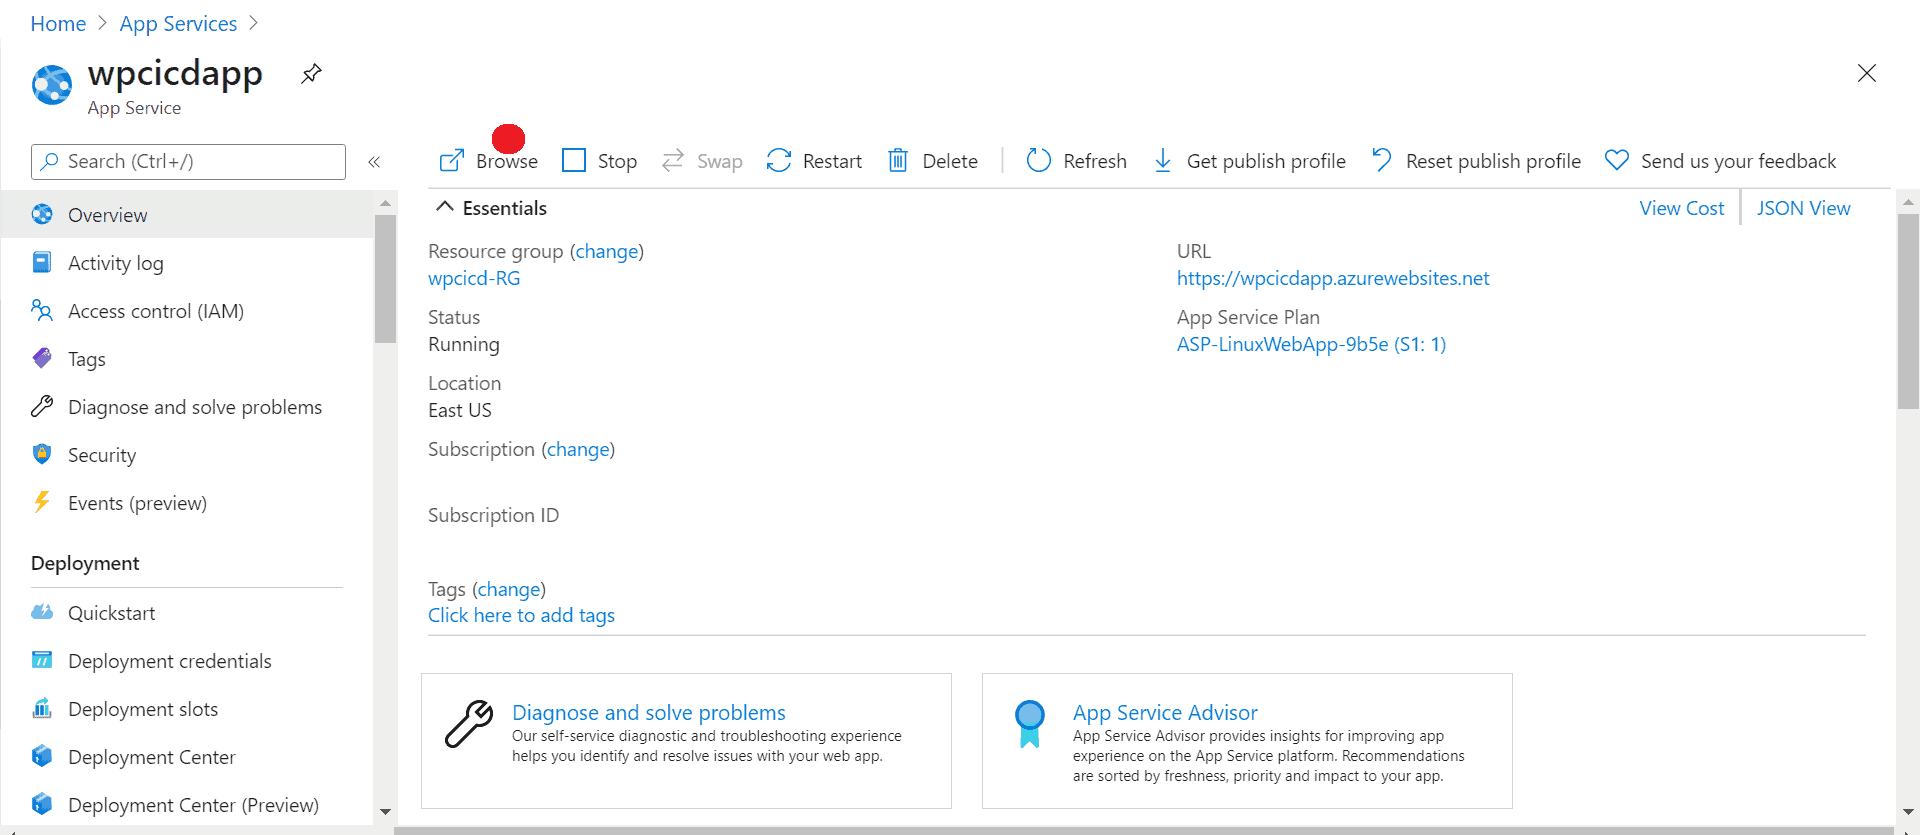
- Go to the app service in Azure Portal which has wordpress deployed in it and click on Browse
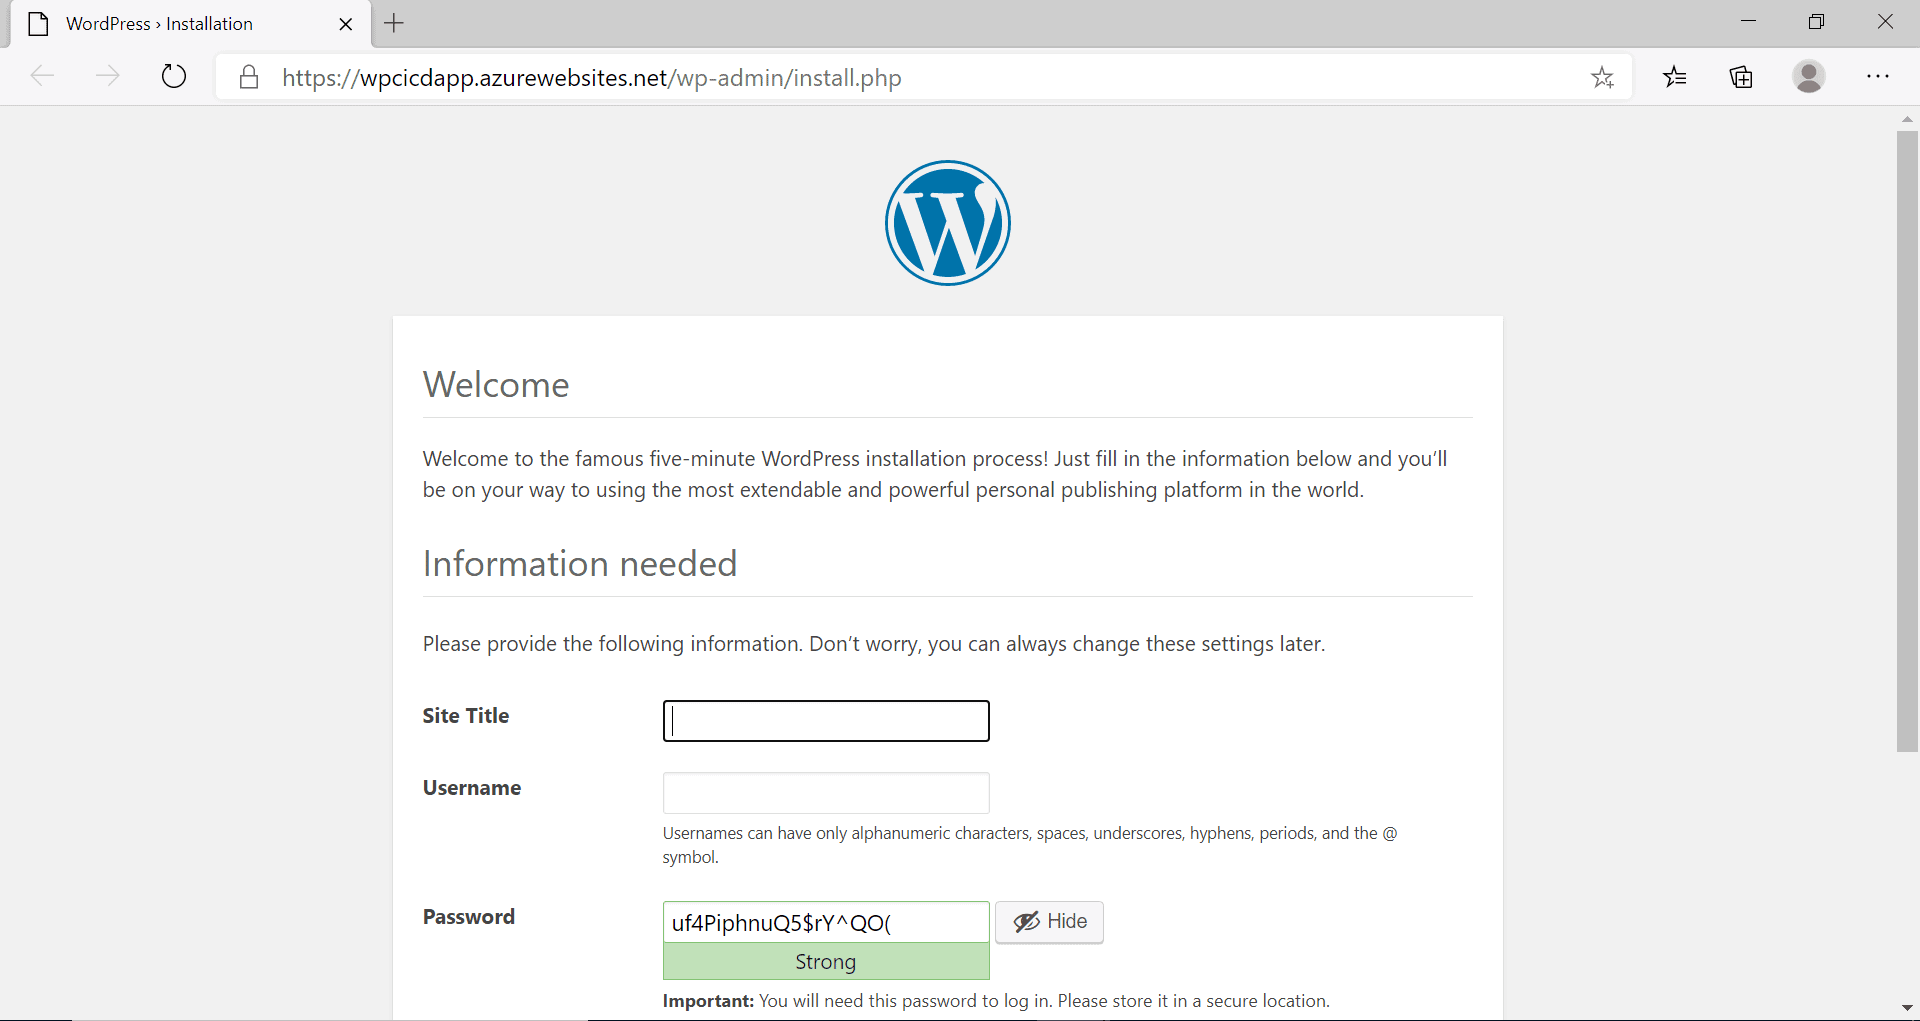
- Now we can install WordPress
For every update that is pushed to the Repo in Azure DevOps, a Continuous Integration will be triggered followed by Continuous Deployment of the Containerized Image to the Azure Container Registry and App Service.


