Author – Pranjal Rele, Associate Cloud Engineer
Introduction:
Incremental Load is defined as the activity of loading only new or updated records from the database into an established QVD. A QVD (QlikView Data) file is a file containing a table of data exported from QlikView. Reading data from It is also sometimes called as Delta Load. Incremental loads are useful because they run very efficiently when compared to full loads, particularly so for large data sets. It is the activity Where delta or difference between target and source data is dumped at regular intervals.
Change Data Capture (CDC) is the process of capturing changes made at the data source and applying them throughout the enterprise. CDC minimizes the resources required for ETL (extract, transform, load) processes because it only deals with data changes. The goal of CDC is to ensure data synchronicity.
In SQL Server, change data capture offers an effective solution to the challenge of efficiently performing incremental loads from source tables to data marts and data warehouses.
The change data capture feature of the Database Engine captures insert, update, and delete activity applied to SQL Server tables, and makes the details of the changes available in an easily consumed, relational format.
This concept is very important especially when the amount of data you need to process is growing. If your company is like a lot of others, your data is growing quite rapidly each day. And as your data grows, techniques like CDC become ever more crucial for handling your data inflow.
Change Data Capture ensures that any modifications made in one data set are automatically transferred to another data set. A good example of a data consumer that is targeted by this technology is an extraction, transformation, and loading (ETL) application. An ETL application incrementally loads change data from SQL Server source tables to a data warehouse or data mart. Although the representation of the source tables within the data warehouse must reflect changes in the source tables, an end-to-end technology that refreshes a replica of the source is not appropriate. Instead, you need a reliable stream of change data that is structured so that consumers can apply it to dissimilar target representations of the data. SQL Server change data capture provides this technology.
Prerequisites:
- SQL Server Management Studio 2019.
- Visual Studio 2019 With SQL Server Integration Services (Version 3.8).
Step 1: Create A Source And Destination Database.
- Open Microsoft SQL Management Studio.
- Connect to the database engine using database administrator credentials.
- Expand the server node.
- Right click Databases and select New Database.
- Enter a database name and click on OK to create the database (Source Database).
- Once the database is created, you need to create your source table and insert few values into it. And one of the columns in your table should be a PRIMARY KEY.
- In a same way create your destination database on another server (Target Database). Create a table into it with no values.
- Enable the CDC onto the source database and on the source table, follow the reference link below to see how to enable the CDC.
Step 2: Open Visual Studio 2019, Create new project, and in solution explorer pane right click on SSIS Package and create a new one.
- Drag and drop the data flow task, then double click on the Data Flow Task it will navigate you to Data Flow pane.
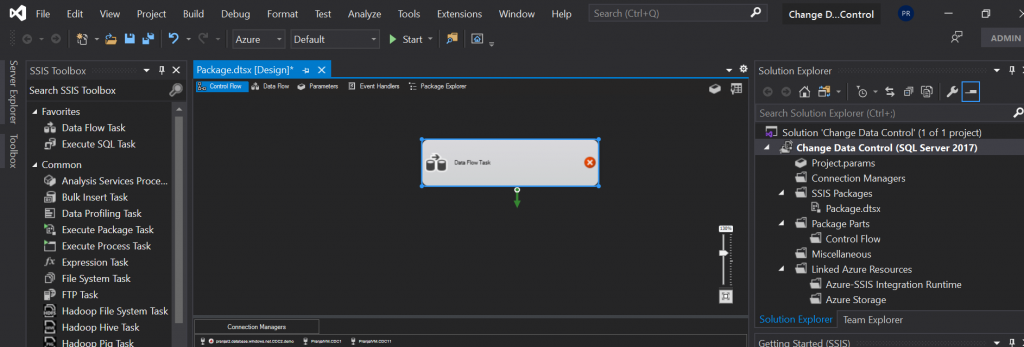
- In the SSIS Toolbox, click on the drop down of other source, and select “OLE DB Source” drag and drop it, double click on it to configure the source.
- Drag and drop one more “OLE DB Source” name it as Source Destination and double click on it to configure. Enter the target server, select the target database and test the connection. Once, succeeded select the target table and click ok.
- And, now to use Merge Join Transformation. We need, to sort the data from source and destination as well. So, we need to use Sort transformation. Drag and drop two Sort Transformation’s for Source and Destination. Connect the source and destination to the Sort Transformation’s. Right click and edit the properties of Sort Transformation for Source. In the same way edit the destination Sort Properties as well. Here, we are sorting the data on the ID column.
- And, now we need to use the Merge Join Transformation. So drag and drop the Merge Join from the SSIS Toolbox. Then connect the source and destination sort transformations to merge join. When we connect the Source Sort to the merge join you get following pop up. Here in input you need to select “Merge Join Left Input”. Merge join accepts Right and Left input. Next, when you connect the destination sort to the Merge join the default will be selected.
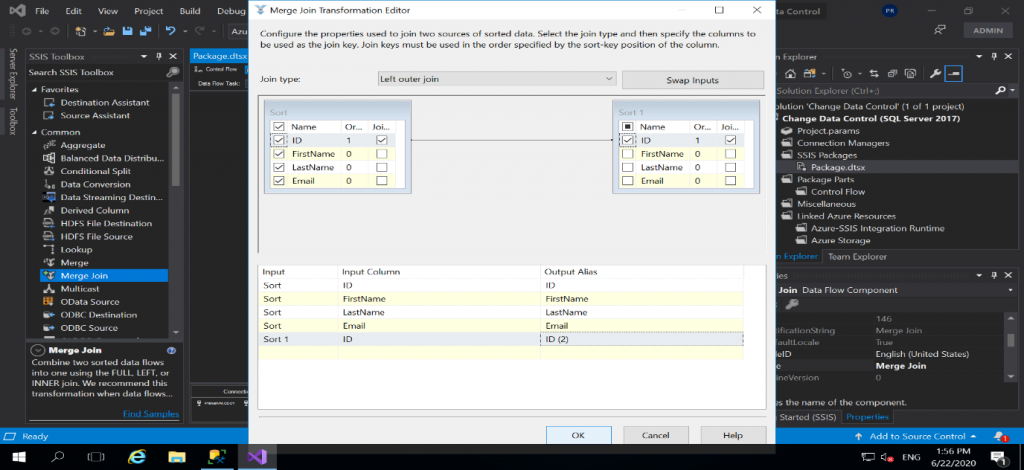
- Next, double click on the Merge Join Transformation, a Merge Join Editor window will open. In join type, select Left Outer Join. It will select all records from the left table (Source) and only the matching records from the right table (Target). So checkbox, the data from the left table and select the ID column from the right table and rename it to ID (2).
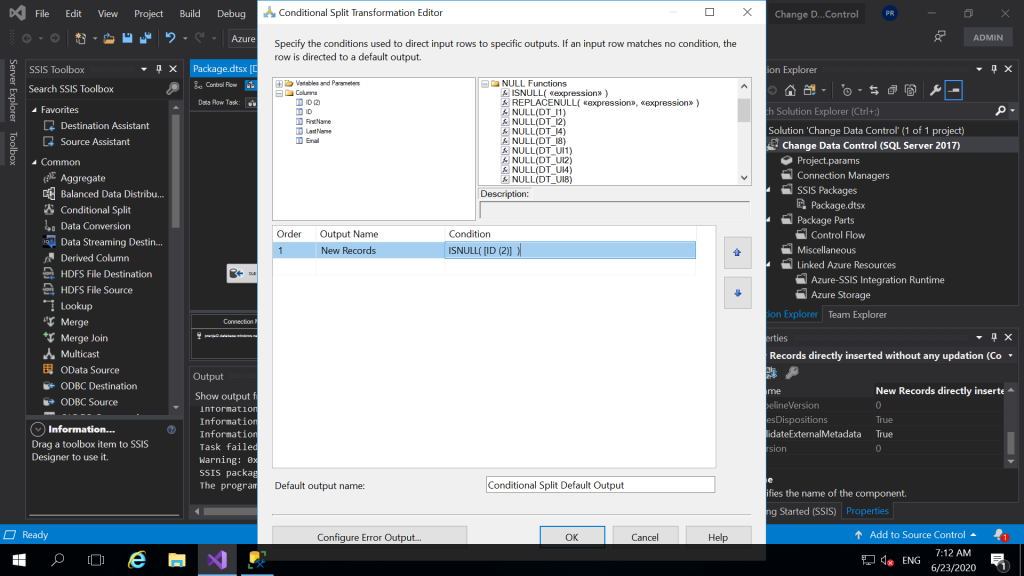
- Next, we will drag and drop Conditional Split Transformation. We will use this to check that if the records are new or the records are the existing records. So, connect the output of Merge join transformation to Conditional Split transformation. Then double click on it and configure it. In the above window of Conditional split, we have given a condition “ISNULL([ID (2)]). And, then click OK. Conditional split always has a default output and the output we create.
- So now we will have two destinations. One destination to insert the new records in our target table and another one to update the existing records of our destination table.Here, we drag and drop “OLE DB Destination”.
And, then we will connect the output of Conditional Split to the OLE DB Destination. While doing this we will get the pop as shown in the above window. And in the output you will select the new record because we want to insert new records to a destination table. And, then double click on the OLE DB Destination and configure it the same way we did for our Source Destination. The target database and target table will be the same i.e. CDC2 (Database) and dbo.Users (Table).
Also, click on thee “mappings” on the destination editor window to make sure if all the columns are correctly mapped otherwise you can manually map them. Then click ok.
- Now, for updating the records we will drag and drop “OLE DB Command”. Connect the output of the conditional split to the OLE DB Command i.e. the default output will be the updated records.
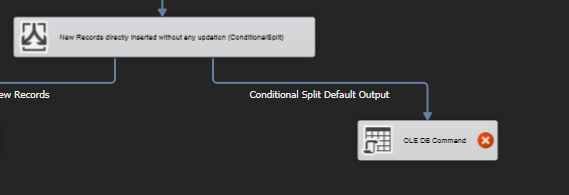
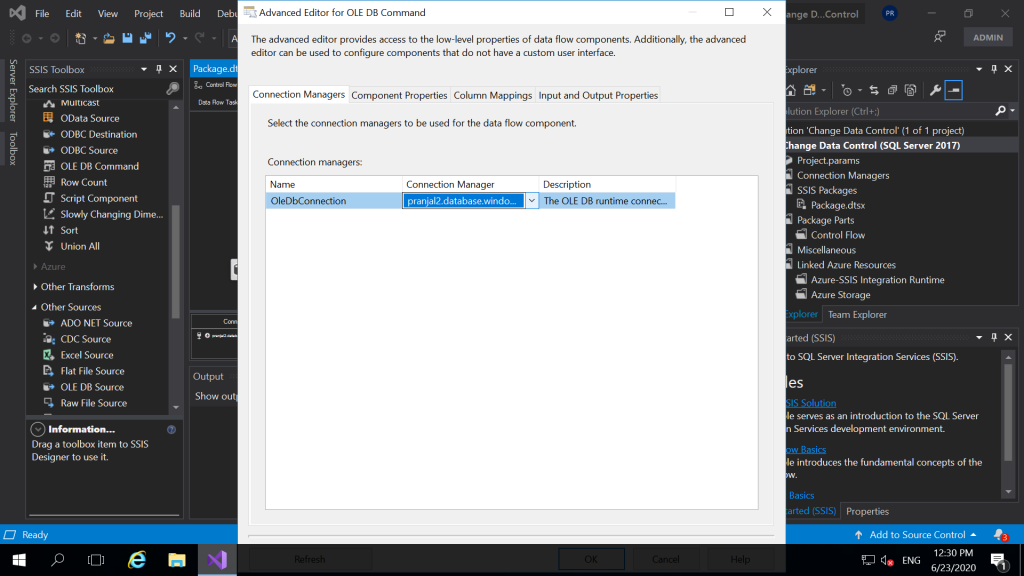
- Double click on it, under connection manager select the destination server which will be used for data flow component.
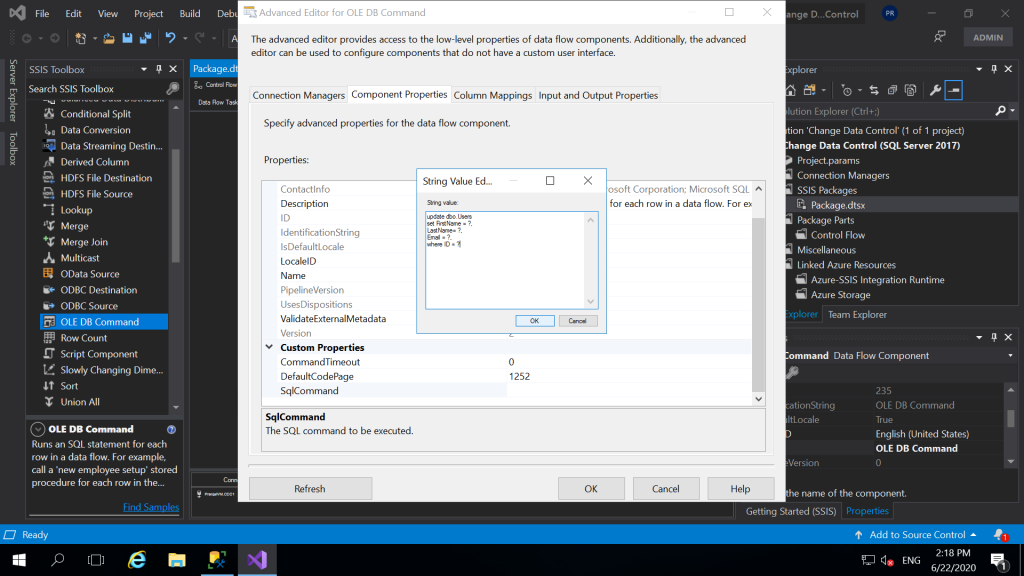
- Next, click on component properties. Under Custom Properties click three dots (…) in front of SQL command and write the SQL query as follows. Click OK.
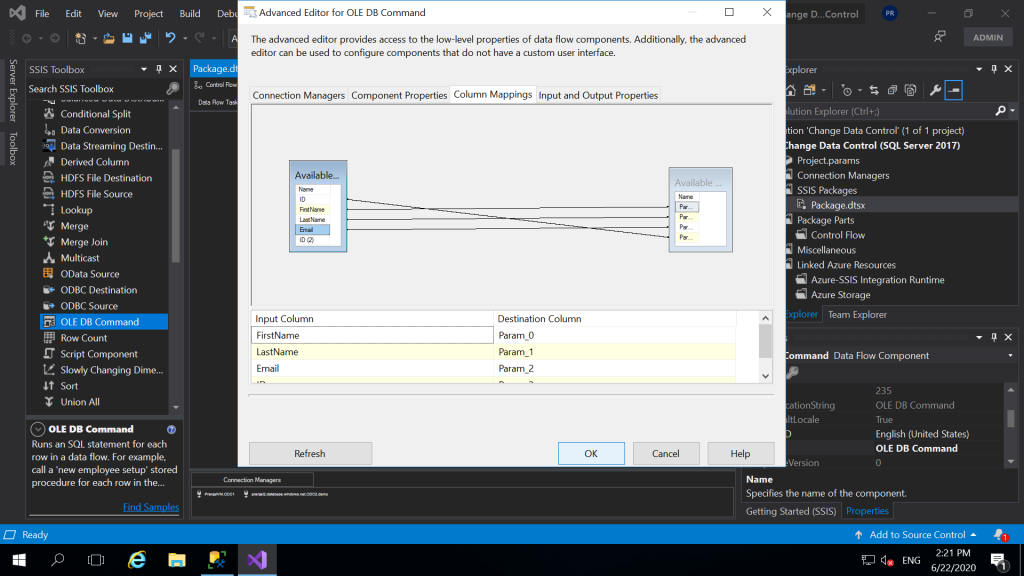
- Next, click on Column Mappings and map the input columns with destination Parameters correctly. Check the following window and do it correctly. Click OK.
- This is how my final model looked like. Click on the start to run the package.
 .
. - And, finally run the test cases. Insert new records into the table and check if you can see them in your target table as well. Always after making any changes rerun the package again.
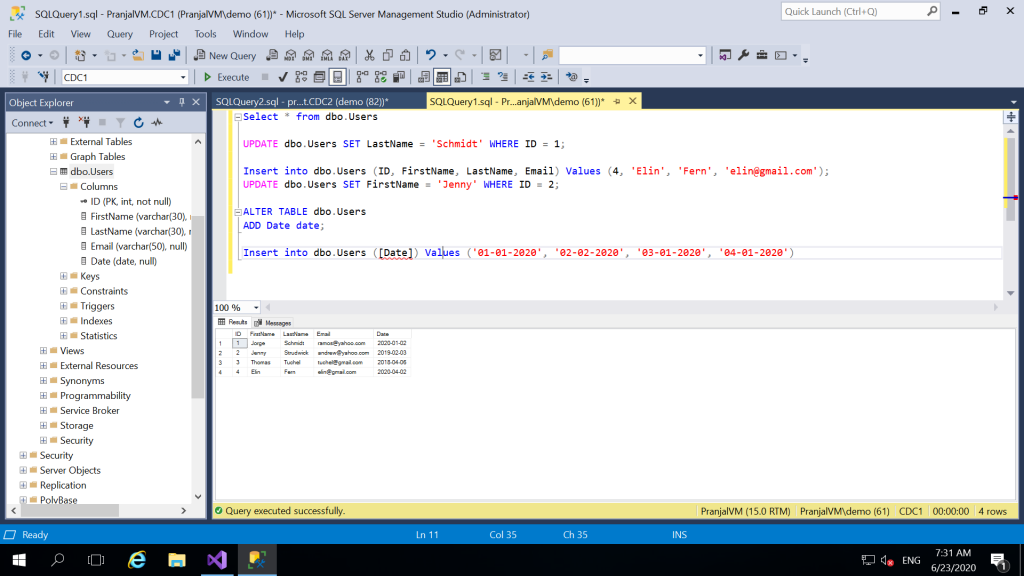
For example: In the following window, I inserted, updated the rows. And I could clearly see my changes into the target table as well.


