Introduction
Have you ever watched any video and couldn’t find the appropriate subtitles or ever wanted to watch any Korean/ German movie but had trouble understanding the movie because of the language barrier?
These issues are faced by a lot of people over the globe. In order to rectify this problem, Microsoft came up with a solution under Azure Cognitive Services called Video Indexer.
In Video Indexer, we can find out the subtitles of the video in 12 languages and can change the subtitles into one of the 12 languages too. Video Indexer also scans the video to let us know the actors/actresses present in the video.
There’s also sentiment analysis that the Video Indexer determines while indexing the video. The advantage of these features is that it will help you jump directly to the part where the dialogue was said.
Pre-Requisites
Since Video Indexer can be accessed using API, SDK as well as through the web. We need to have few pre-requisites to have a Video Indexer account, they are:
- An Azure subscription
- While creating an account in Video Indexer web portal, the Video Indexer creates its own Azure media indexer resource group or lists the existing resource group from your subscription for you to select if you have many accounts.
- This will help us in extracting the subtitles from the Video Indexer and the celebrities in that the video.
As I am writing this blog, The Video Indexer is currently available in a few regions. We need to create the Media Service account in that region. While creating the new account in the Video Indexer portal, the portal itself identifies the account and the region.
The Regions in which Video Indexer is available are:
- East US 2
- East US
- West US 2
- South Central US
The Region Availability may change in the future.
Working of the Video Indexer
- Visit the Video Indexer Web Portal
When you visit the Video Indexer web portal, you will be asked to sign in with your Azure subscription id. After which the Azure portal will be connected to your Video Indexer web portal subscription.
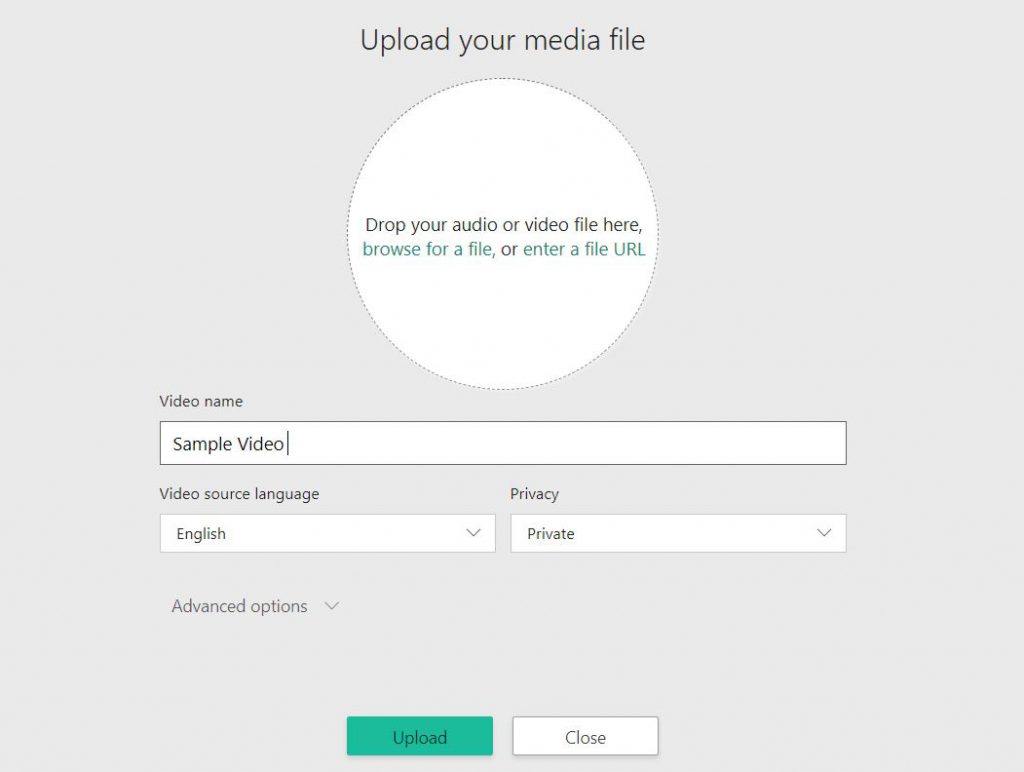
- Upload the video that you want to index
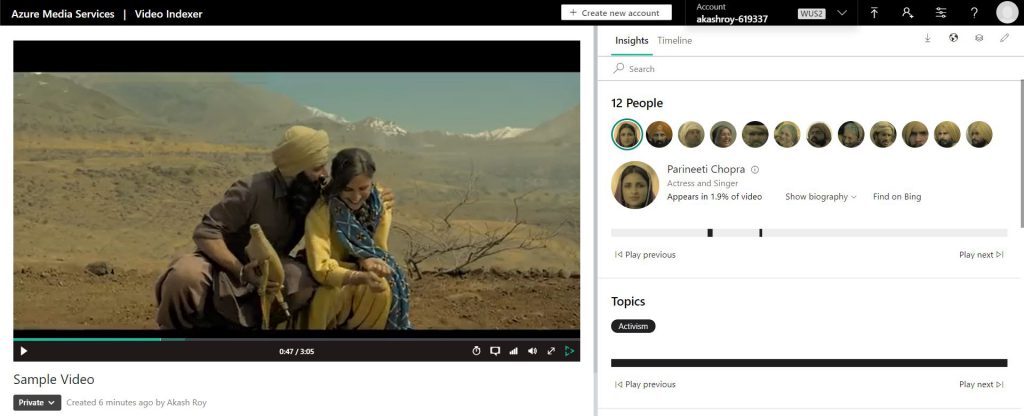
The video that needs to be indexed can be uploaded from the web portal. Once uploaded the indexing starts taking place on its own. After Indexing, the web portal displays the video and all the indexed content with it. The indexed contents are as follows:
- Subtitles
- Face Detection
- Sentiment Analysis

Benefits
Video Indexer has a lot of benefits that can help in the media industry, these are:
- Noise Cancelling: Since the indexing also gives the audio, we can remove the audio from an entire video.
- Facial Recognition: With the indexing, we can determine how many times a person has occurred in the video and for how long.
- Content Moderation: We can detect explicit content in any video and can have the option to eliminate these contents.
- Linguistic Transcript: We can convert any given speech or subtitle into 12 other languages IaaS VMs boot under customer-controlled keys and policies. You can audit their usage in your key vault.
Getting Started with Video Indexer
Step 1: Sign up to your Video Indexer web portal
You need to sign in to the Video Indexer portal with your Azure AD/Microsoft account. The same account with which you have signed up on Azure Once signed up, the Video Indexer lists the subscription and the resource group (if created) or creates a new one in your subscription
Step 2: Upload the video
You can upload the videos on the portal in 2 ways, either you can browse your local PC and upload the video, or you can pass the link of the video stored in the Storage Account on your Azure subscription.
Step 3: Basic/Advanced Uploading options
The last step before uploading will be to select the language in which you want the insights to be in. There are more than 12 languages in which you can translate the insights. A Multi-Language insights extraction is also available but is currently in preview mode.
We can also find the insights for any animated movie, but we have to select the “animated movie” option under advanced options.
Step 4: Extracting insights from the indexed video
- Once the video has been indexed, the page will have several sections where the insights will be shown
- Celebrity Recognition– Indexing the video will show us the celebrities present and how many times the celebrity has occurred in the video.
- Sentiment Analysis– Indexing the video also provides us with the sentiments of the video. It lets us know where the tone of the video is angry, happy or sad.
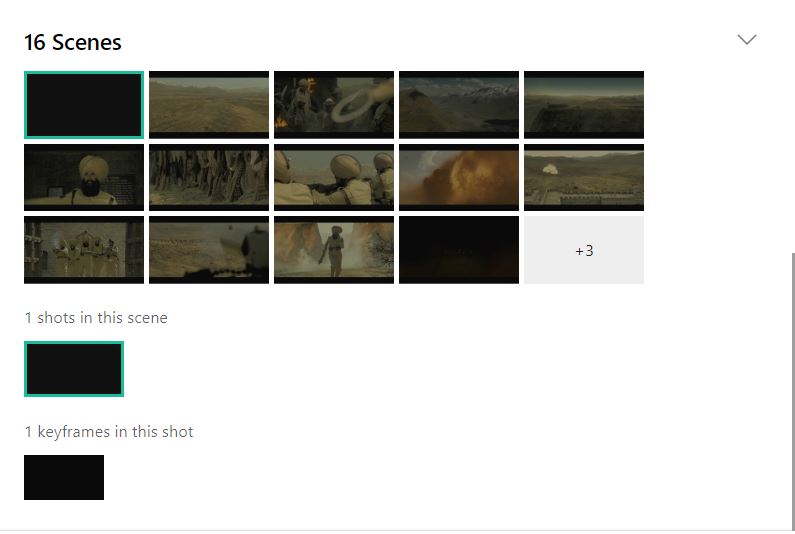
- Scenes– Particular scenes from the video is also provided which will help you scroll through the video quickly in the future.
- For example: If there is a scene where Jason Statham is holding a basketball, then in future you can just search “Jason Statham” or “Jason Statham holding basketball” and it will take you to the exact scene in the video.
Pricing
Video Indexer provides up to 10 hours of free indexing to website users and up to 40 hours of free indexing to API users. For every new resource group created, there are 10 S3 reserved units allotted to the user. It can later be modified.
S3 units belong to the Azure Media Reserved Units which determine the speed with which the media will be processed.
There Are 3 Types of Azure reserved media units, S1, S2, and S3. They are:
- S1: Single bitrate encoding. Files at SD or below resolutions, not time-sensitive, low cost.
- S2: Single bitrate and multiple bitrate encoding. Normal usage for both SD and HD encoding.
- S3: Single bitrate and multiple bitrate encoding. Full HD and 4K resolution videos. Time-sensitive, faster turnaround encoding. The higher the reserved media, the more media tasks it can handle.
To know more about the pricing of Video Indexer, check the pricing documentation
Visit the Video Indexer service portal to try this out.
For additional reference, do check the documentation.


Hi, is it possible to index more than a video at the time?